
782 


Instant Pot Dairy-Free Coconut Yogurt
With a few ingredients added to the #InstantPot, this delicious dairy-free coconut milk yogurt kicks it up a notch in flavour. Slightly tangy but oh so smooth & creamy!
Print Pin Rate Yields: 10 (125 ml) jars
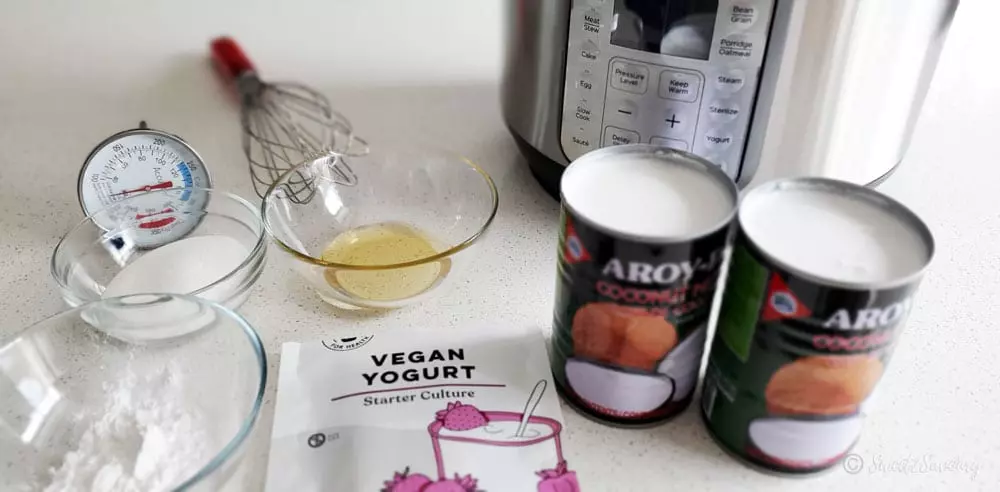
Ingredients
Yogurt
- 3¼ cups coconut milk (2 cans), ¼ cup set aside
- 2 tablespoons tapioca starch
- ¼ cup water
- ¼ cup coconut cream powder, can substitute with coconut milk powder
- ⅛ cup honey
- 1 teaspoon vegan yogurt starter
To sterilize Instant Pot
- 8 cups Boiling Water
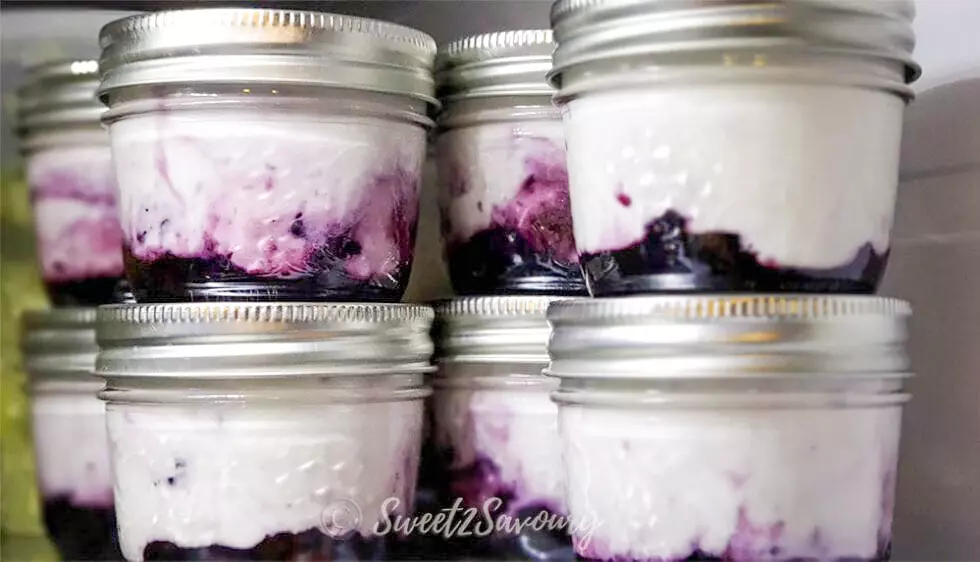
Blueberry Fruit Bottom (optional)
- 2 cups fresh blueberries
- 1 pinch sea salt
- ½ cup water
- ¼ cup honey
INSTRUCTIONS
Instant Pot Yogurt
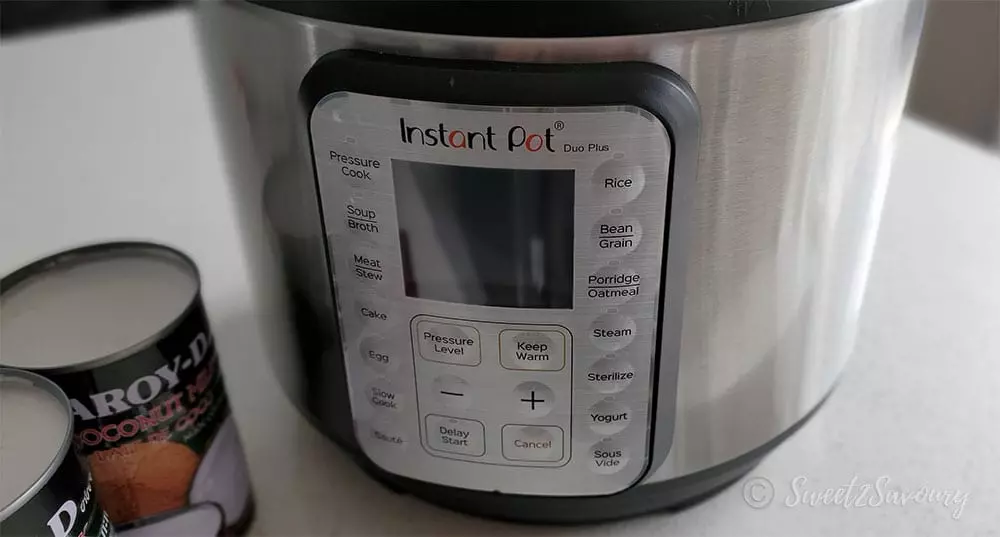
- Remove instant pot liner and set on counter. Pour boiling water into liner and stir using whisk (this is to sterilize pot & whisk). Carefully, remove hot water by pouring down sink drain. Place whisk on a clean paper towel. Dry pot liner with clean paper towels as well.
- Add tapioca starch to 1/4 cup coconut milk and stir to combine. Set aside. Pour the rest of the coconut milk into Instant Pot liner. Add Tapioca slurry to pot liner and whisk milk to combine. Place liner into Instant Pot machine. Mix 1/4 cup water in coconut cans and tapioca slurry bowl to get every bit of milk mixed with water, add into pot.
- Press yogurt button 2x (depending on machine) until "boil" is highlighted. Whisk continuously while coconut milk is heating up and thickening. After machine beeps, test temperature with candy thermometer. If it reads below 110°F (43.3°C). Repeat boiling process and check temperature again. If temperature is 110°F (43.3°C) or higher, move on to next step
- If temperature of boiled milk is higher than 110°F, let it cool to reach this temperature. Once milk temperature is 110°F (must be exact), sprinkle coconut cream powder into pot and whisk to combine. Pour in honey and whisk until completely combined. Lastly, add 1 pack (1 tsp.) of yogurt starter culture and whisk everything to combine. Close Instant Pot with lid (make sure pressure valve is closed) and set yogurt time to 8 hours. If adding fruit bottom to jar containers for yogurt, continue to "Blueberry Fruit Bottom instructions" below, while yogurt is incubating in Instant Pot.
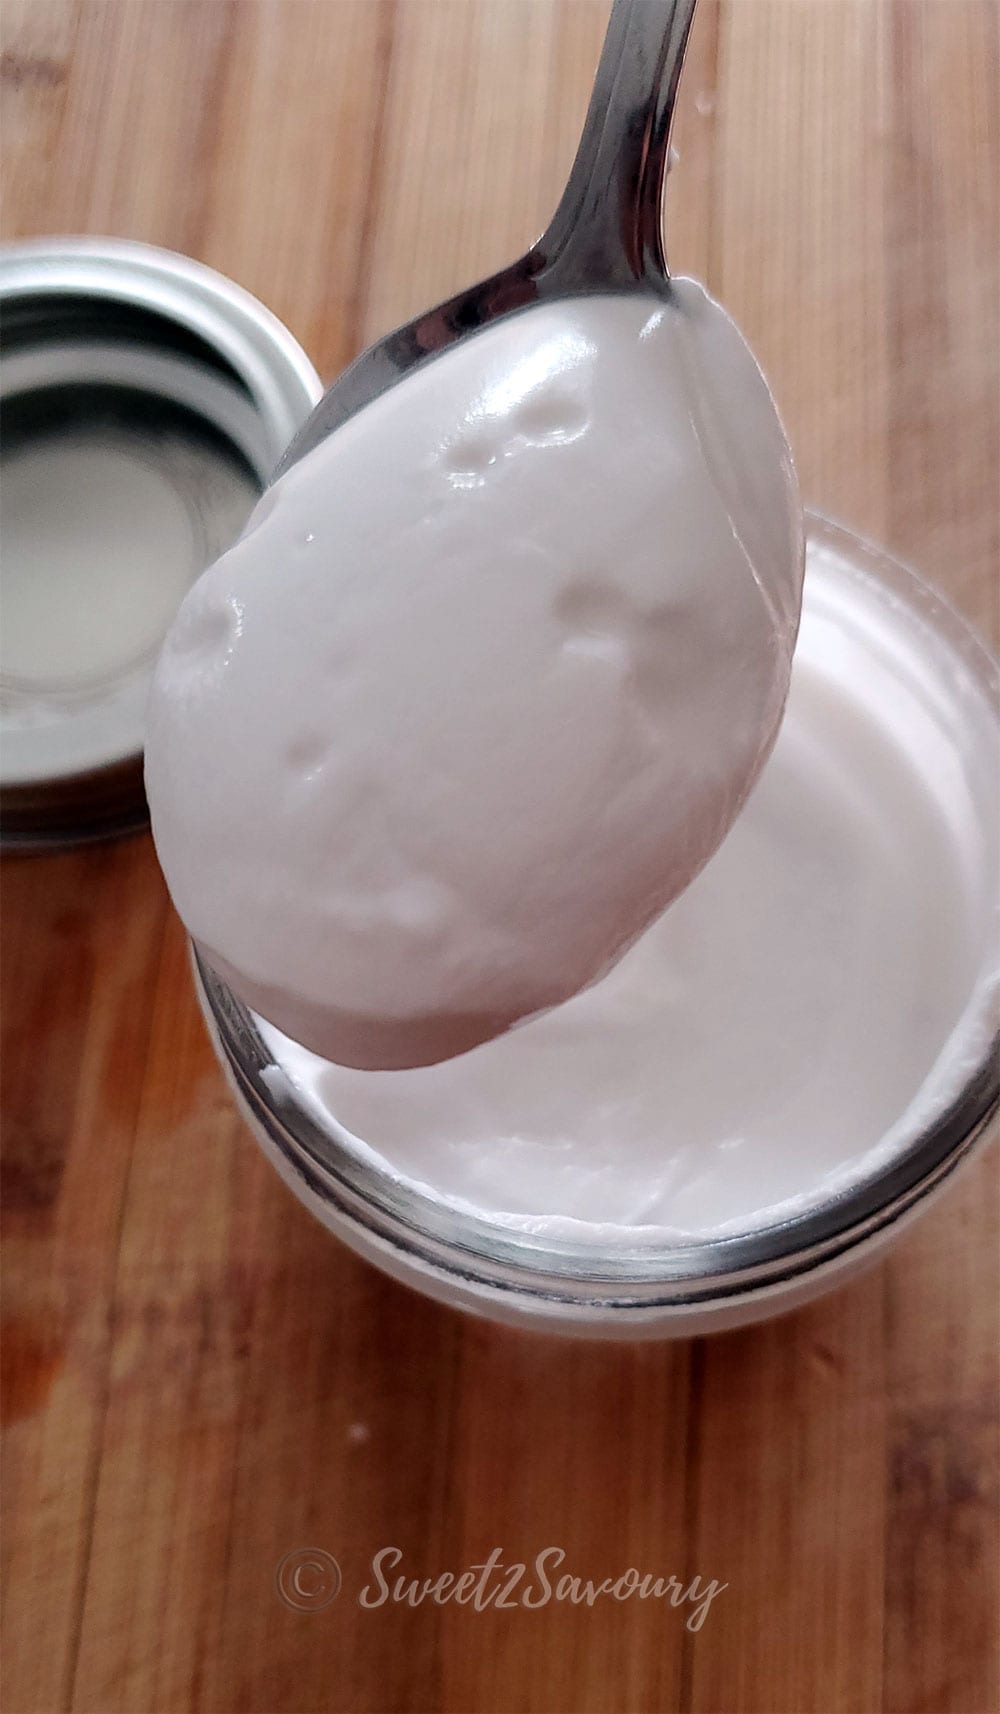
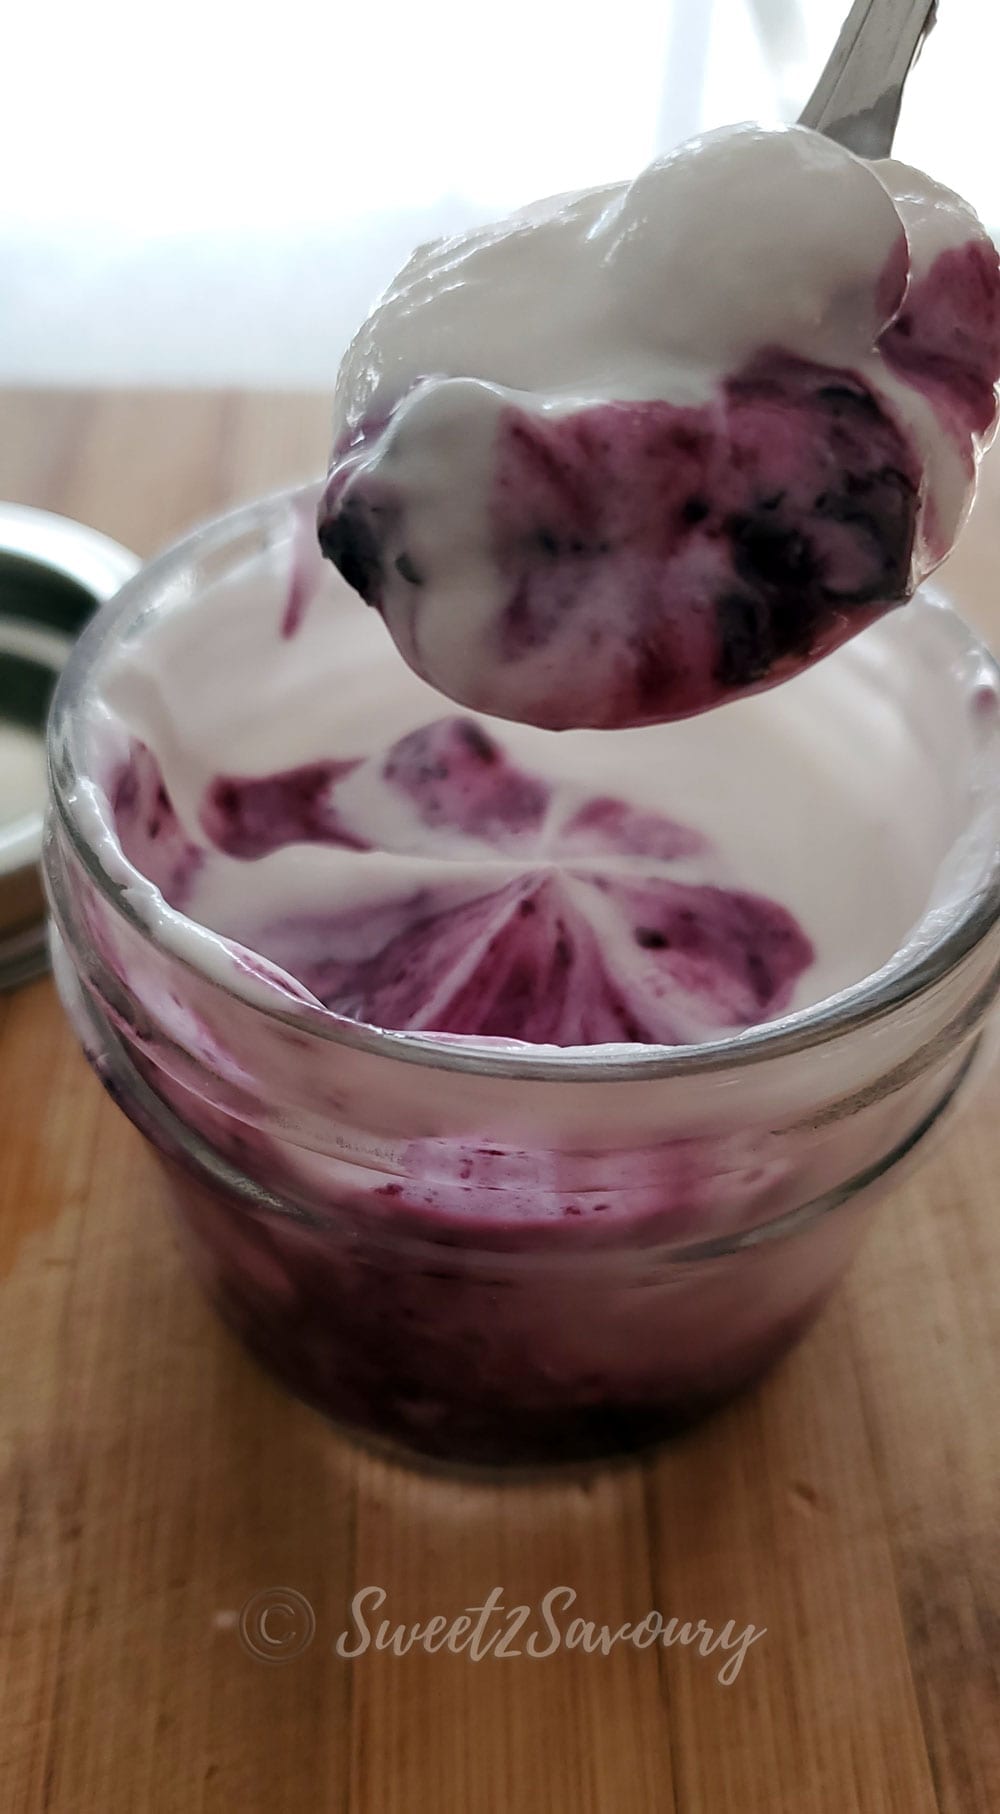
- When machine beeps done, use a clean spoon to scoop yogurt into clean jars (texture will be slightly runny while still warm and there may be some separation, just give it a stir before adding to jar). Close jar lid and refrigerate 6 hours for yogurt to set and thicken while it chills.
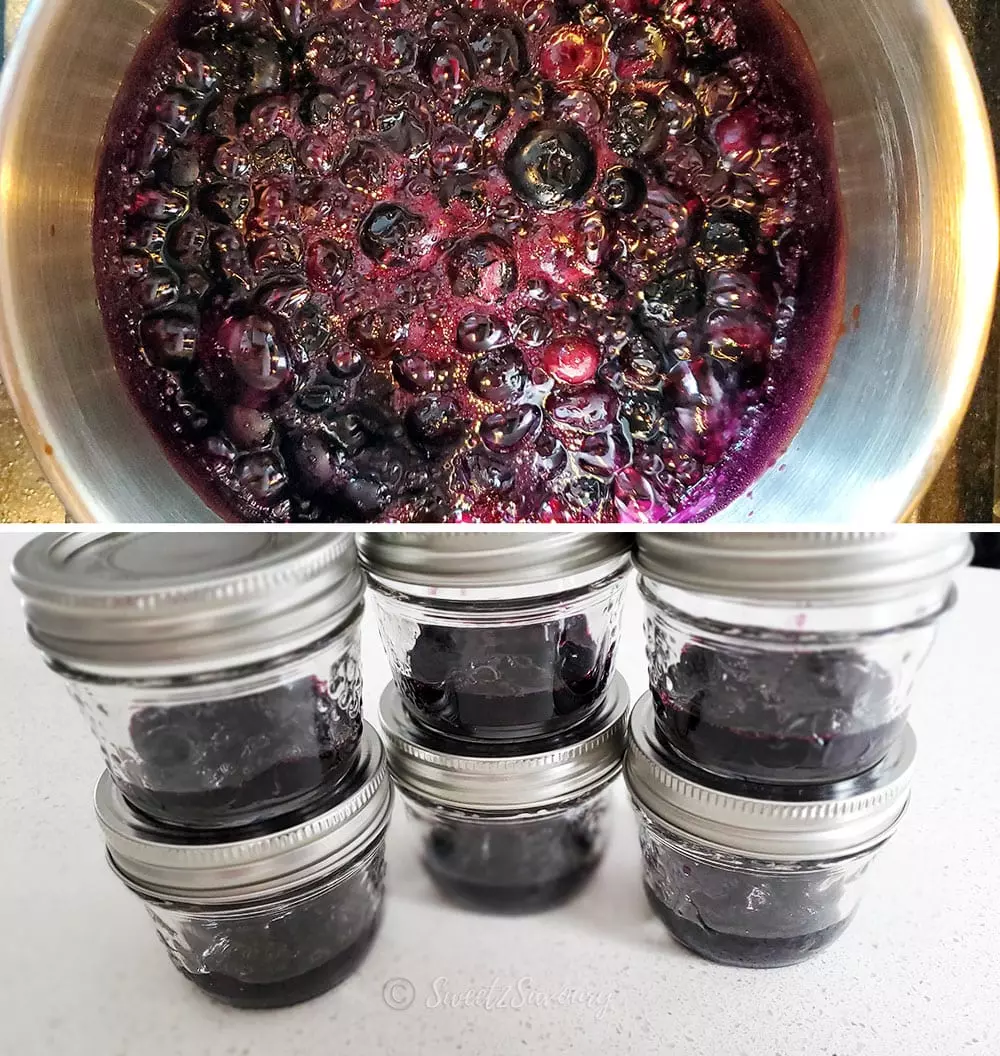
Blueberry Fruit Bottom
- Rinse blueberries and add to saucepan. Add water, salt and honey. Bring fruit to a boil on high heat, stirring occasionally with non-stick spatula. Cook for 5 to 7 minutes or until blueberry sauce has thickened.
- Add 1 tablespoon of prepared blueberry jam to each jar and allow to cool completely before pouring in yogurt.


Tips
What’s the difference between coconut milk and coconut cream?
Technically, both are the same except cream has a higher concentration of fat and protein than water (whereas coconut milk has the opposite). In coconut milk, you can scoop the layer of cream from the surface after the can has been refrigerated (with coconut water underneath it). Coconut milk has more water than fat and protein. Another way to explain this is to compare it to cow’s milk. Coconut cream is similar to heavy cream and coconut milk is similar to 3.25% M.F. homogenous milk.
Can I use other thickeners besides Tapioca starch?
My first batch of coconut yogurt was made with gelatine. Technically, it thickened the yogurt, however the consistency was congealed yogurt instead of the smooth, creamy texture I was after. You could try cornstarch instead of tapioca (but I have not tested this) and to be on the safe side, recommend to stick with Tapioca starch since yogurt making can become frustrating really quickly if it doesn’t turn out the way you wanted it to after patiently waiting for it to incubate & chill for 14 hours total.
Can I use other berries or fruit to make the fruit bottom?
Absolutely! Just make sure when you cook your fruit, you want it to boil to a jam consistency (or close to it anyway). Let most of the water/ juice evaporate and thicken. This ensures that when you mix the fruit bottom with the yogurt, it does not become too runny due to the liquid in the fruit bottom.
Does this have to be cooked in an Instant Pot?
This recipe was tested using an Instant Pot. However, if you apply the same steps with a regular saucepan to heat the milk and then cultivate it in a yogurt maker, it should work too.
How long does coconut yogurt last in the refrigerator?
It can last up to 2 weeks if stored covered in the refrigerator properly (ideally at 4 degrees or below). Best consumed within 10 days for optimal flavour. What else can I use this yogurt for?
Your options are endless (use it in place of regular dairy yogurt.)
Some suggestions:
– Fruit Breakfast Bowls (add granola, nuts, fresh fruit, dried fruit)
– Yogurt Parfait
– Use in Curries
– Smoothies
Nutrition Facts
Instant Pot Dairy-Free Coconut Yogurt
Serving Size
130 g
Amount per Serving
Calories
279
% Daily Value*
Fat
22
g
34
%
Saturated Fat
19
g
119
%
Sodium
39
mg
2
%
Potassium
232
mg
7
%
Carbohydrates
22
g
7
%
Fiber
2
g
8
%
Sugar
17
g
19
%
Protein
3
g
6
%
Vitamin A
16
IU
0
%
Vitamin C
5
mg
6
%
Calcium
20
mg
2
%
Iron
1
mg
6
%
* Percent Daily Values are based on a 2000 calorie diet.
Did you make this? I would love to see your creation!Tag me @sweet2savoury on Instagram and hashtag it #sweet2savoury
4 comments
Are their any fruits that you *wouldn’t recommend* for this recipe? Fruit that wouldn’t go with the coconut flavour? Excited to try this in my Instapot!
It comes down to personal preference. Having said that, I don’t suggest fruits that have a lot of water content such as water melon, honey dew, cantaloupe or citrus fruits like orange or mandarin orange. I would stick to berries, apples, pears, peach or nectarine. Have fun making it!
This looks delicious! I can’t wait to try this at home!
Let me know if you need any pointers! 🙂