

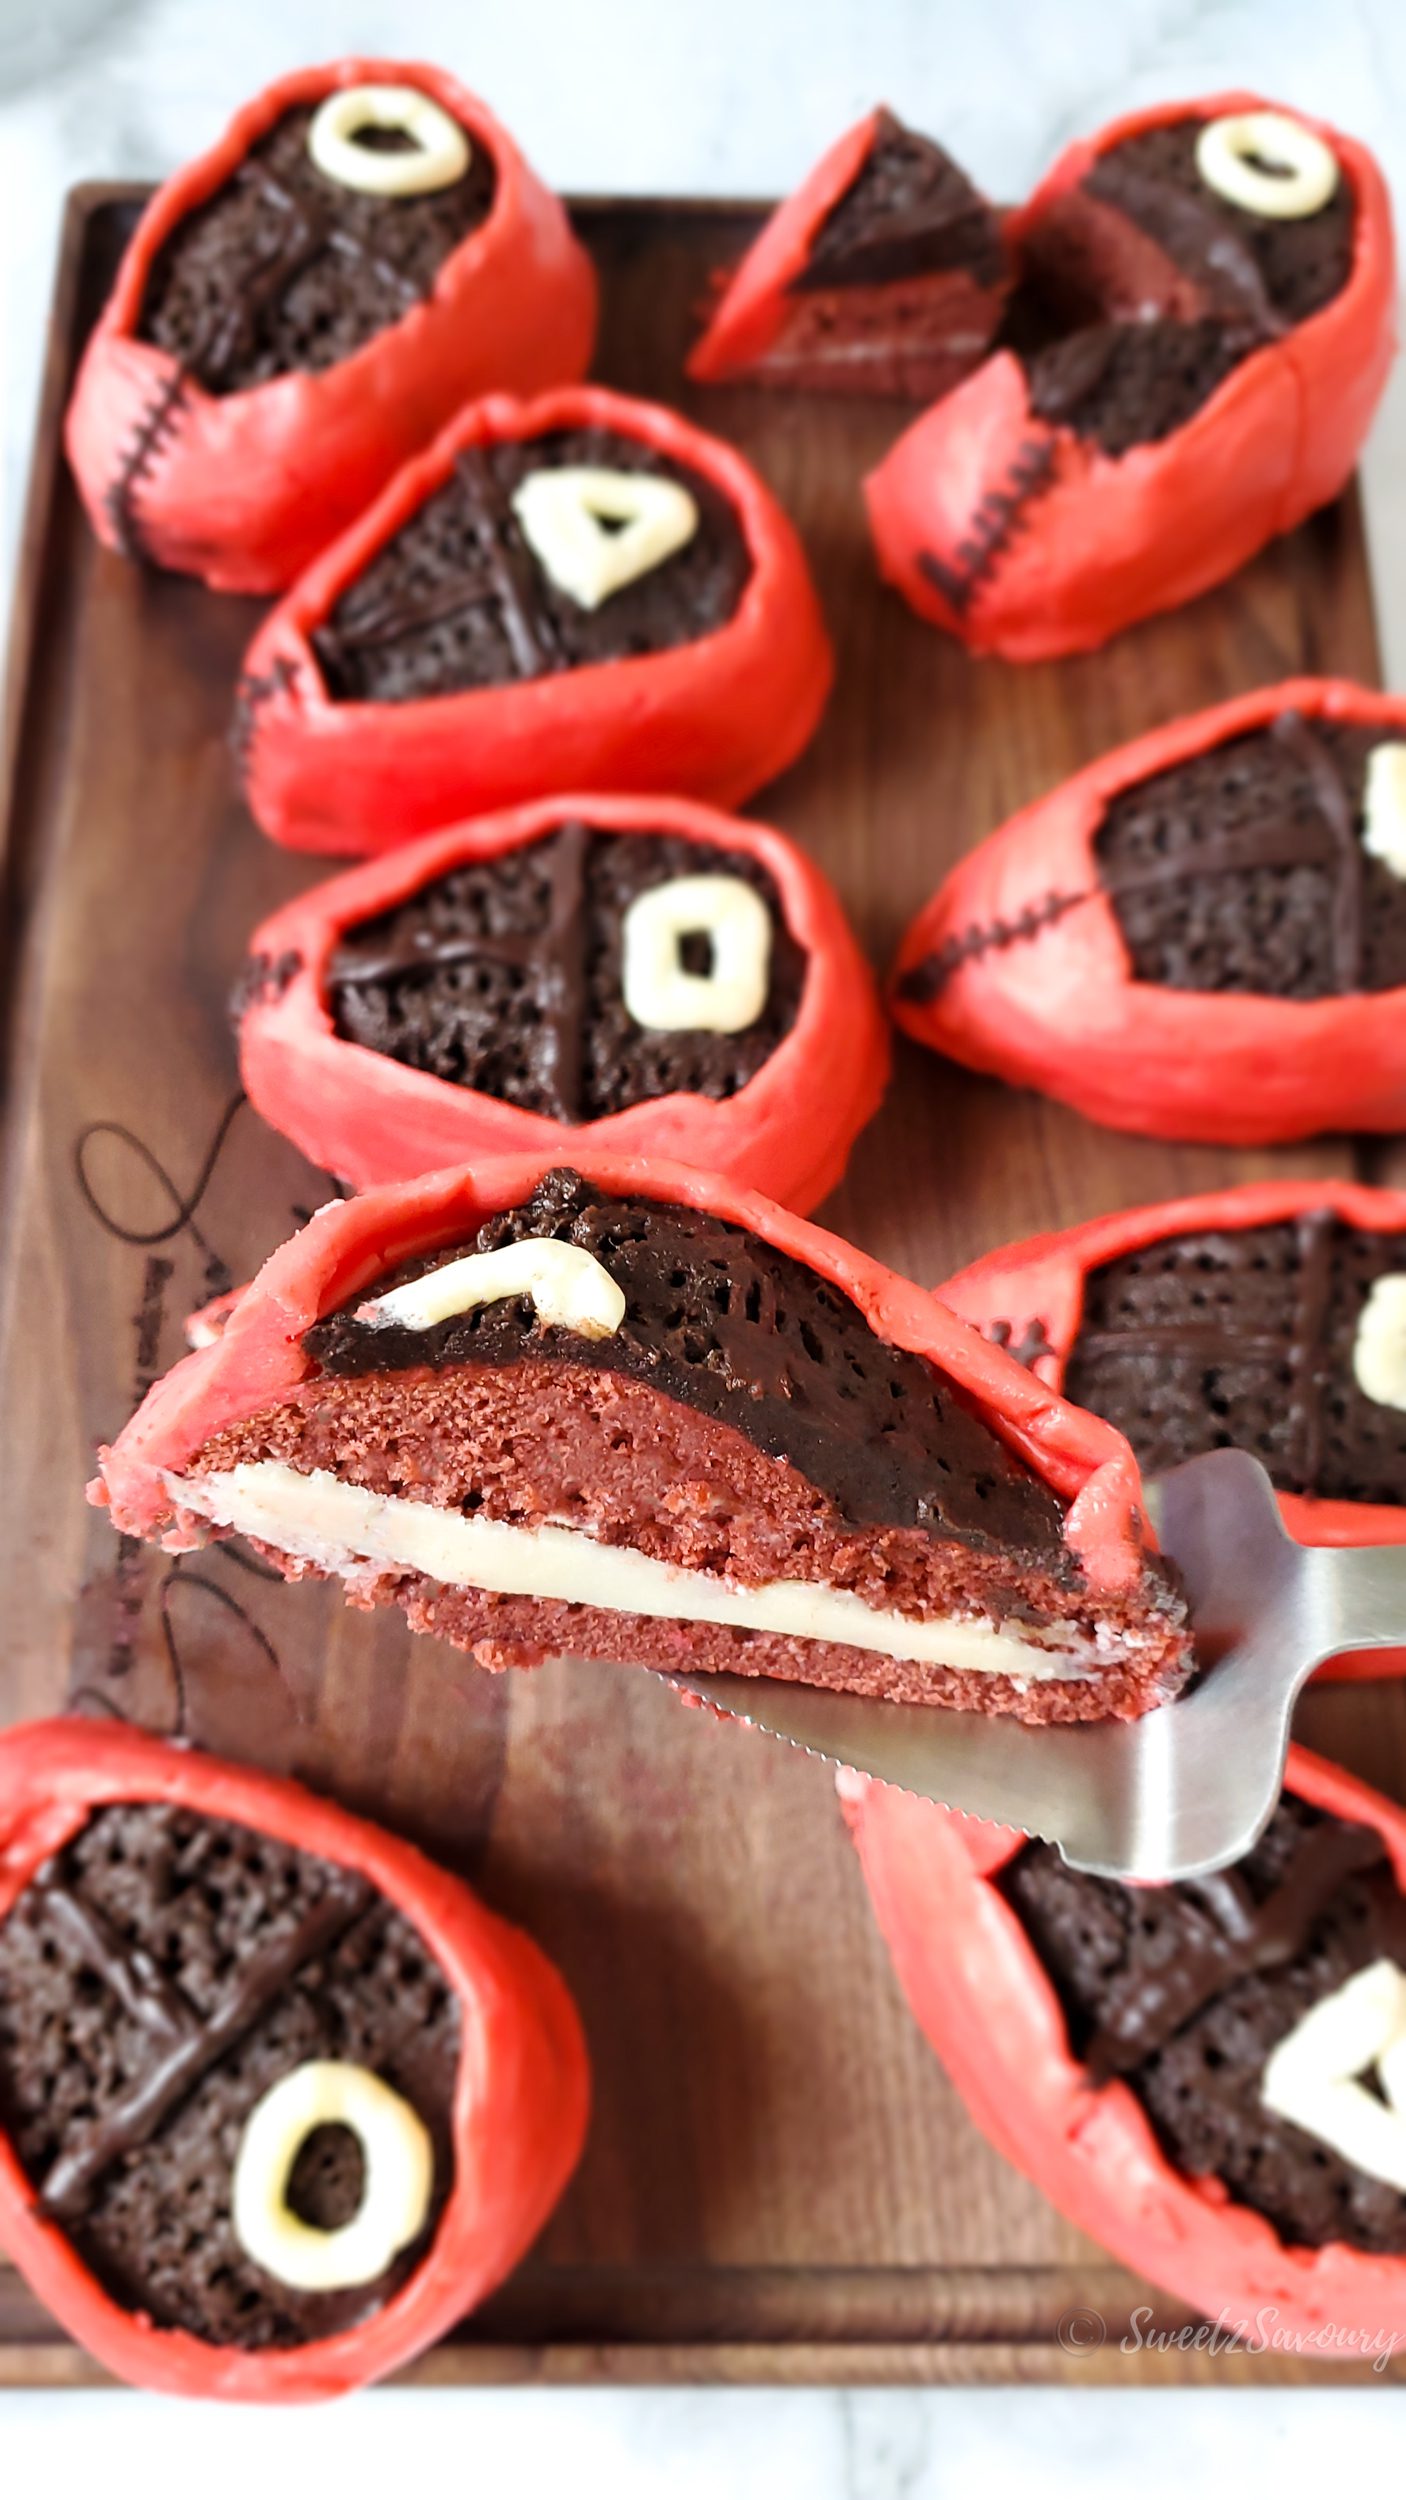
Have you seen Netflix’s hit show “Squid Game”, yet? If you have not, there are no spoilers here, don’t worry! The only thing I will mention (that is related to today’s post) is that on the show, there are soldiers who are dressed in a red outfit adorned with a black mesh mask and a symbol on it. These symbols show their rankings. Square-wearing soldiers are the bosses within the group, underneath them are the triangle soldiers and the circle-wearing soldiers are the lowest ranking.

Still image taken from Netflix’s hit show – Squid Game (S1:E1 | 38:51) Red Light, Green Light)
Want to stand out at your upcoming Halloween party? Serve these Squid Game mini soldier cakes to your family and friends. They will be surprised at how tasty AND good these look! Especially when they are decorated with pure buttercream, not fondant!
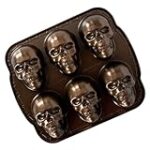
How to make red velvet mini skull cakes
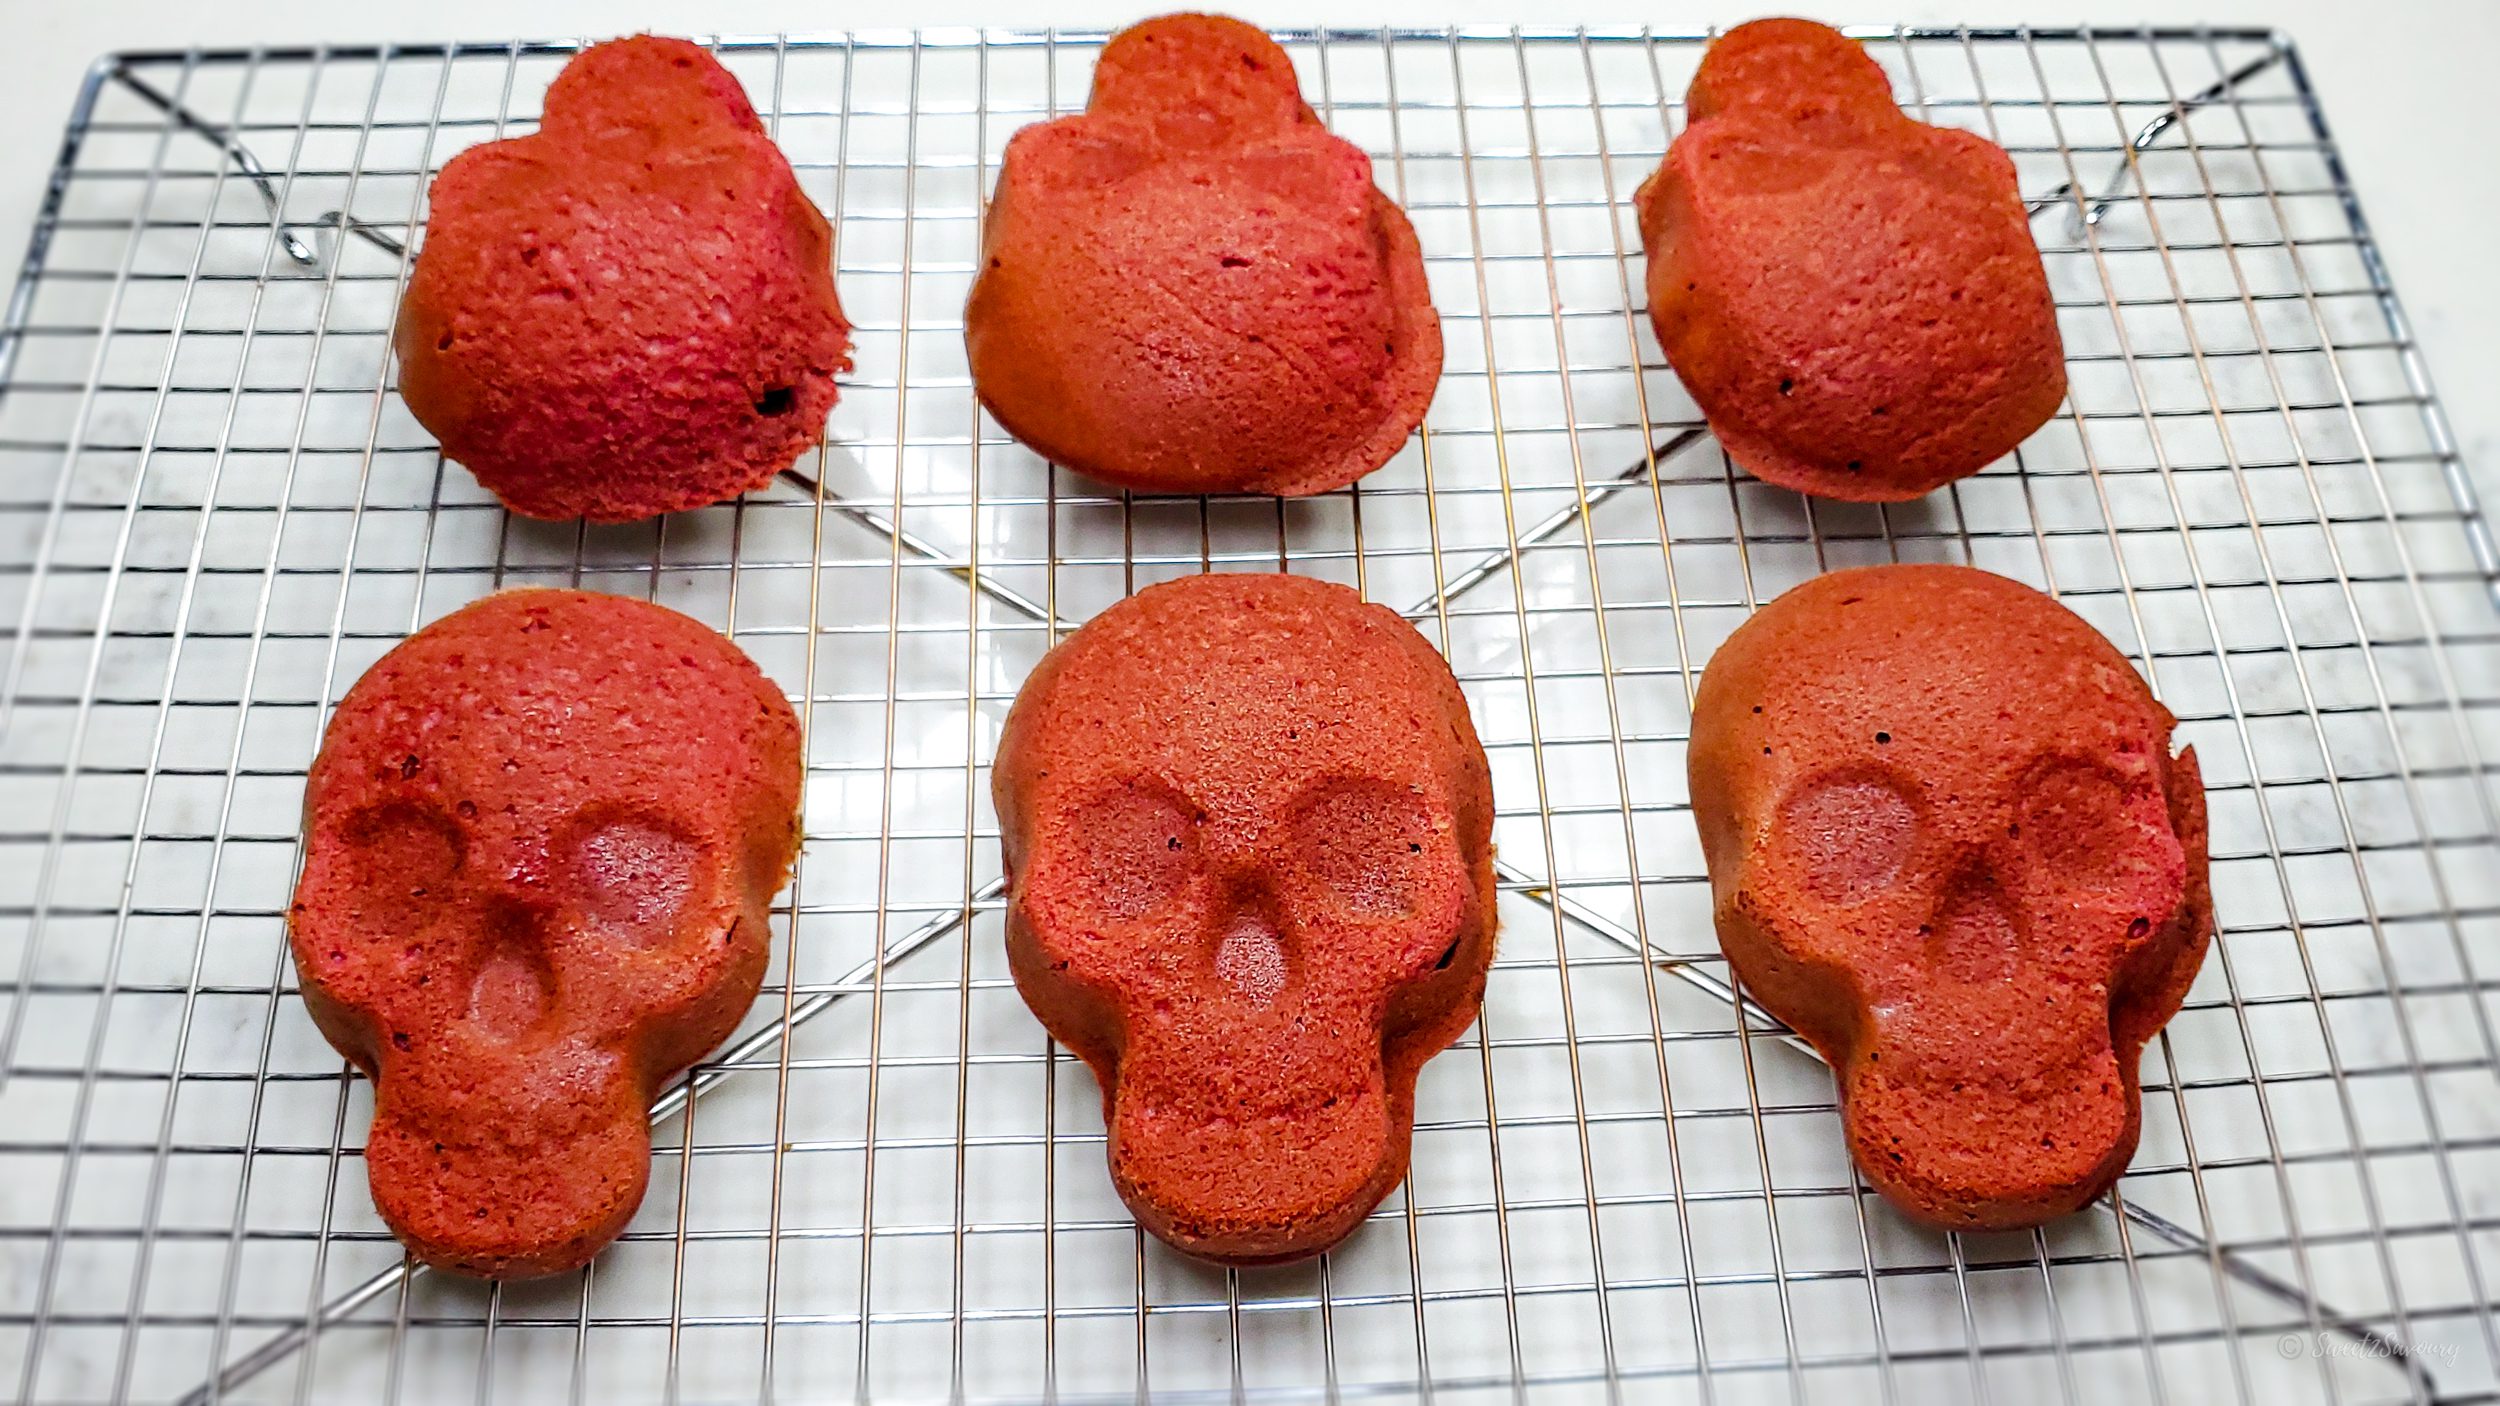
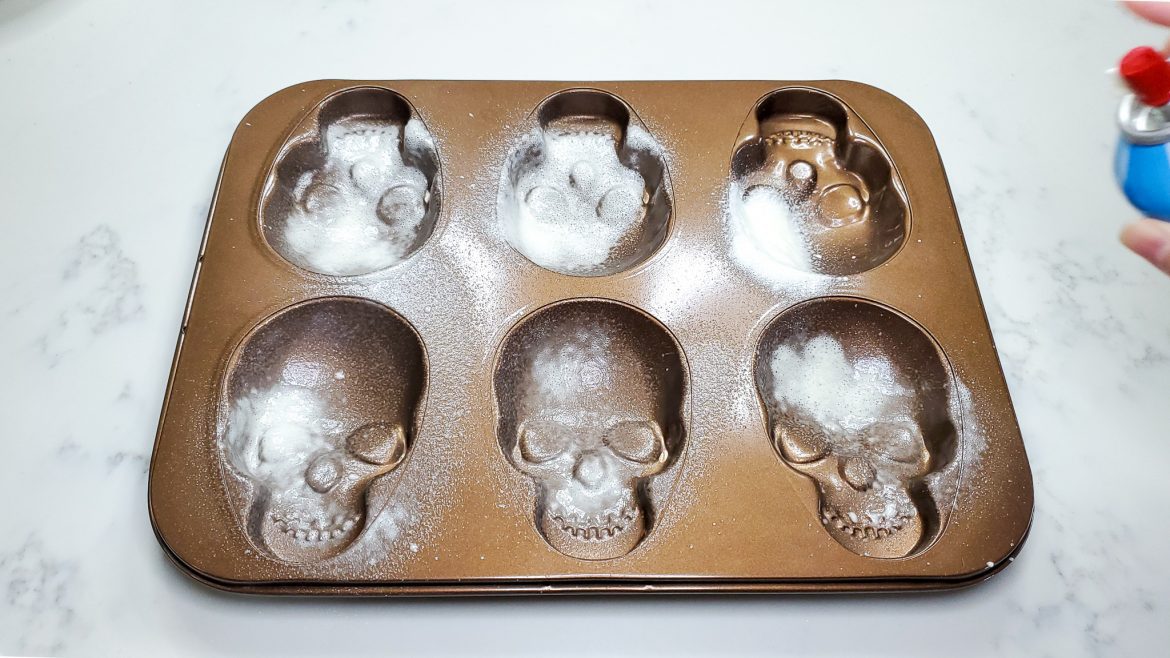
Each of these mini skull cakes bakes to 4 x 5-inch in size. They are the perfect shape for you to fill with frosting and decorate with buttercream. Grease your pan before you get started.
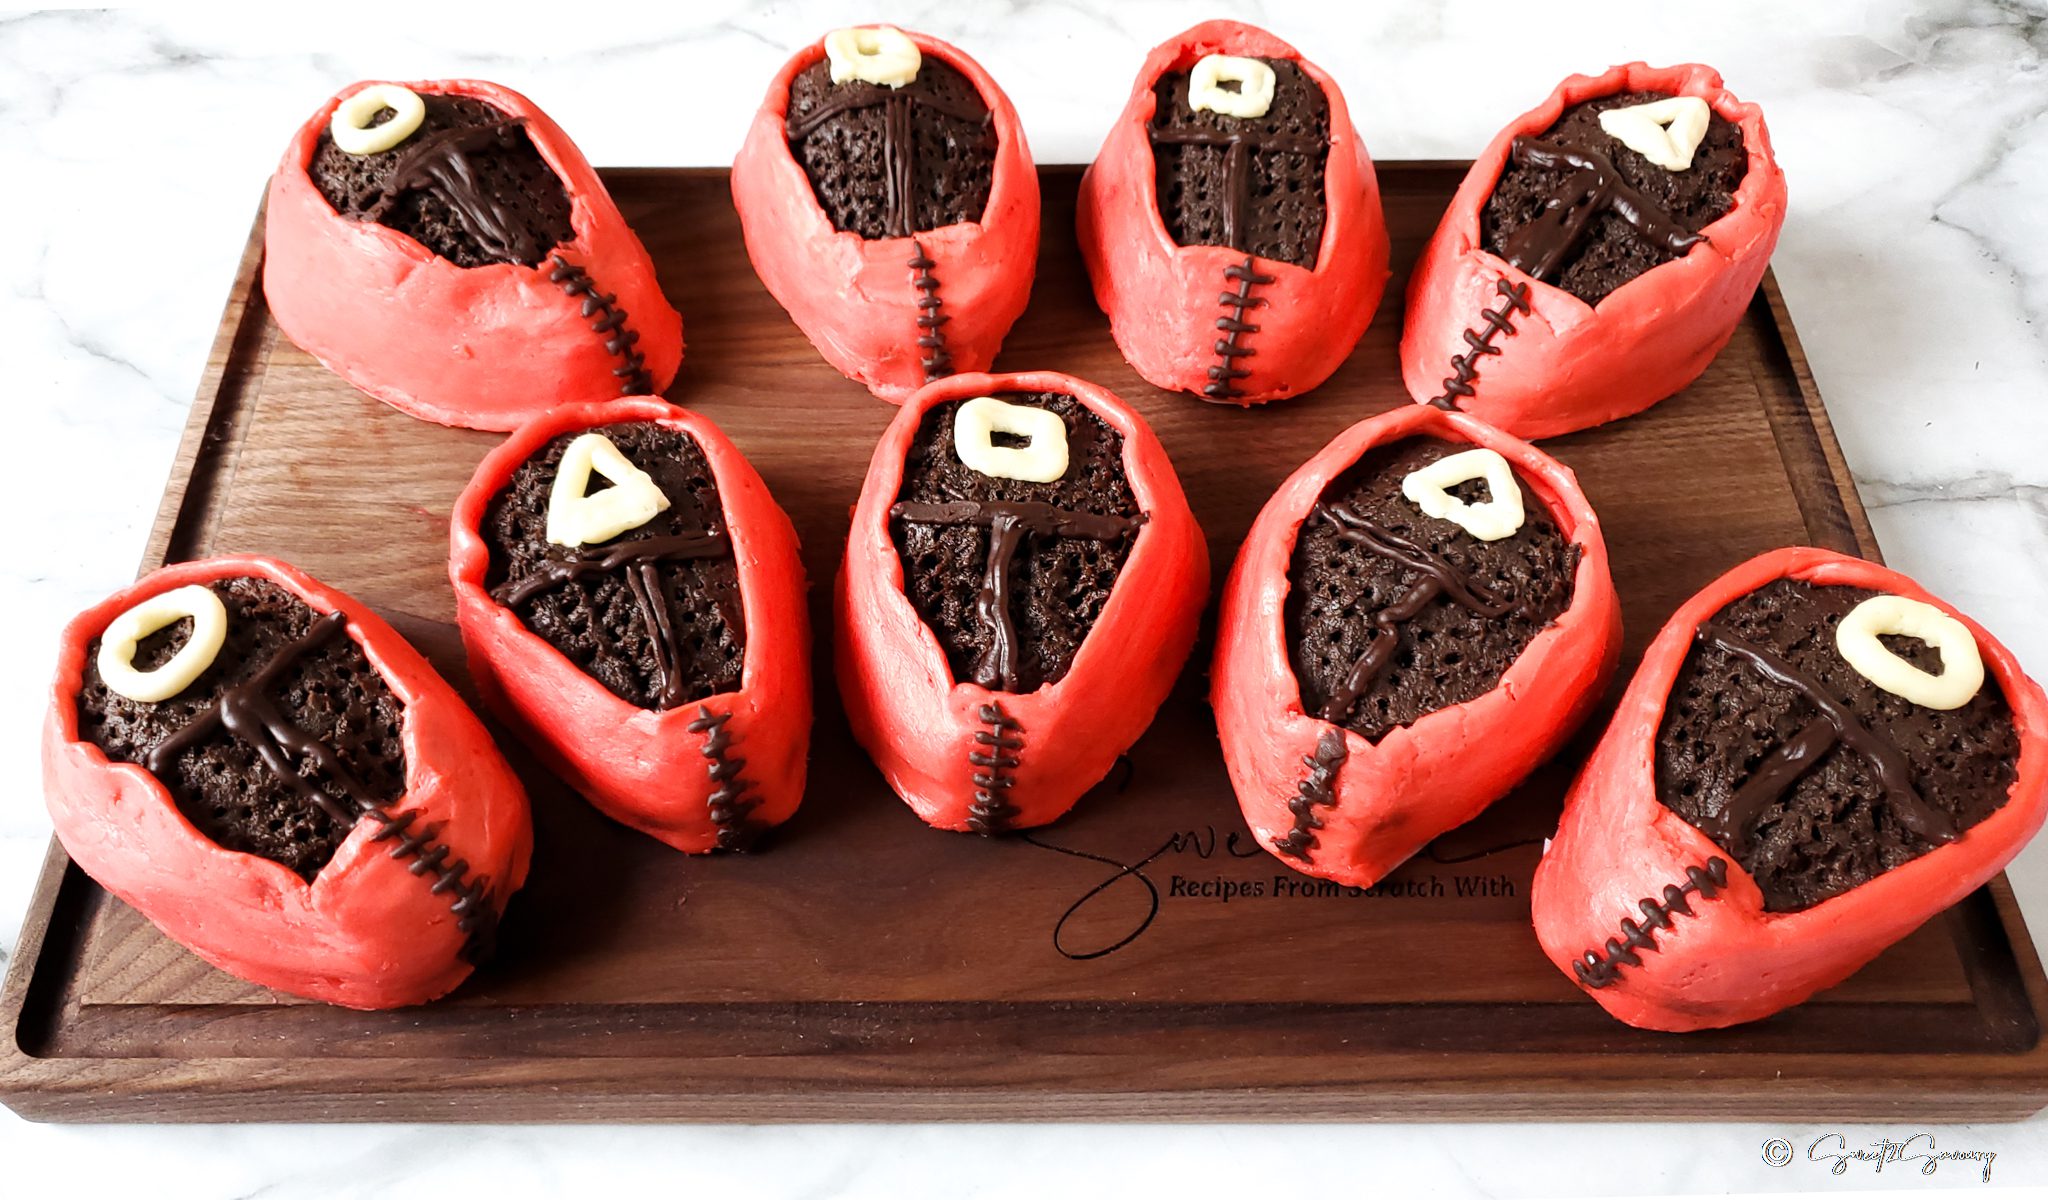
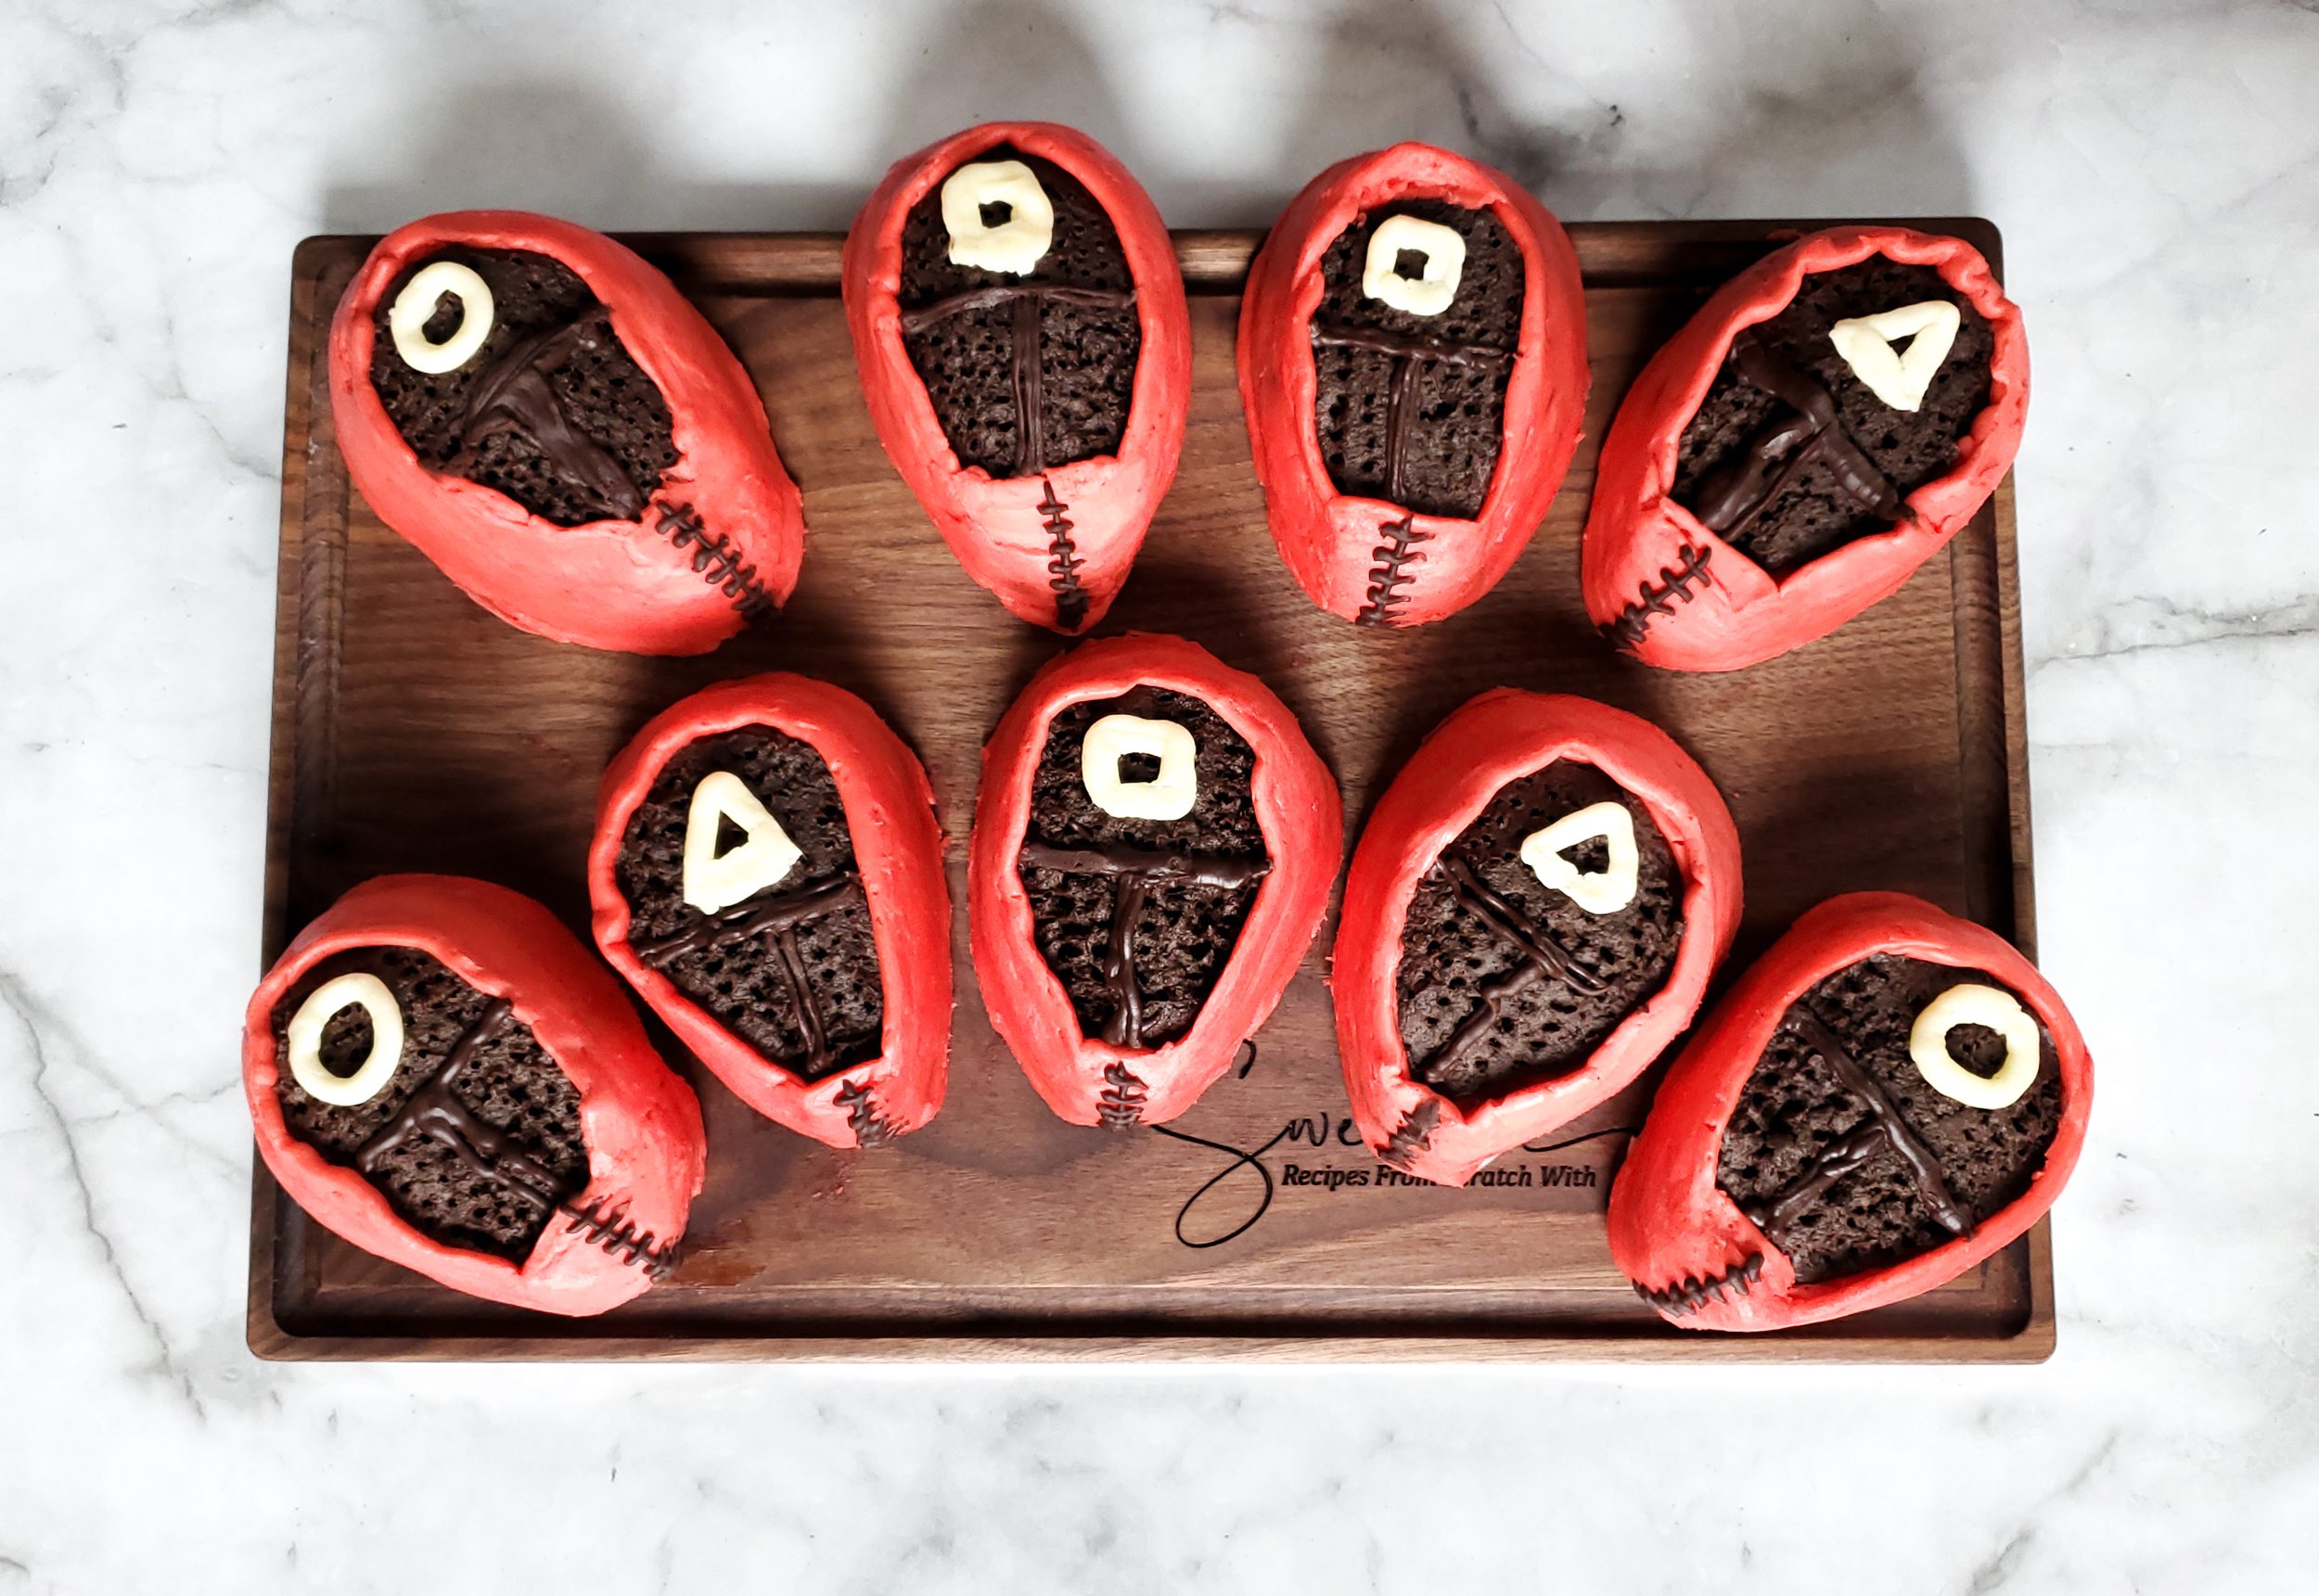
‘Squid Game’ Pink Soldier Mini Cakes (No Fondant)
Ingredients
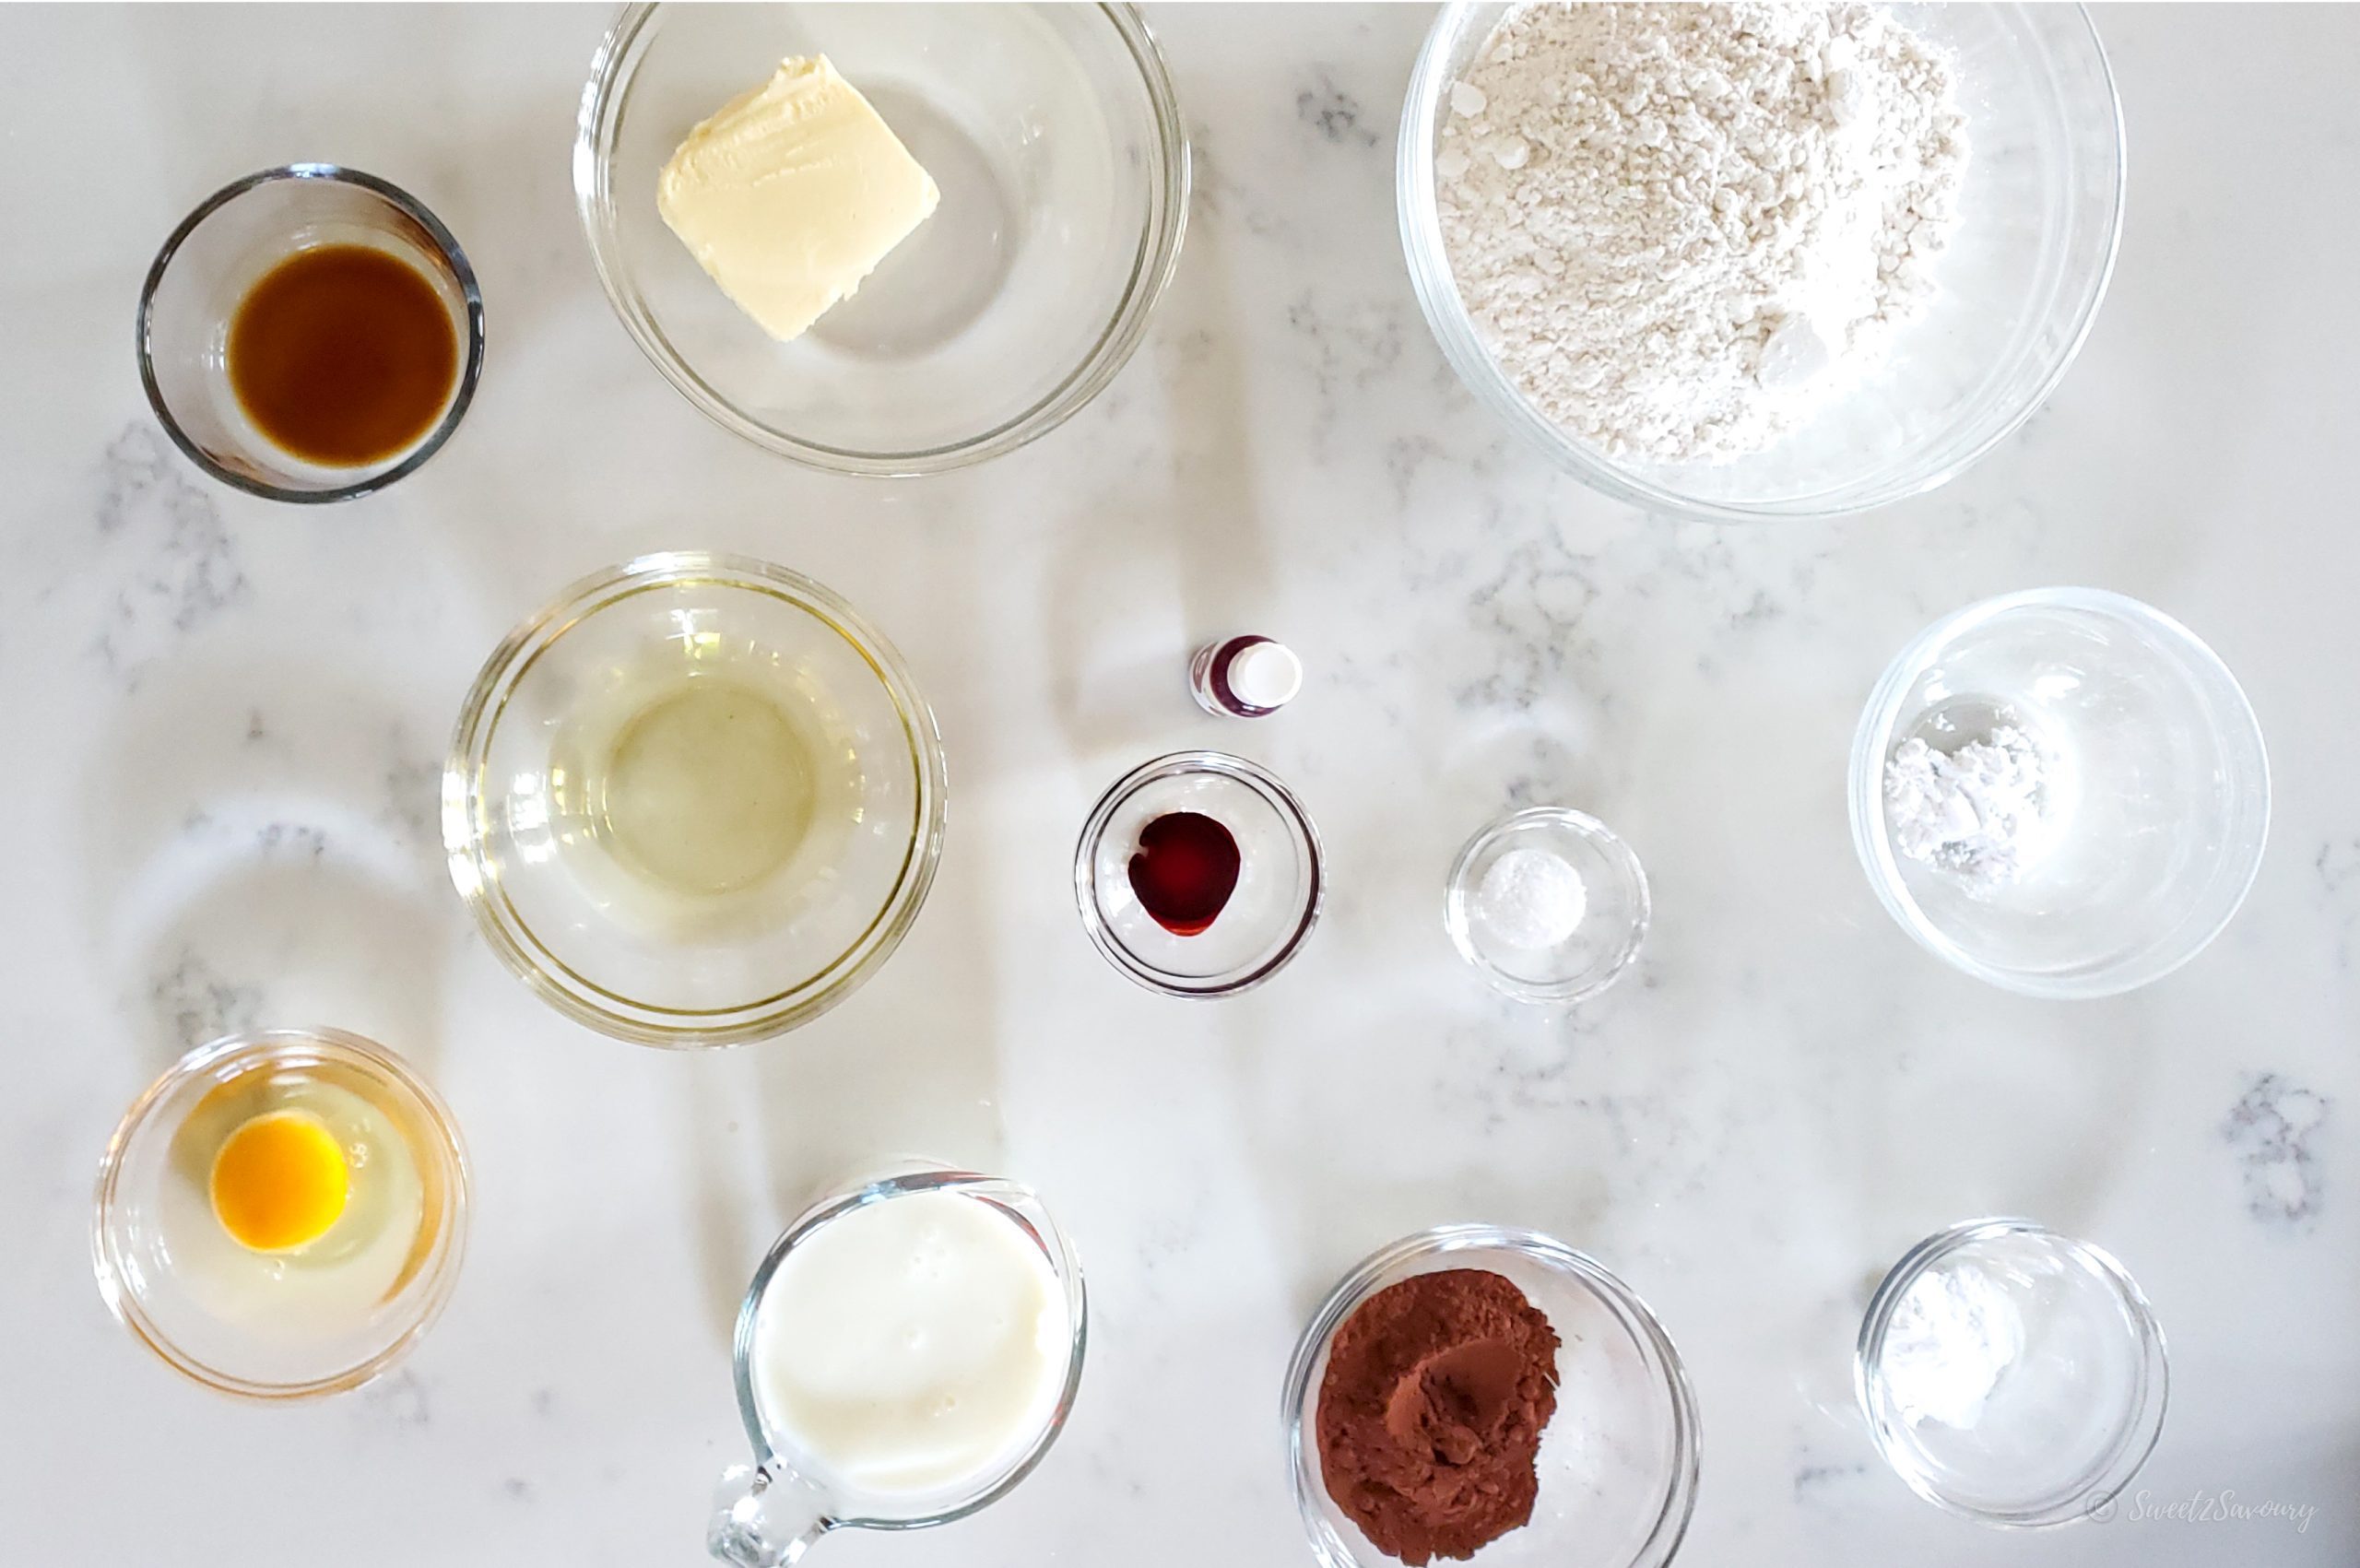
For the red velvet cake
- 2¼ cups cake flour, sifted
- 2 Tablespoons unsweetened cocoa powder
- ½ teaspoon baking soda
- ¼ teaspoon salt
- ¼ cup unsalted butter, room temperature
- ¾ cup white sugar
- 1 large egg, room temperature
- ¼ cup vegetable oil
- 8 drops crimson or red liquid food colour
- 1 teaspoon vanilla extract
- ½ teaspoon cream of tartar, or 1/2 teaspoon lemon juice or white vinegar
- 1 cup buttermilk, room temperature
For the cream cheese frosting
- 8 ounce 32% M.F. cream cheese (1 brick), room temperature
- 2 cups confectioners' sugar
- 1 teaspoon vanilla extract
- ¼ teaspoon salt
For the buttercream frosting
- 4 sticks unsalted butter (2 cups), room temperature
- 4 cups confectioners' sugar
- 3 teaspoons vanilla extract
- ¼ teaspoon salt
- ¾ cup + 2 Tbsp. | whole milk (3.25% homogenized), room temperature
- 8 drops crimson food colour
- 6 drops red food colour
- 1 cup Oreo baking crumbs
- 1 Tablespoon unsweetened cocoa powder
For the decoration
- ¼ cup pure semi-sweet chocolate chips
- 1 Tablespoon milk
INSTRUCTIONS
To make red velvet cake
- Preheat oven to 325°F (163°C). Make sure oven rack is set to the middle.
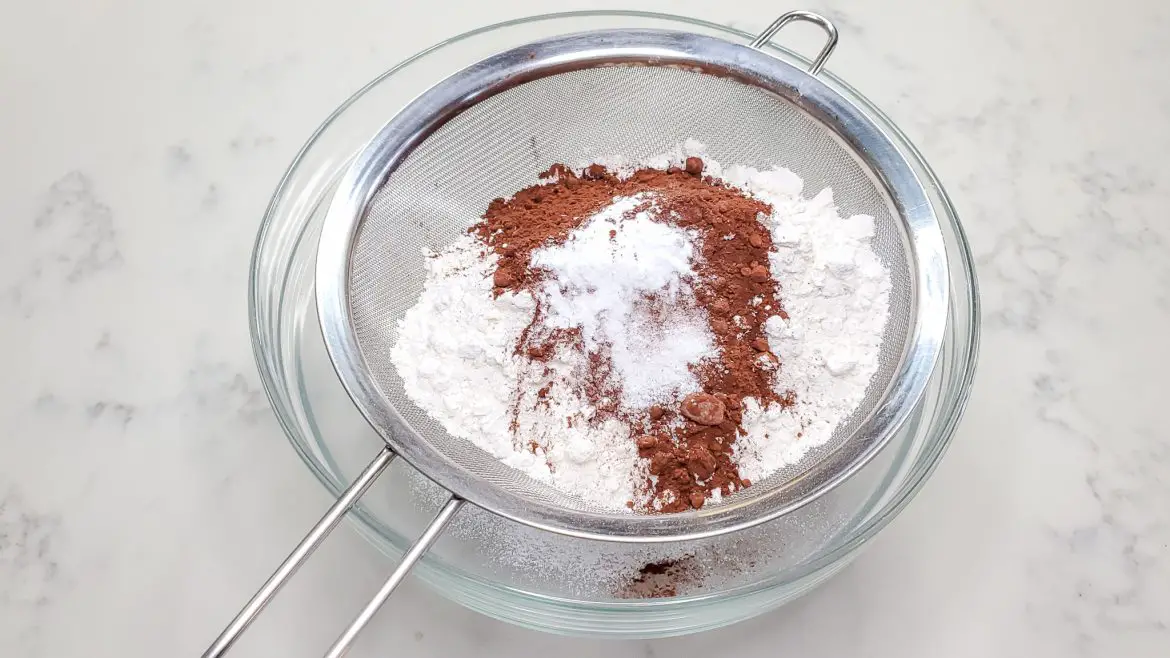
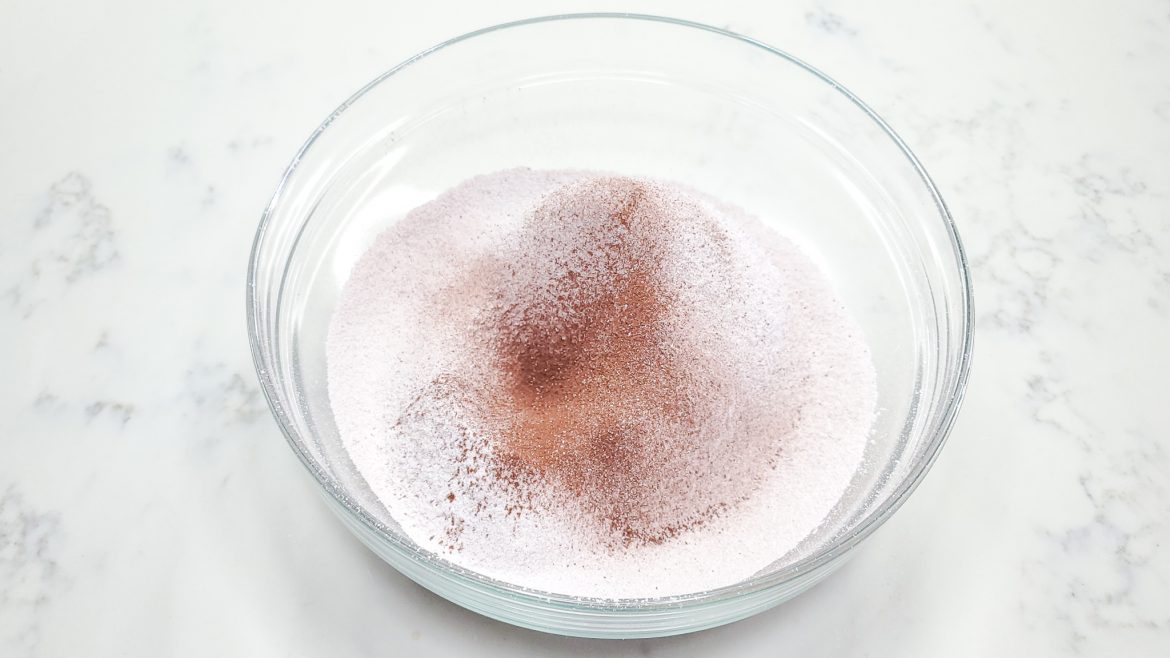
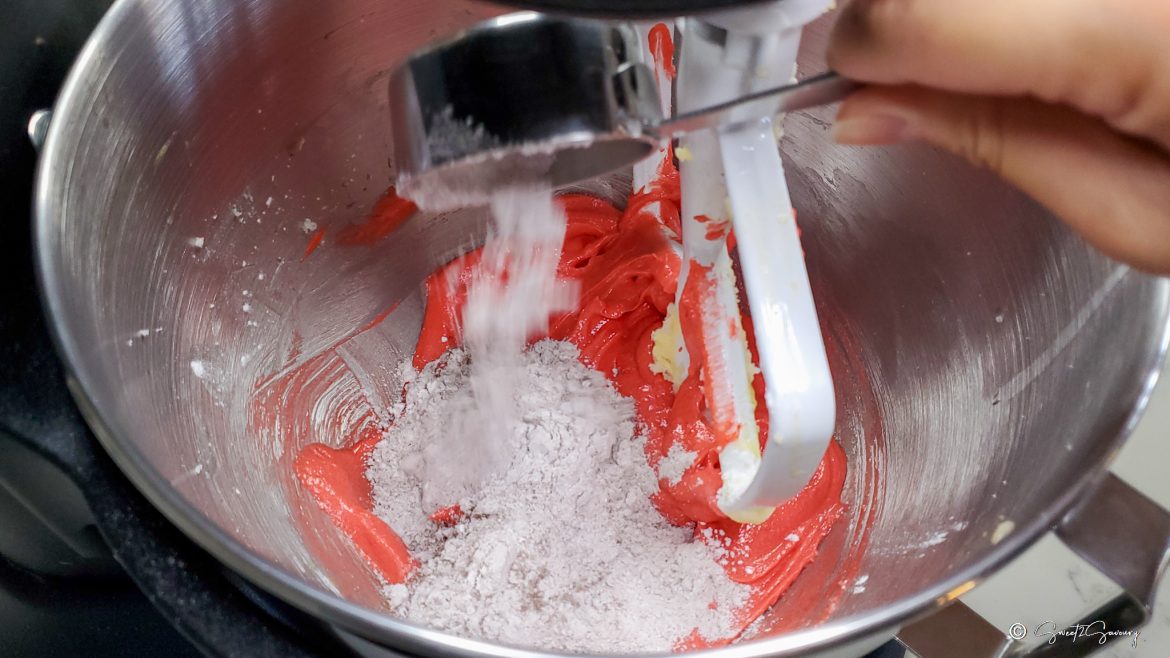
- Place a mesh strainer over a large mixing bowl. Add cake flour, cocoa powder, baking soda, and salt. Sift dry ingredients into a large mixing bowl to remove lumps. Use a whisk to sift flour if needed. Set dry ingredients aside.
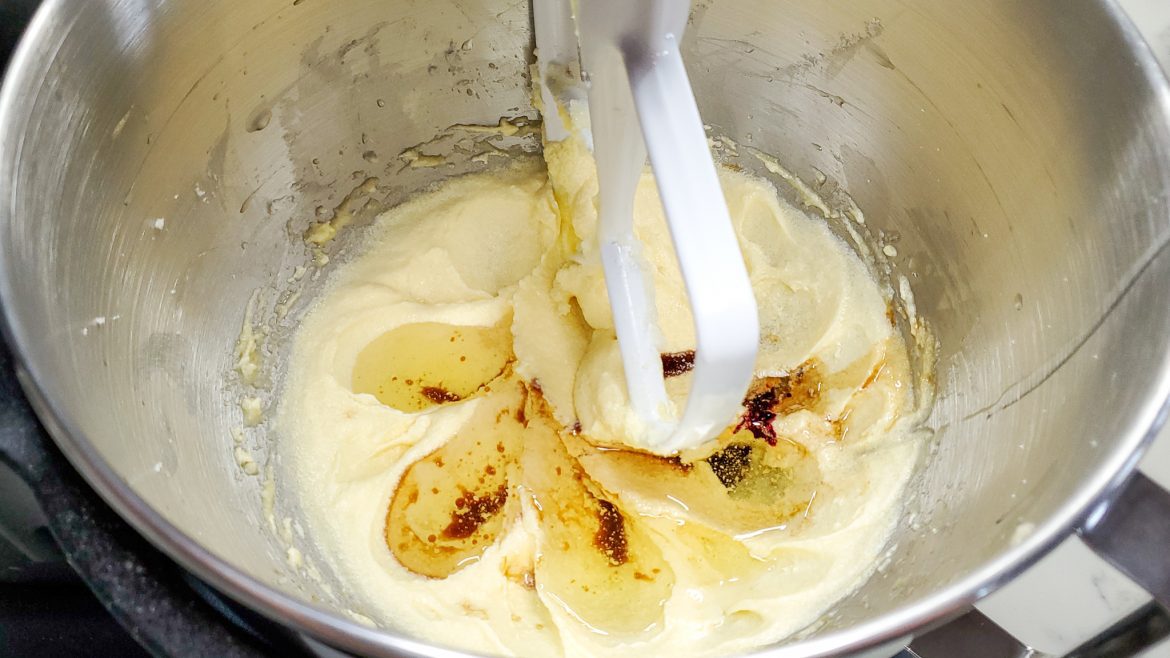
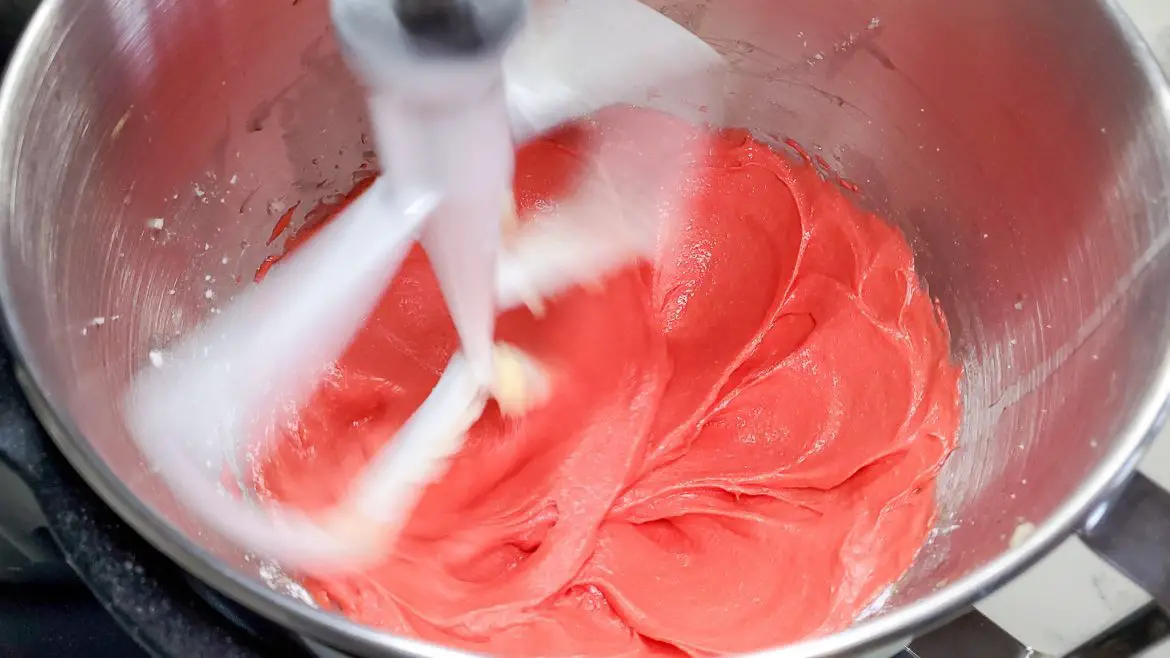
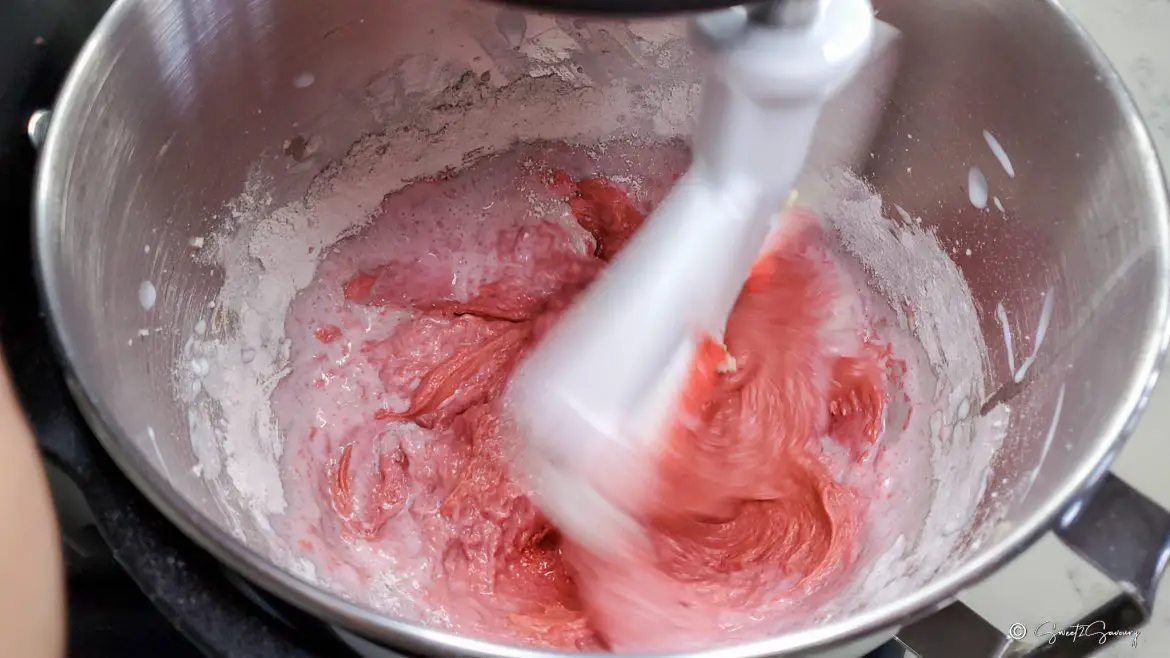
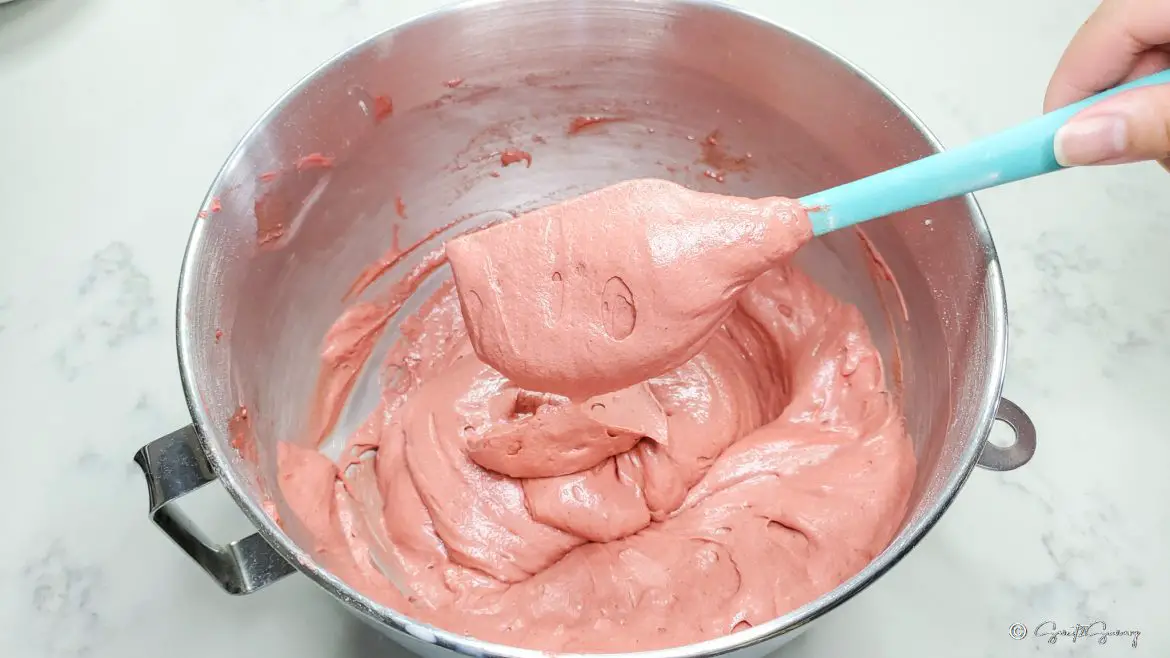
- In the bowl of a stand mixer fitted with paddle attachment, or in a large bowl using an electric mixer, cream together butter and sugar at medium speed until combined. Add the egg and continue to mix until doubled in volume (7 minutes). Add in and mix together on medium speed, vegetable oil, food colour, vanilla extract, and cream of tartar until everything is evenly combined. Scrape down the side of the bowl in between mixing.
- Add a third amount of dry ingredients to the creamed butter and mix until just combined. Then add a third cup of buttermilk and mix until just combined. Alternate adding the flour and the buttermilk and mix in between until just combined. Do not over mix batter since that will result in a denser cake.
- Grease skull cake pan by brushing it with butter or shortening and dusting it with flour to coat. You can also use a baking spray that contains flour (do not use regular cooking spray). Fill each skull head with 1/2 cup of batter. Tap pan on counter a few times to remove air bubbles. Bake cakes for 20 minutes or until a wooden toothpick inserted into the center of the cake comes out clean. Remove from oven and cool cakes on a wire rack. Repeat this step for the remaining batter. Cakes need to cool completely for 1 hour or longer before they can be filled and decorated.
To make the cream cheese frosting
- In the bowl of your stand mixer fitted with a paddle attachment, mix together on low speed the cream cheese, confectioners' sugar, vanilla extract and salt until combined. Then increase speed to medium until frosting is smooth. Set aside in a medium bowl. Cover and refrigerate it until you are ready to fill the cakes.
To make the buttercream frosting
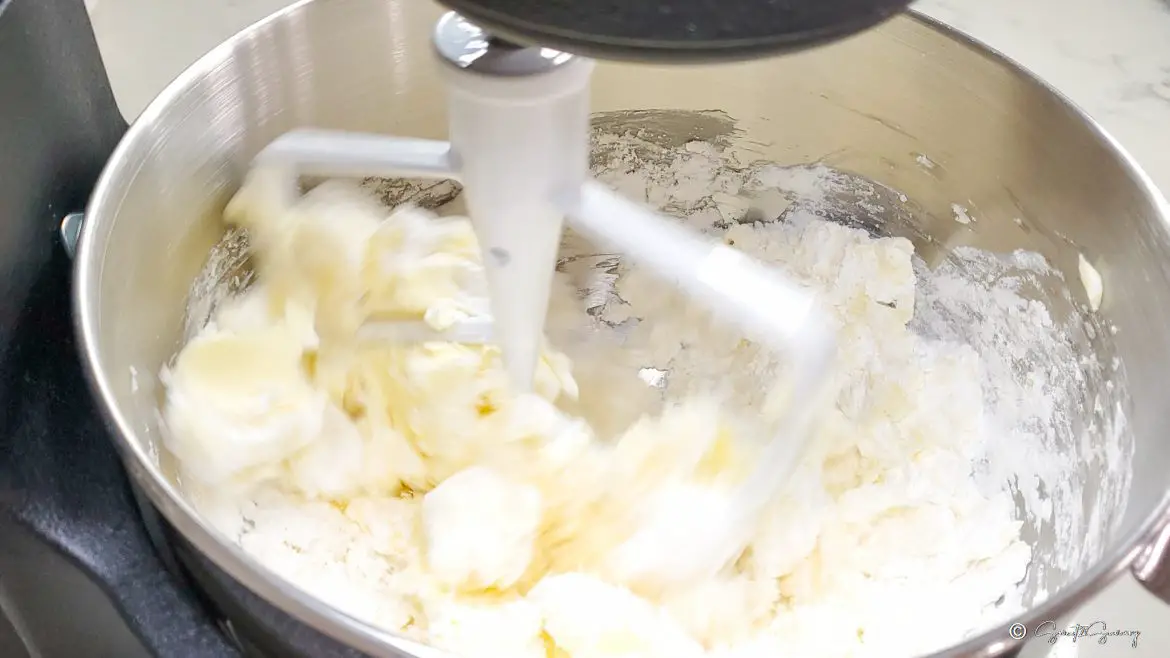
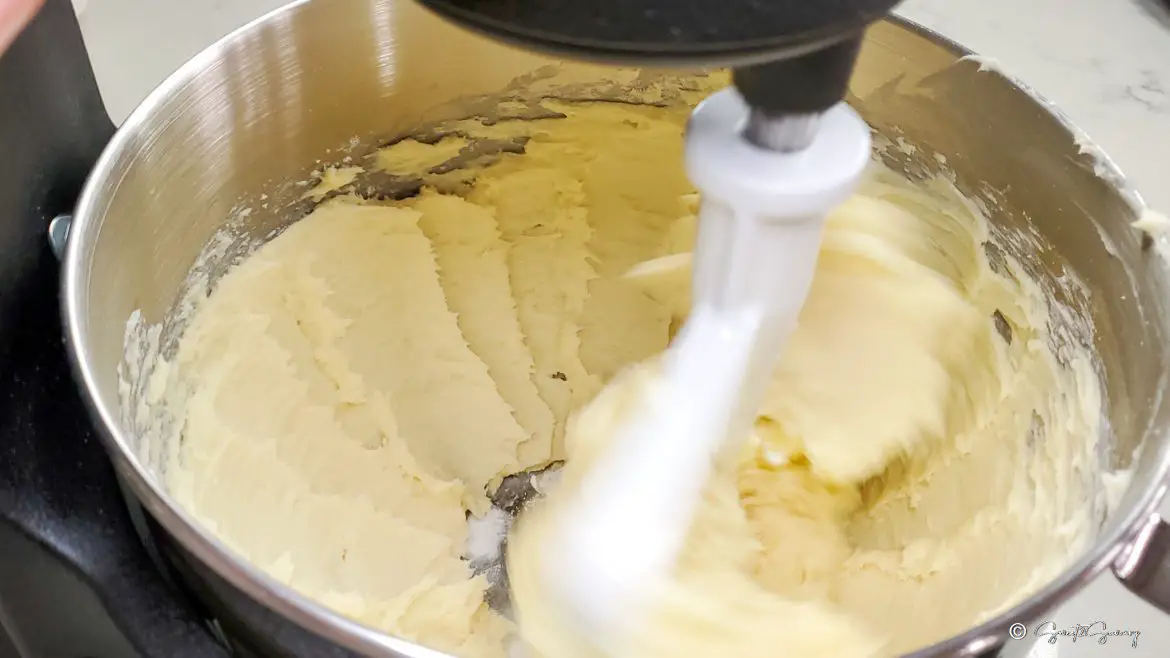
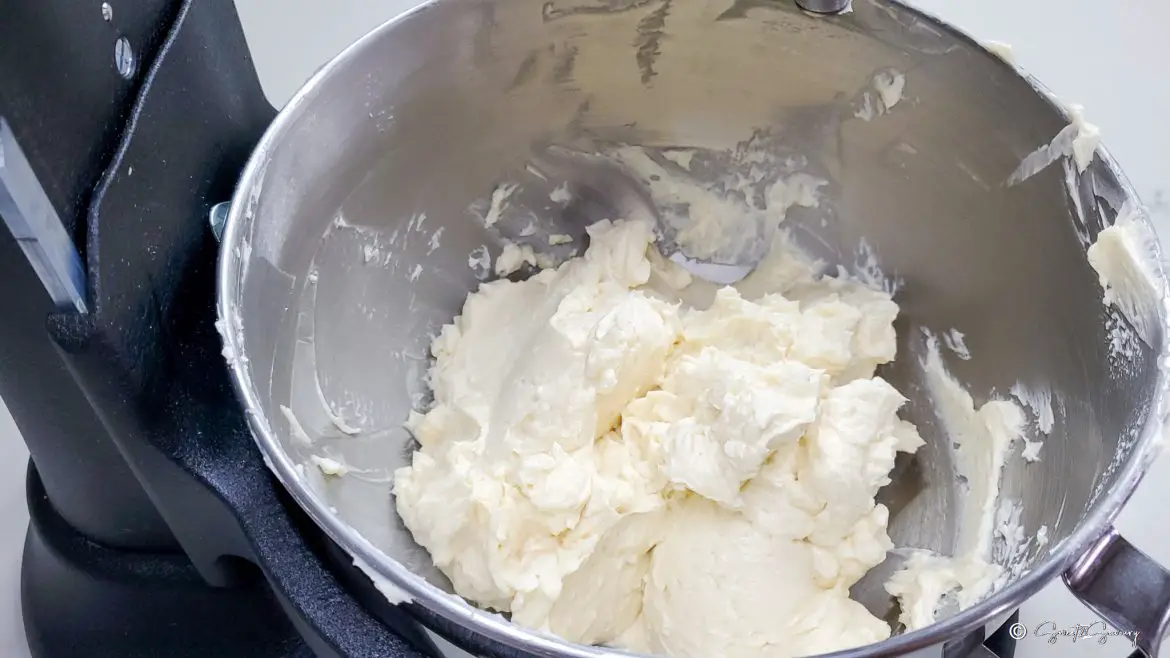
- In the bowl of your stand mixer fitted with a paddle attachment, cream together unsalted butter, confectioners' sugar, vanilla extract and salt on low speed until combined. Scrape the side of the bowl down in between mixing. Add a 1/4 cup of milk at a time while you continue to mix the buttercream on low speed. When the milk is fully incorporated, increase speed to high (you can also switch to a whisk attachment, then increase speed) and mix until buttercream is smooth and doubled.
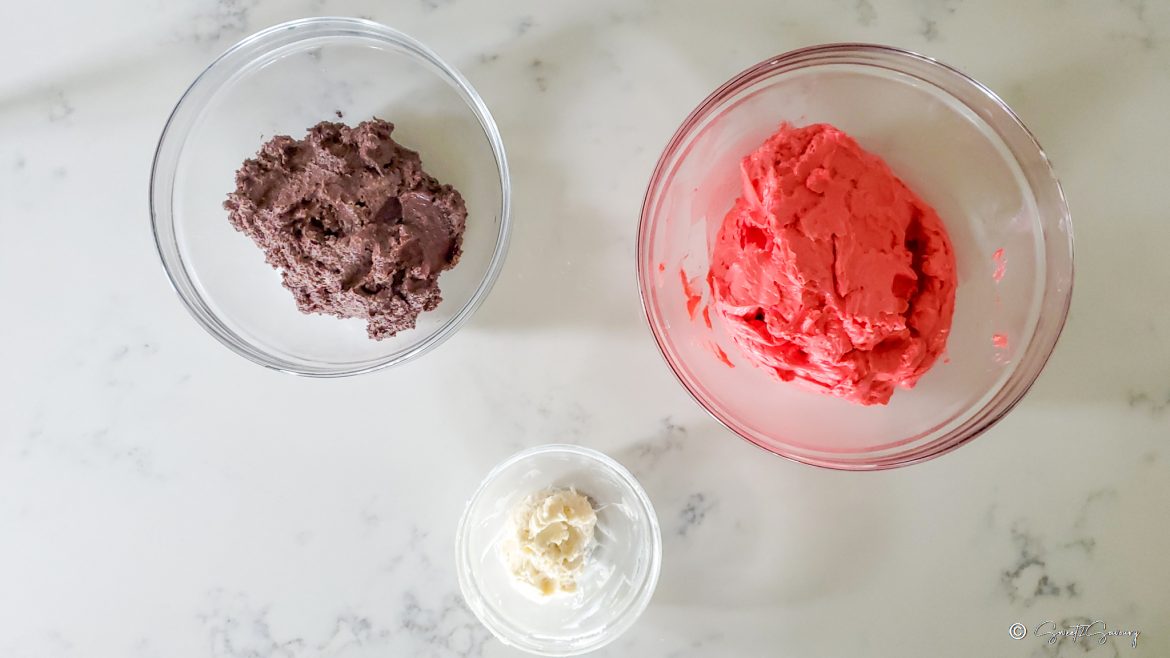
- Divide:– 1/4 cup buttercream into a small bowl– 1½ cup buttercream into a medium bowl– Leave remaining buttercream in the mixer bowl
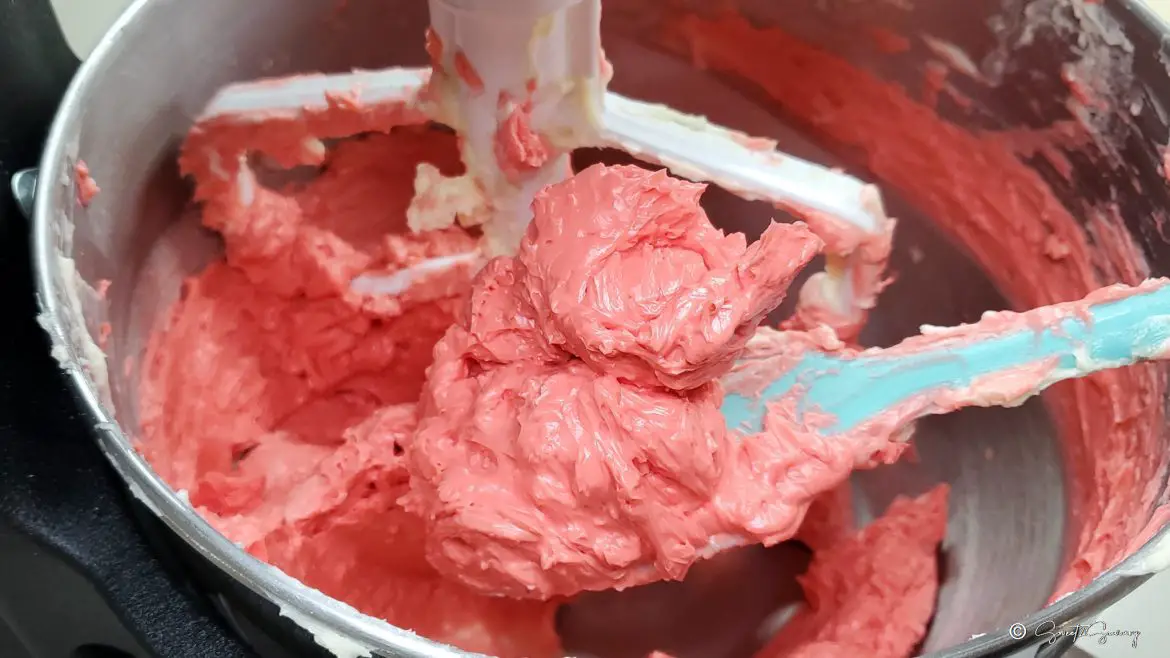
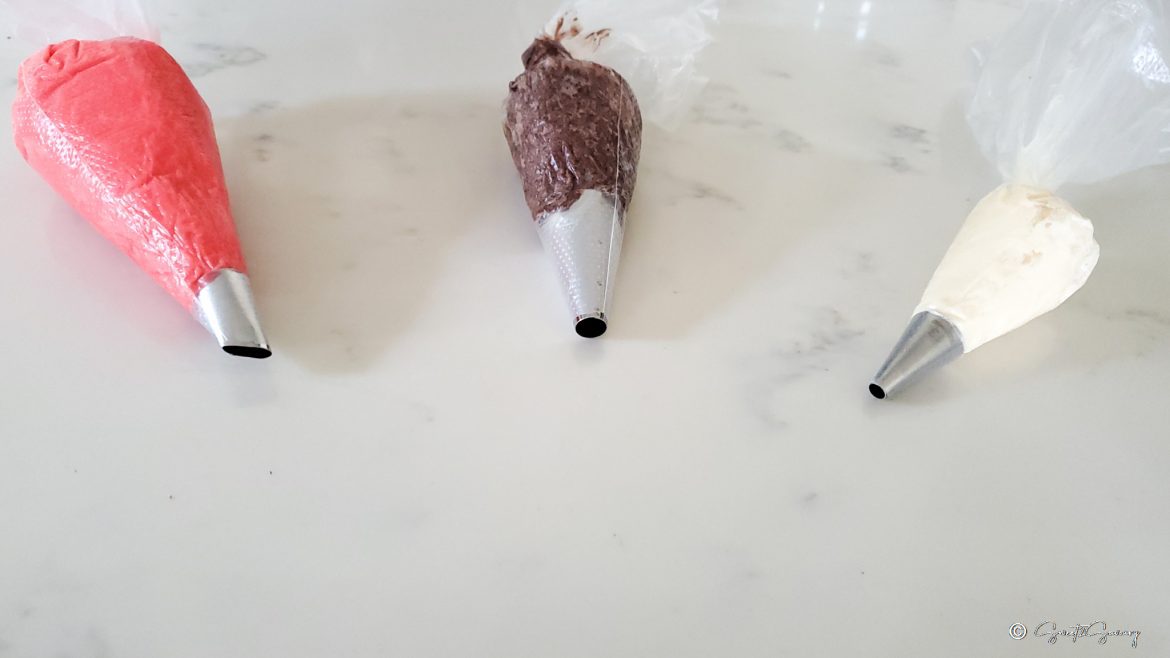
- If you are using the Wilton food colour set, add 8 drops Crimson + 6 drops Red food colour to remaining buttercream in the mixer bowl. Mix it on medium speed until well combined. Fill red buttercream into a piping bag fitted with a 1/2-inch slanted piping tip or use a large zip-top plastic bag and snip the corner at an angle. This will be used to pipe on the red hood.
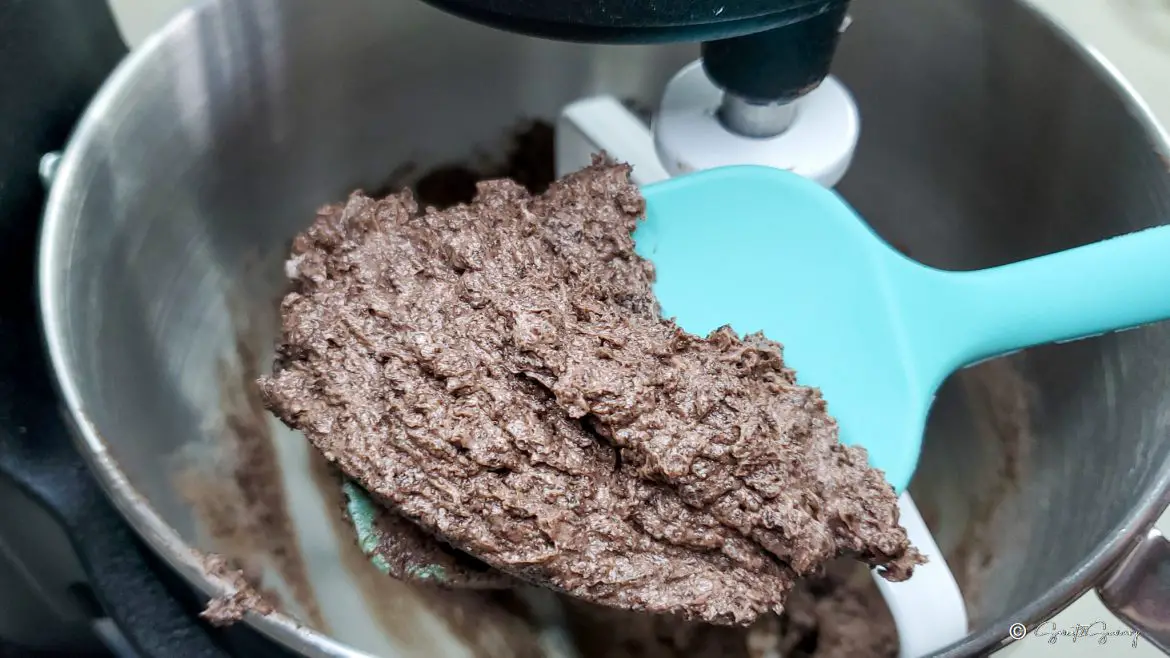
- Add 1 cup Oreo baking crumbs and 1 Tablespoon unsweetened cocoa powder into the bowl with 1 ½ cup buttercream. Mix together until well combined. Fill the Oreo buttercream into a piping bag fitted with a large 1/2-inch round piping tip or use a large zip-top plastic bag and cut the corner to create a 1/2-inch opening. This will be used to pipe on the mask.
- Fill the 1/4 cup buttercream into a piping bag fitted with a 1/4-inch small round piping tip or use a medium zip-top plastic bag and snip the corner with a small opening. This will be used to pipe on the symbol.
For the decoration
- In a heatproof bowl, microwave together chocolate chips with milk, 30 seconds at a time until melted. Add to a disposable piping bag or medium plastic zip-top bag and snip a small opening. This will be used to pipe on the lines on the mask and hood.
To fill and decorate the masked soldier cakes
- Cut 9 pieces of 7 x 7-inch parchment paper.
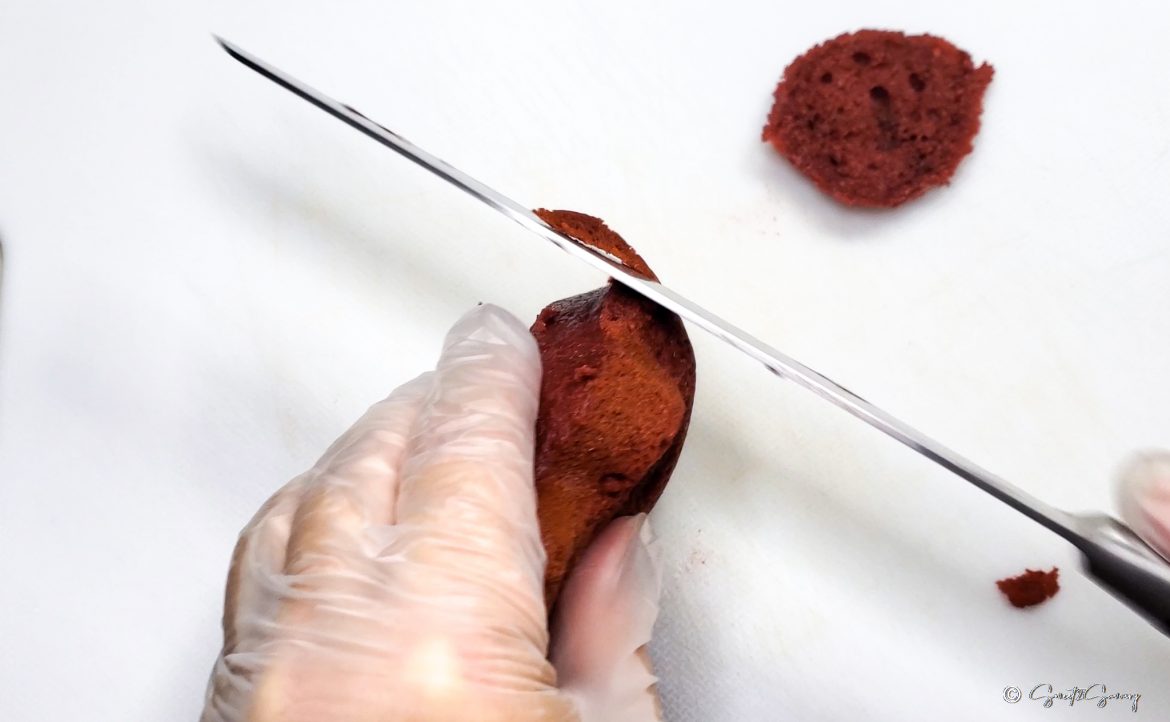
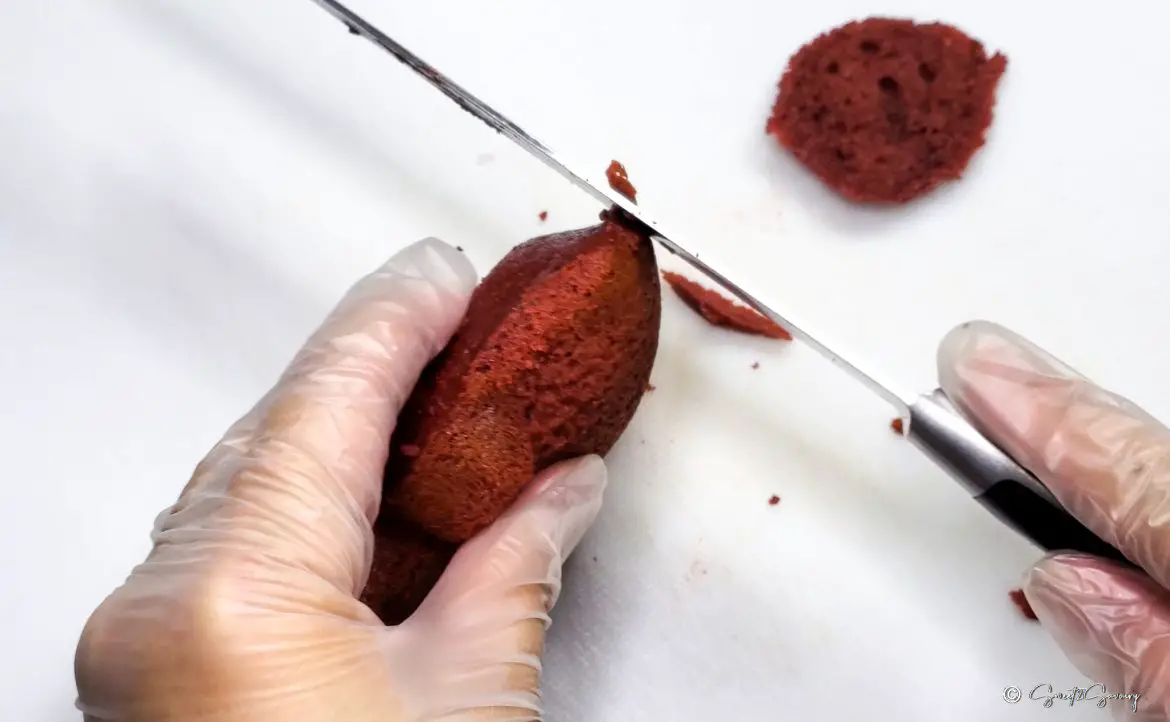
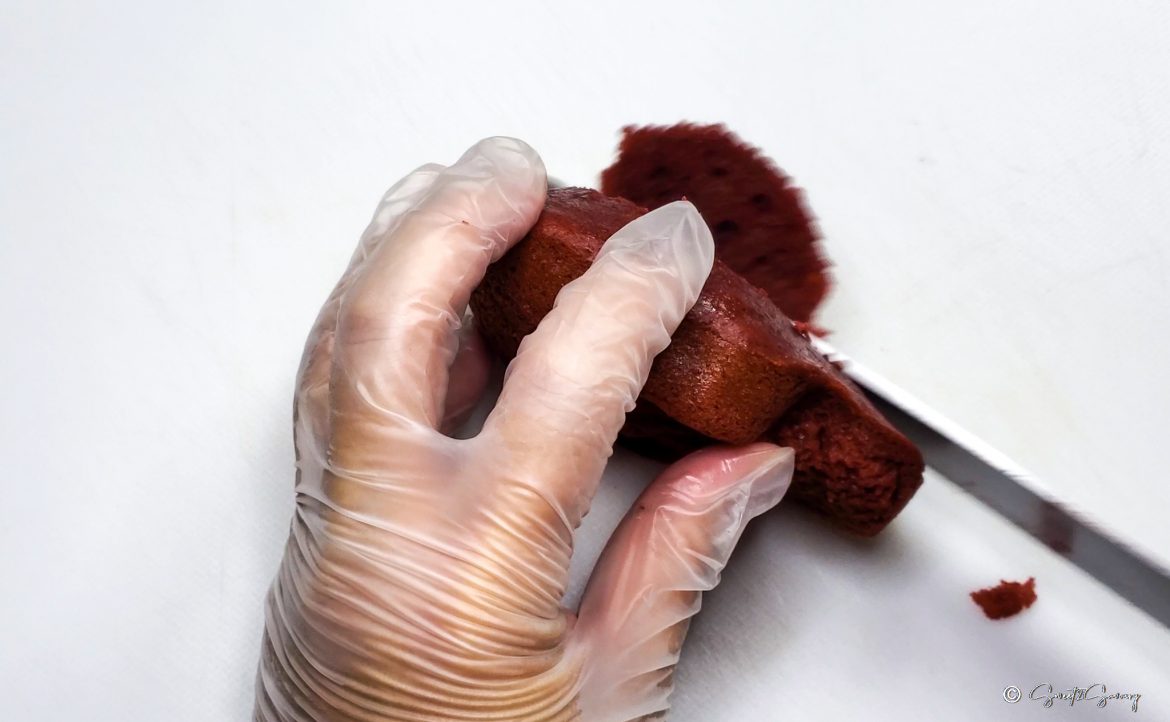
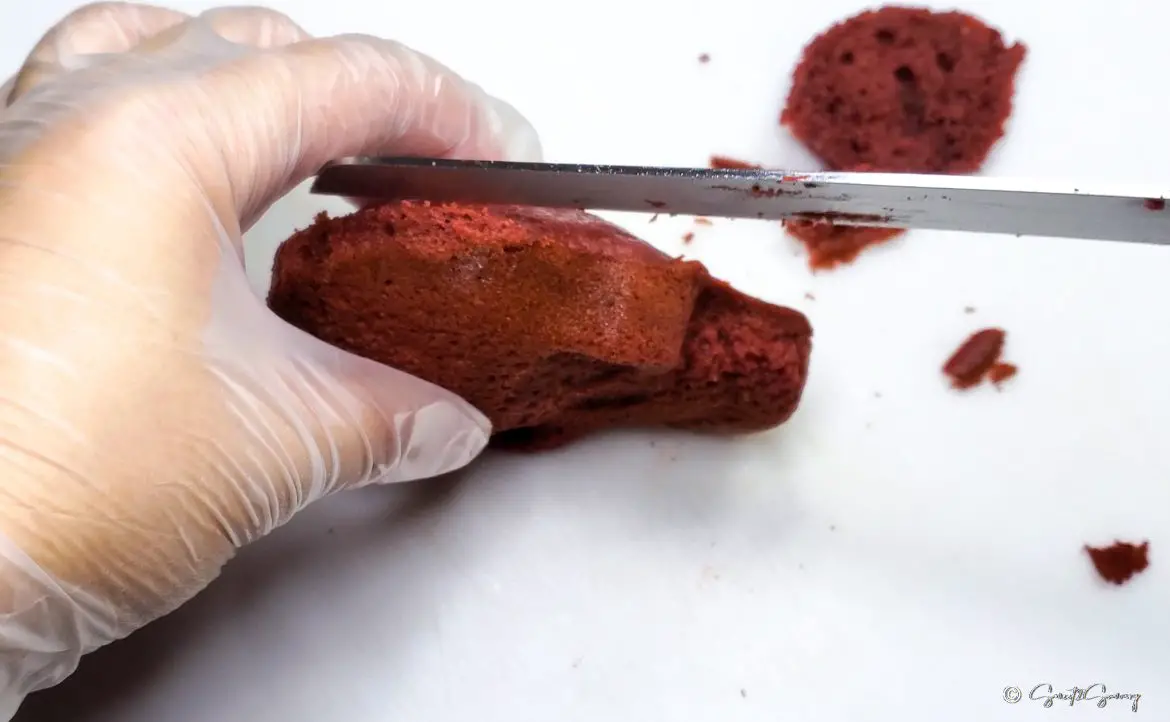
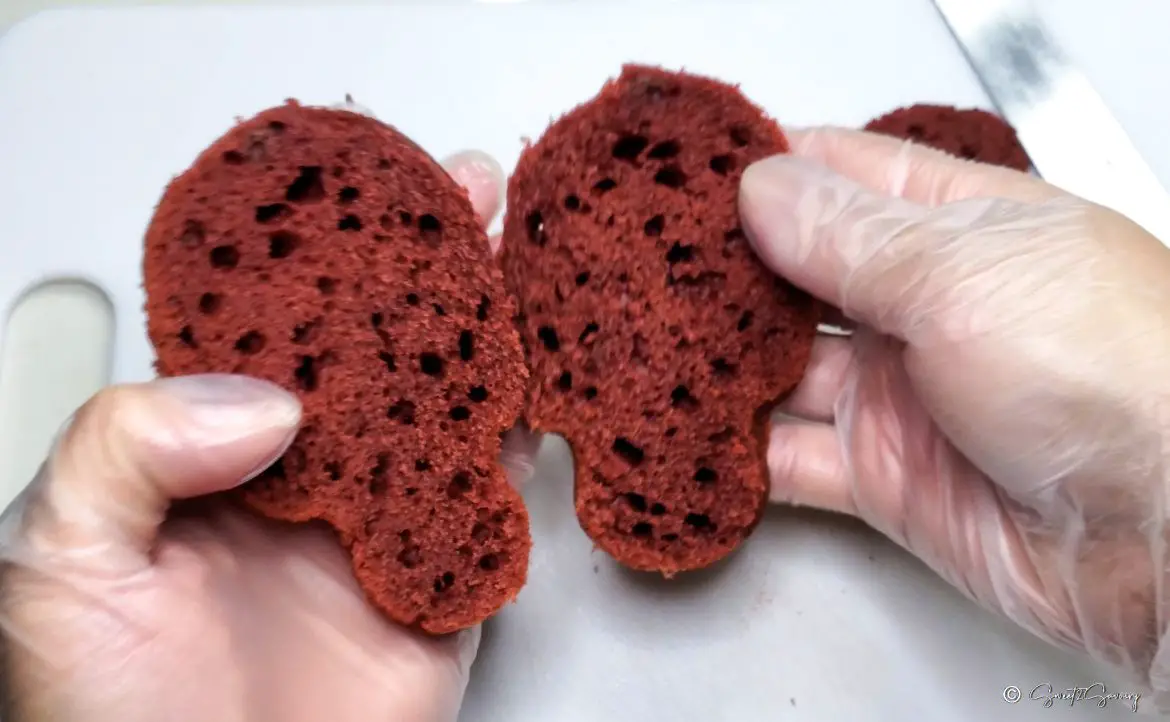
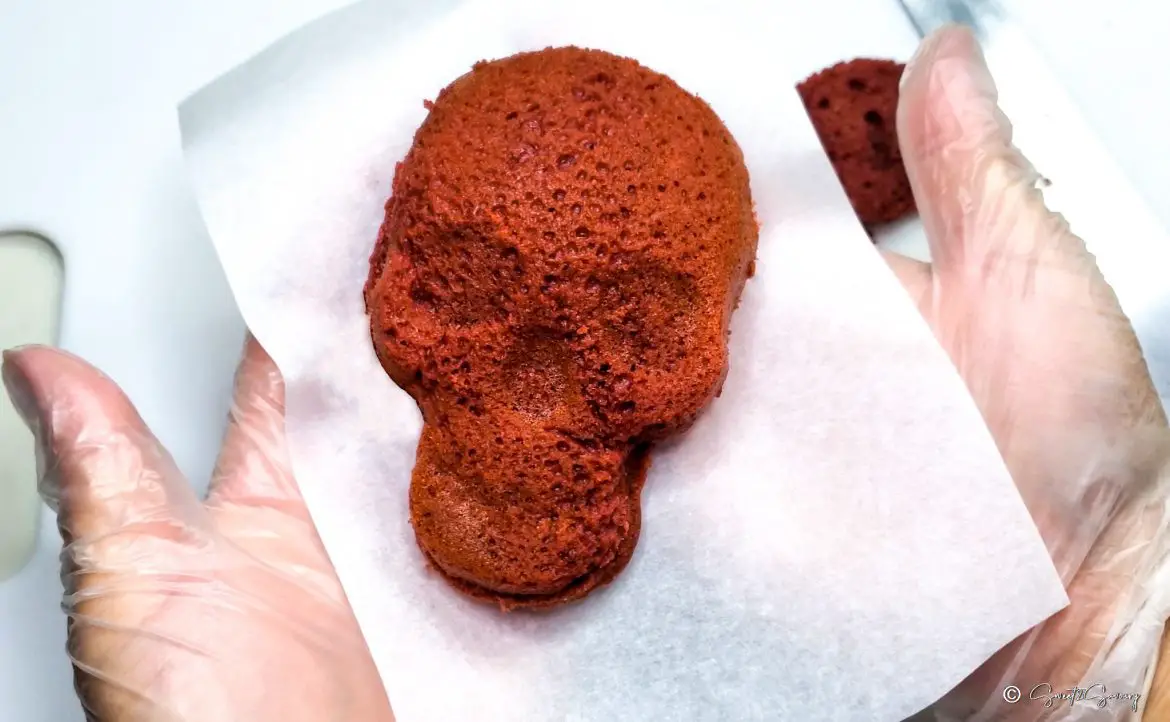
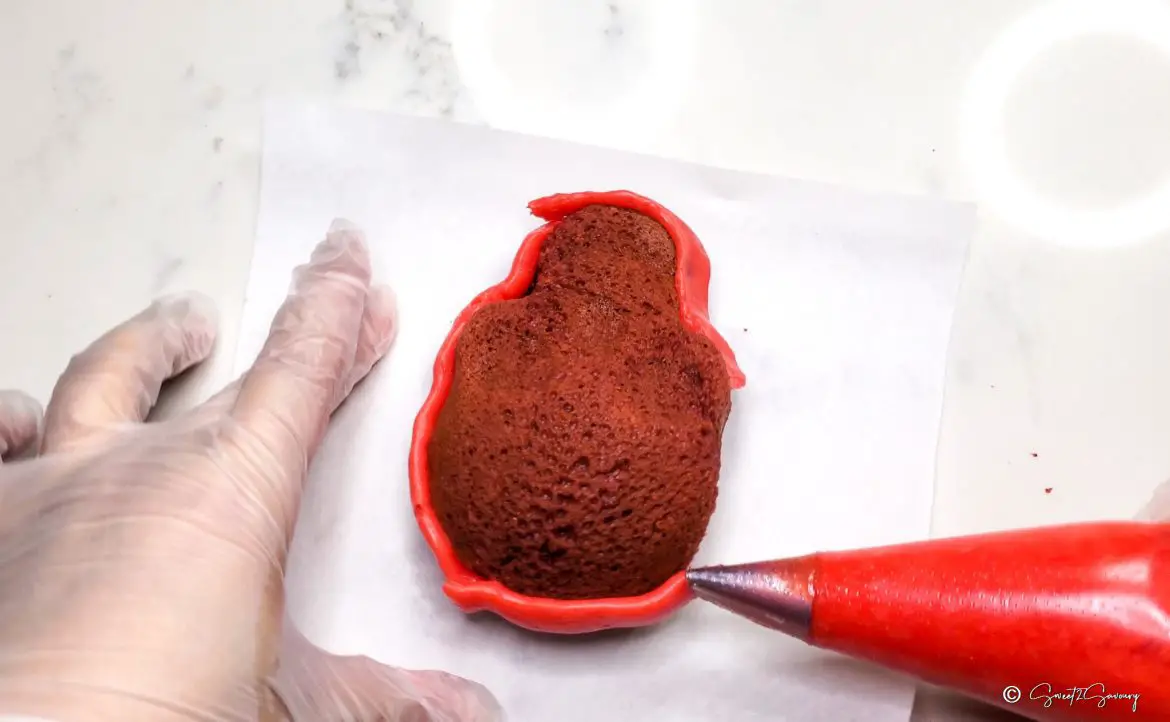
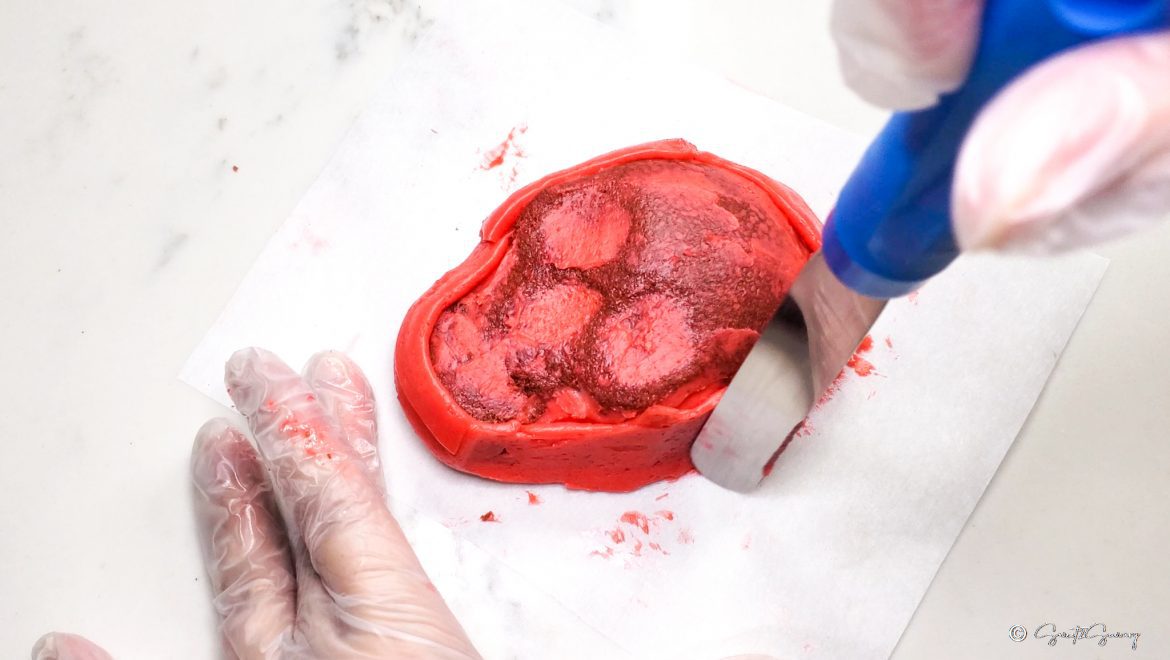
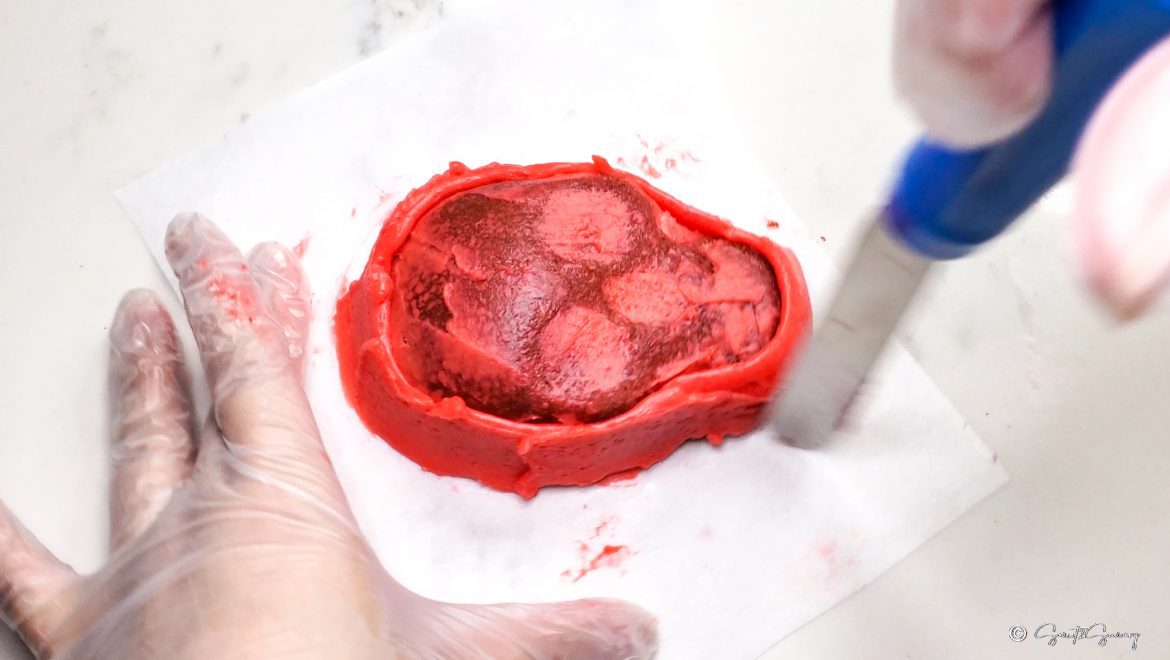
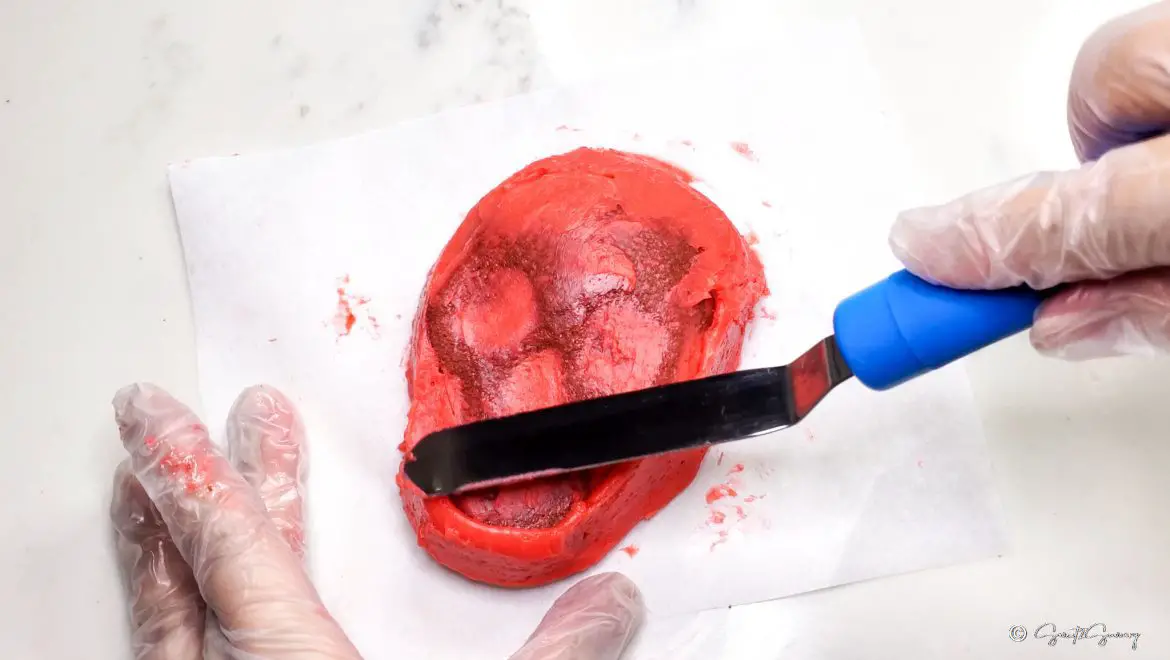
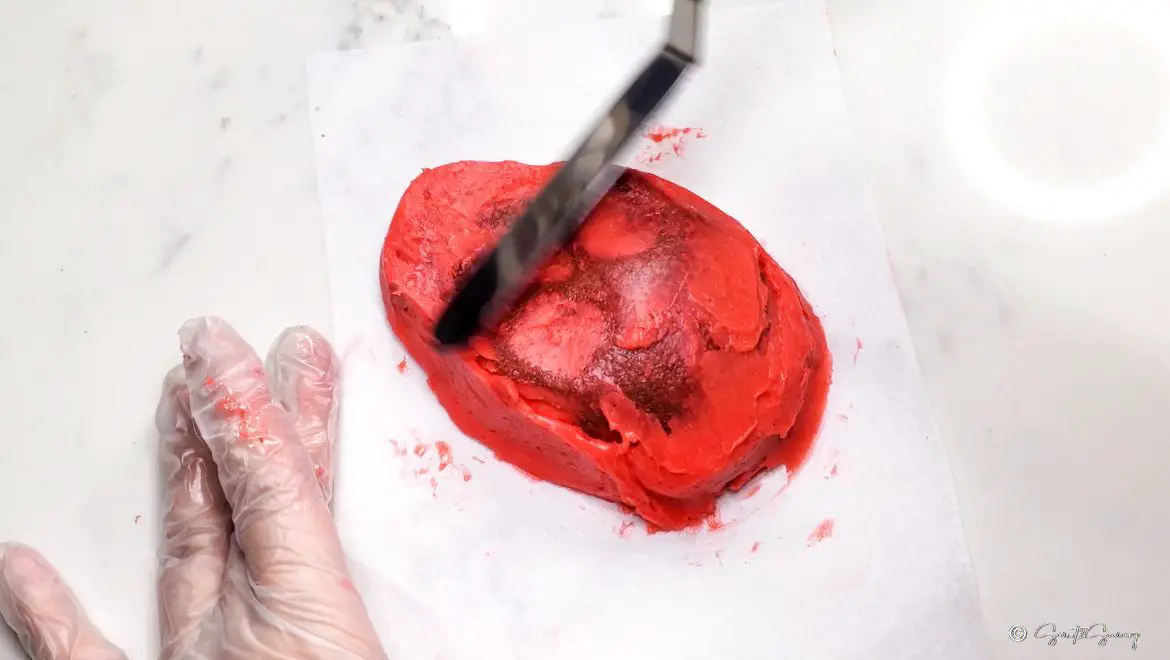
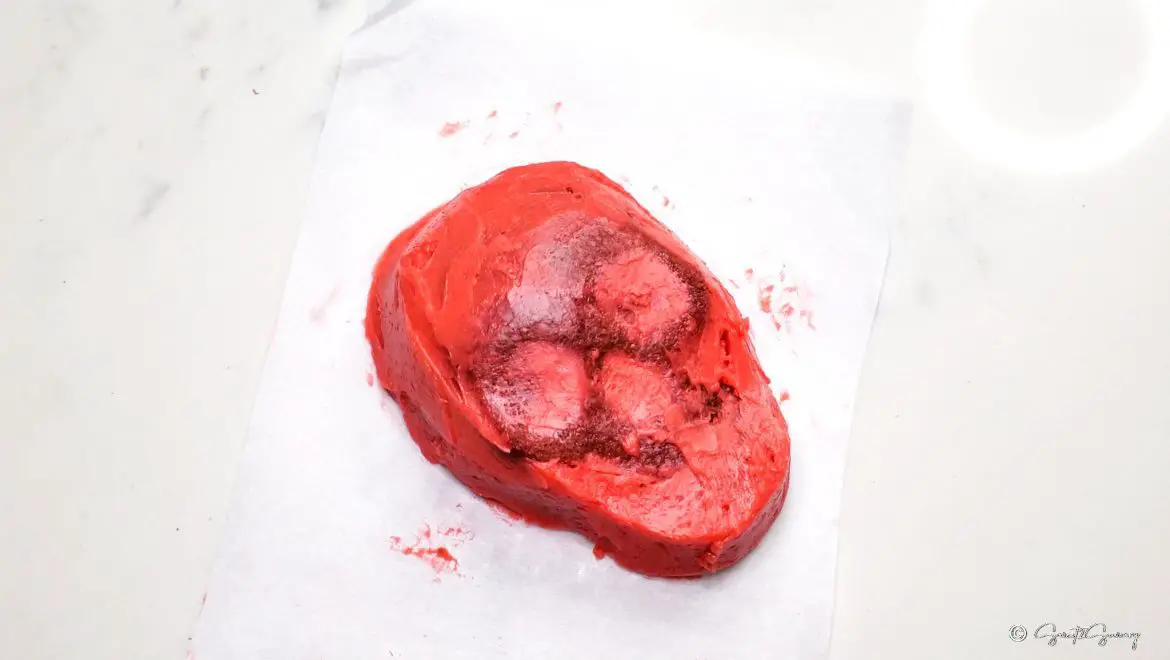
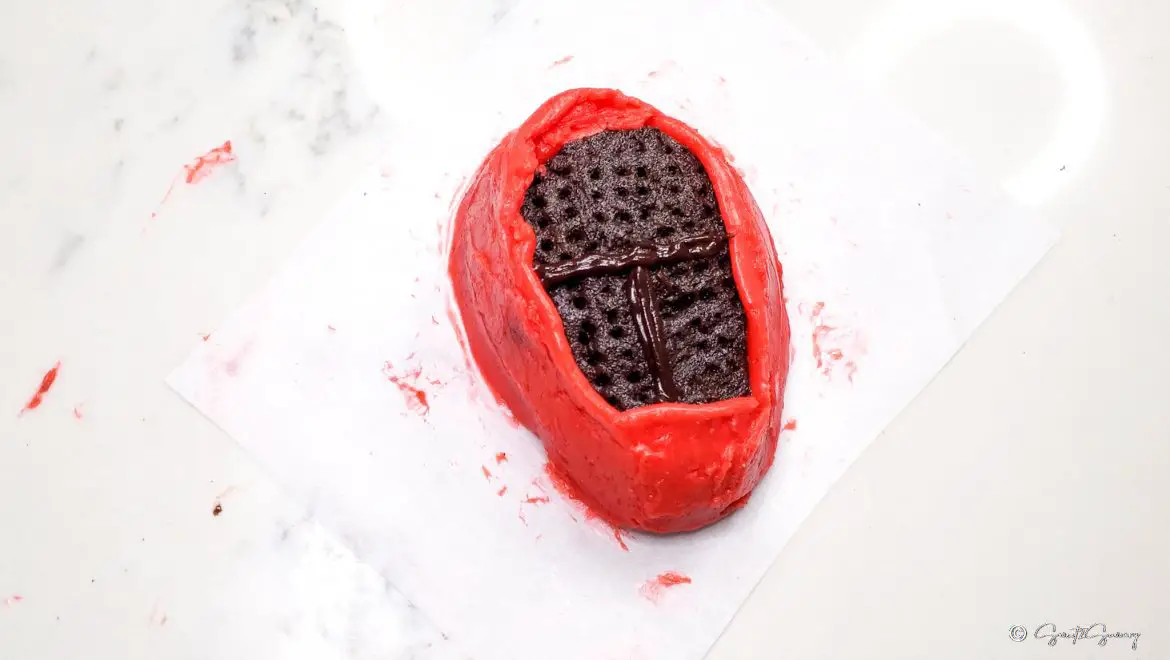
- Trim excess cake around the skull head if needed. Trim the back side of the skull head to create a levelled surface. Finally, cut the cake in half from top to bottom. Place cake halves on a piece of parchment paper.
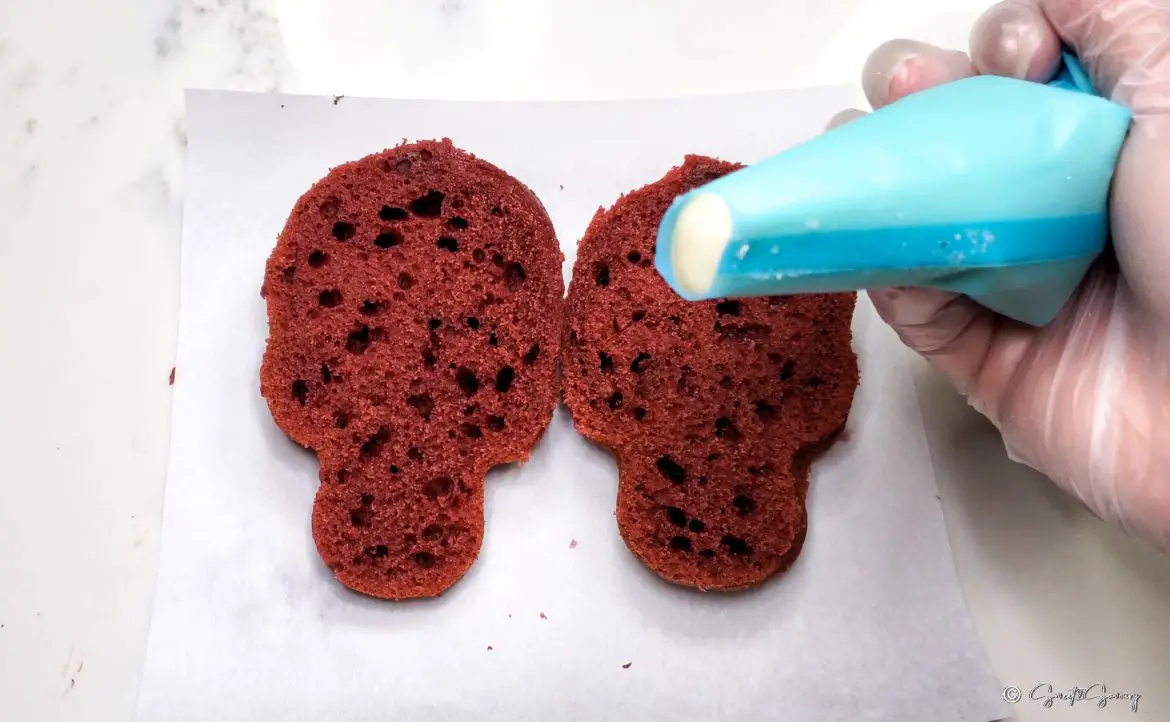
- Add cream cheese frosting into a piping bag with a large opening and pipe a straight line on the bottom half of the cake. Use a 9-inch angled spatula to spread the filling and leave a 1 cm gap all around the cake. Place the top half of the cake on top of the cream cheese filling.
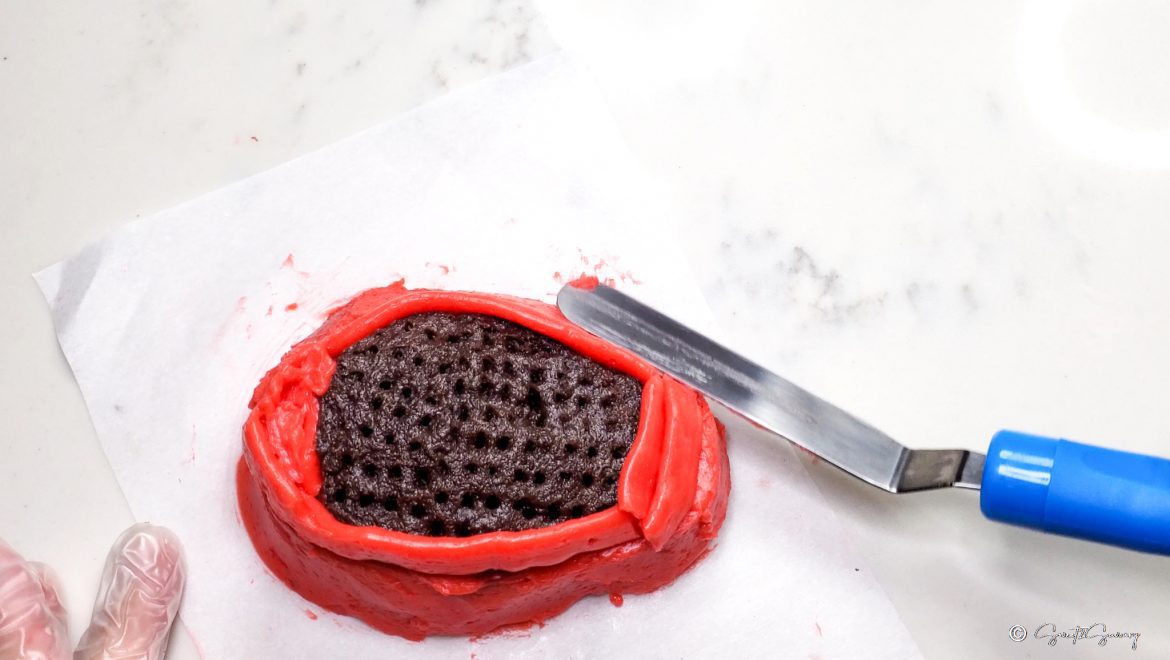
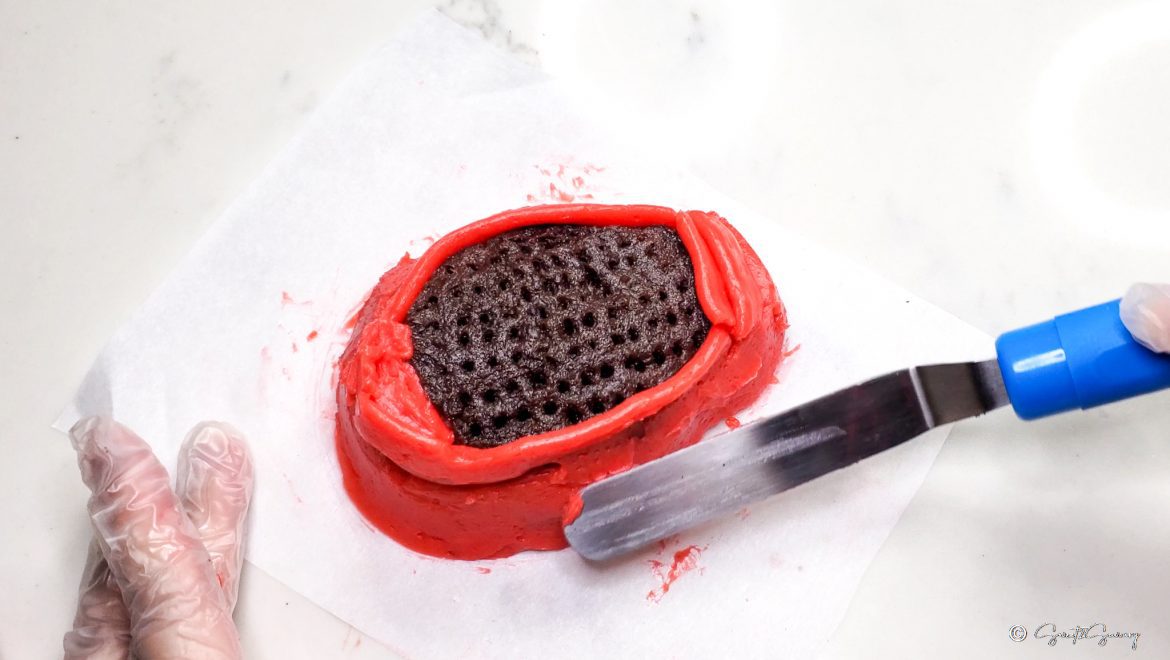
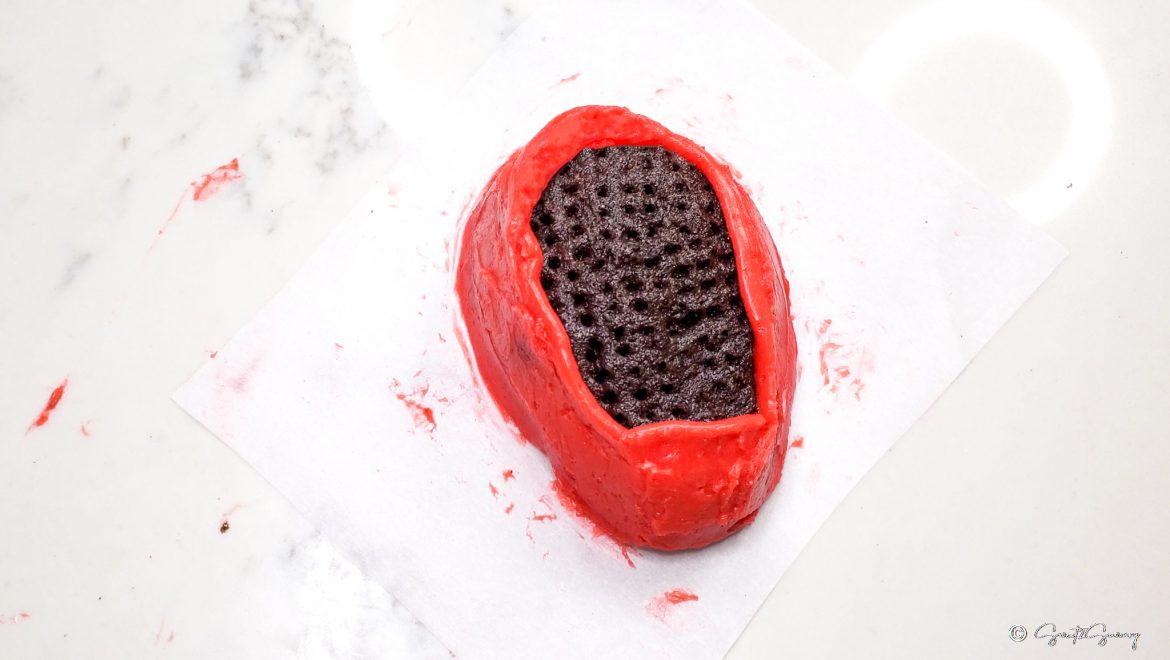
- Use the red buttercream piping bag and pipe buttercream 1x around the cake. Then use a clean angled spatula to spread the buttercream thinly all over the cake. This is called a crumb coat that 'glues' crumbs down and helps seal the filling so that it will not leak while you work. Place the cake into the refrigerator for 10 minutes so that the buttercream can firm up. Repeat this step for the remaining mini cakes.
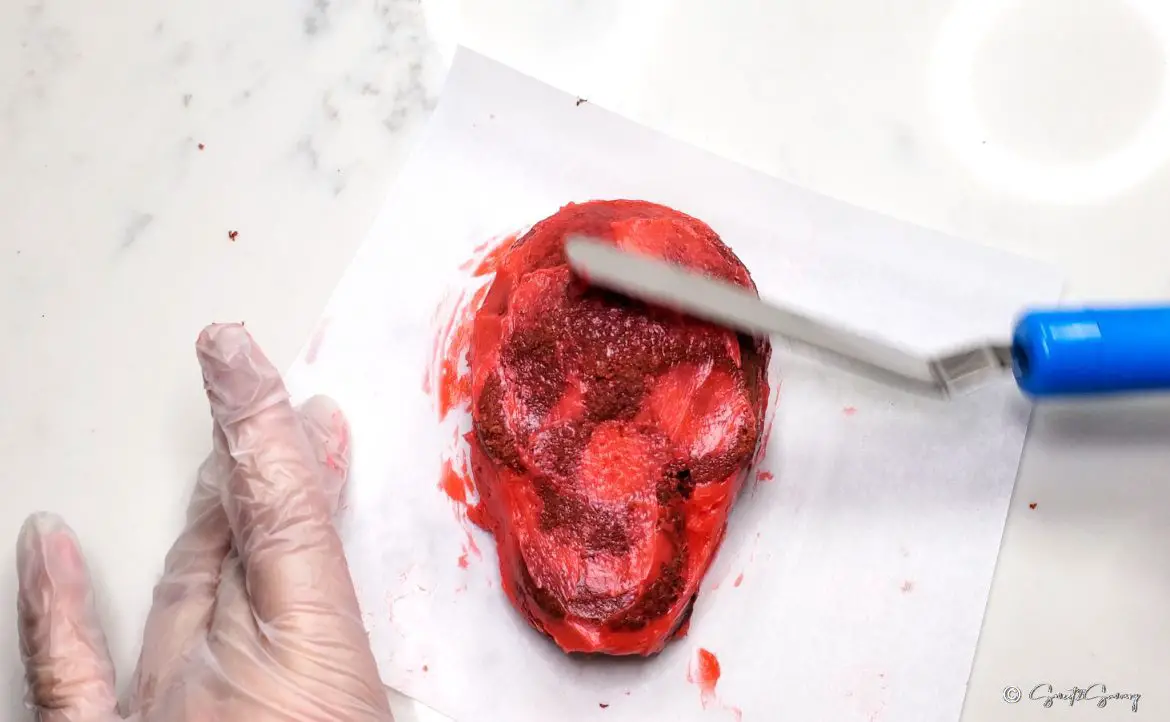
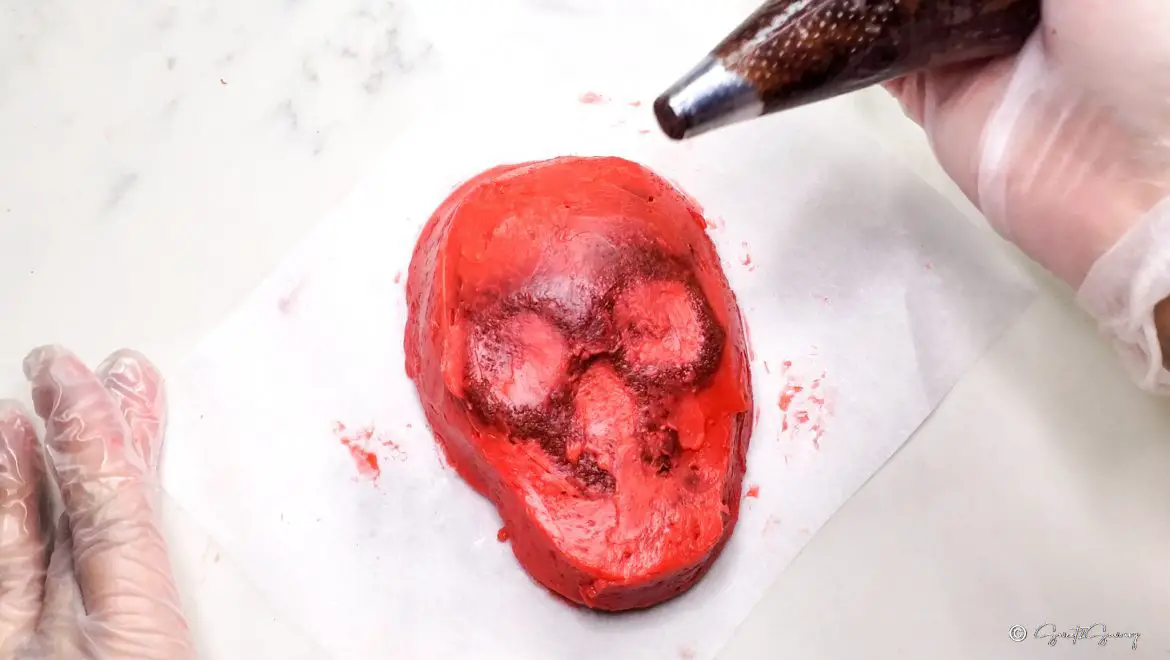
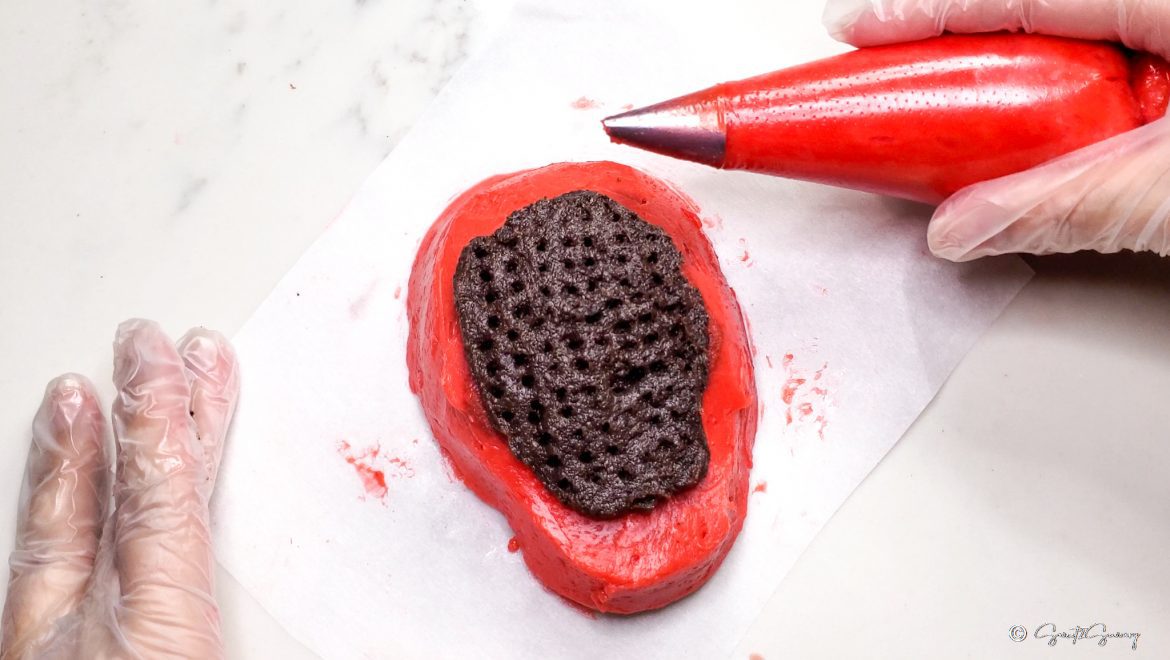
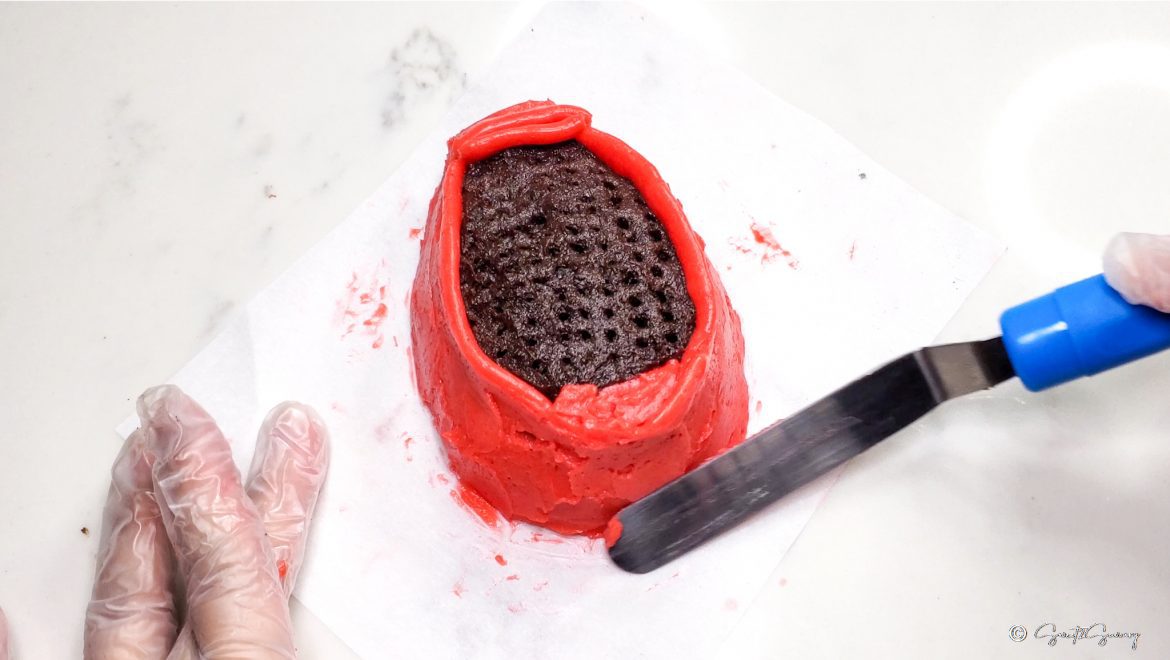
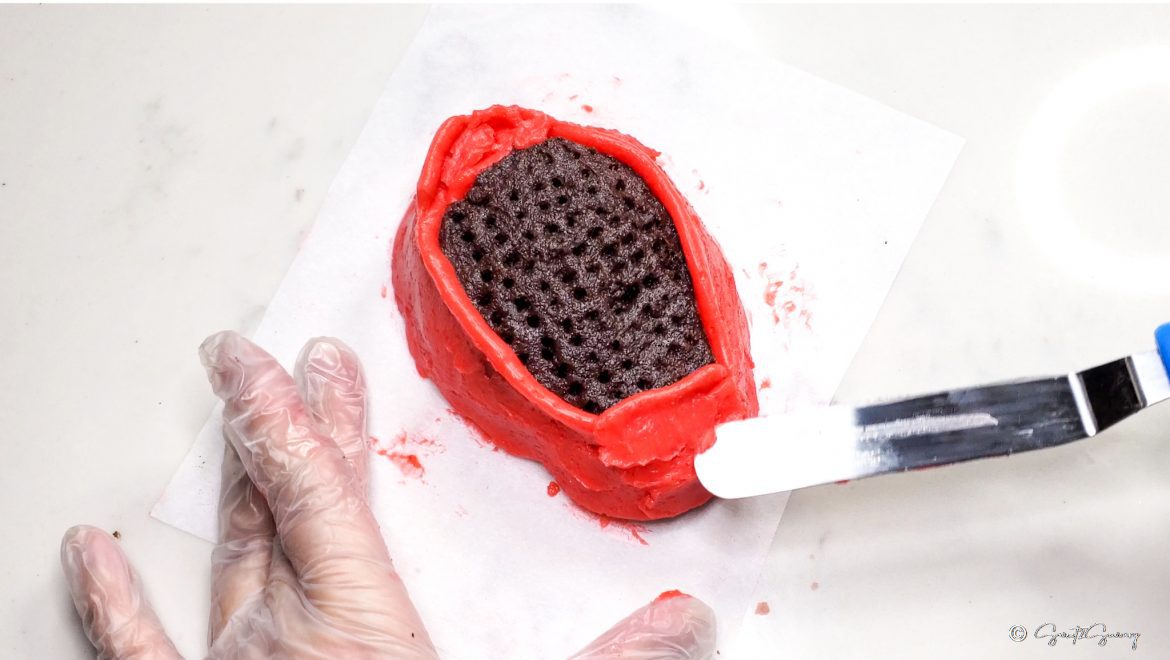
- To decorate, pipe red buttercream 2x around the skull cake (use the parchment paper to help rotate the cake while you pipe). Then use a 9-inch angled spatula to evenly spread the buttercream only around the side of the cake. Smooth the edges around the top sides of the cake.
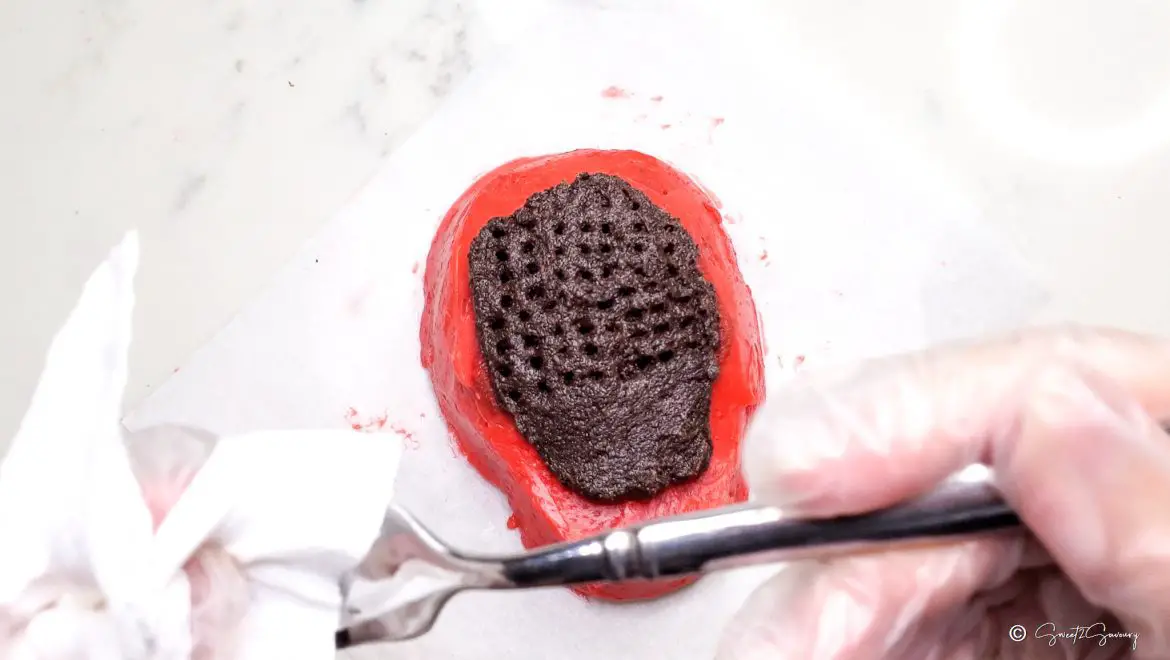
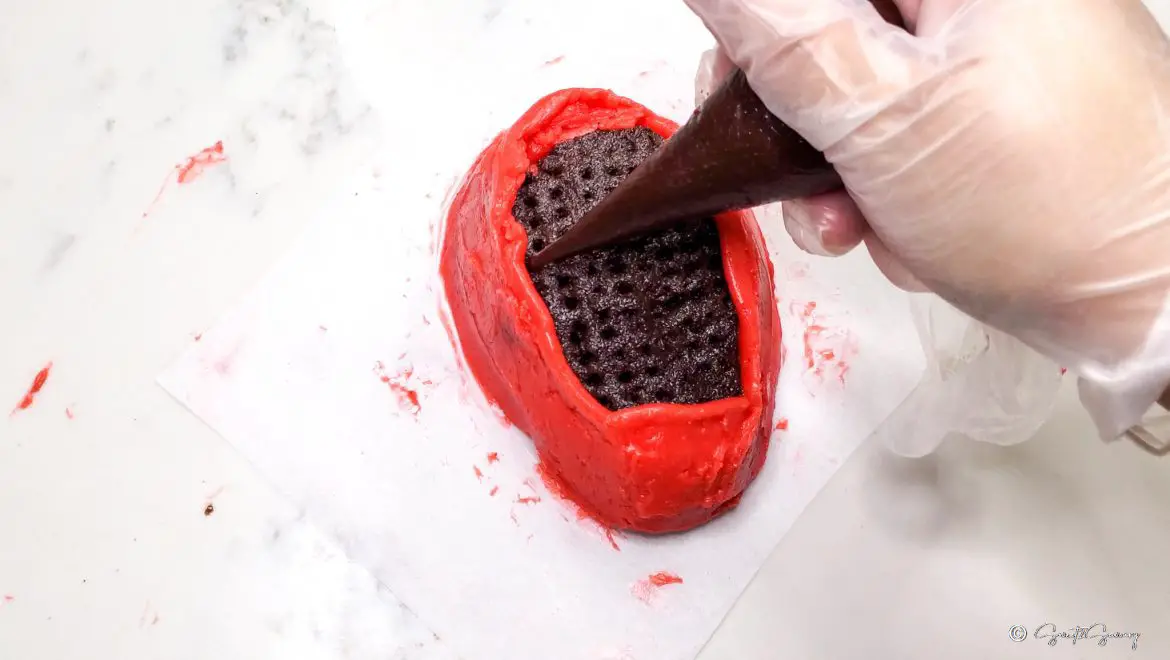
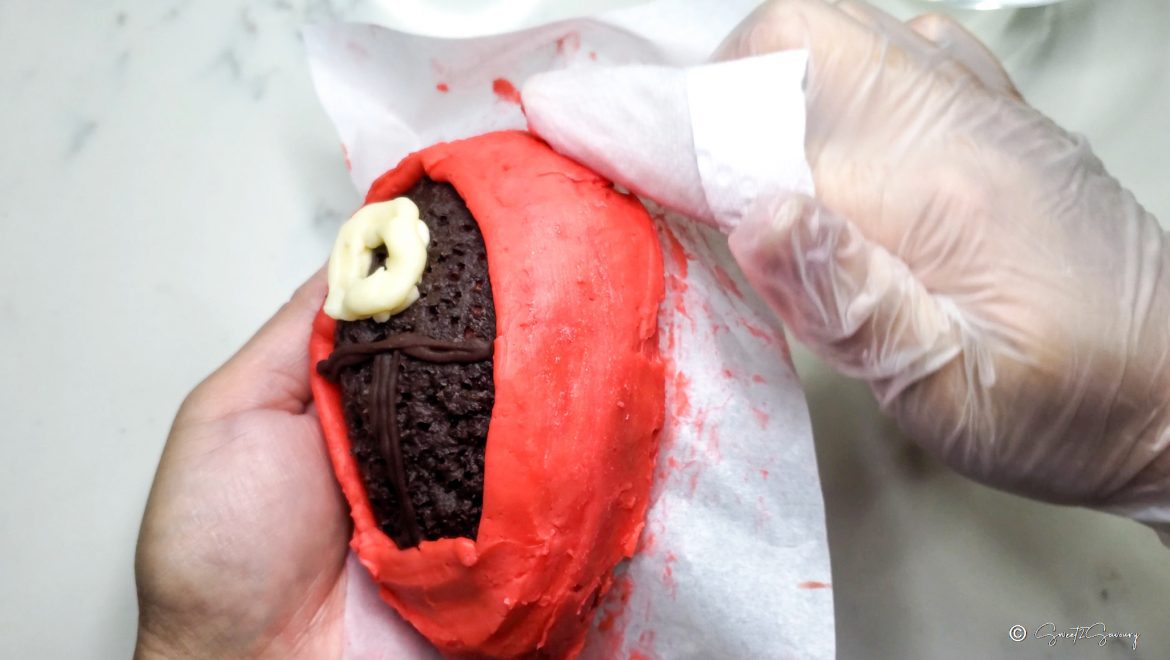
- Use the Oreo buttercream piping bag to pipe on the mask by covering the skull face and leaving a 1 cm gap around the edges. Then use a clean 9-inch angled spatula to smooth out the buttercream.
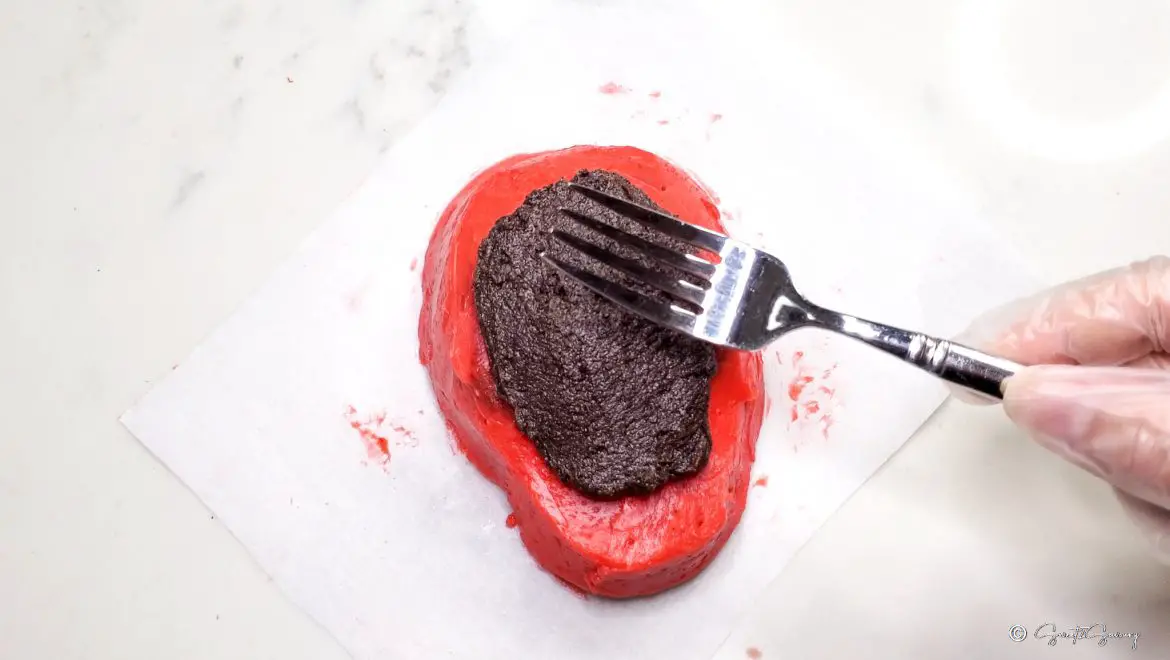
- With a clean fork, lightly puncture even grid marks into the mask to create a 'mesh' look. Clean your fork every so often with a clean paper towel while you puncture.
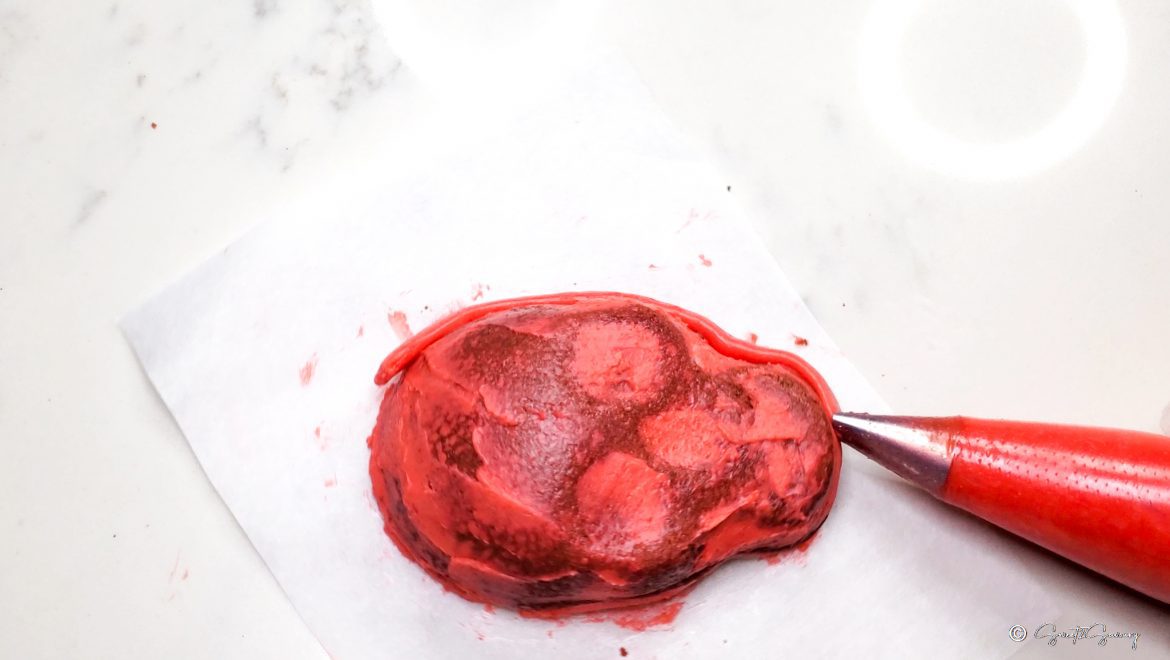
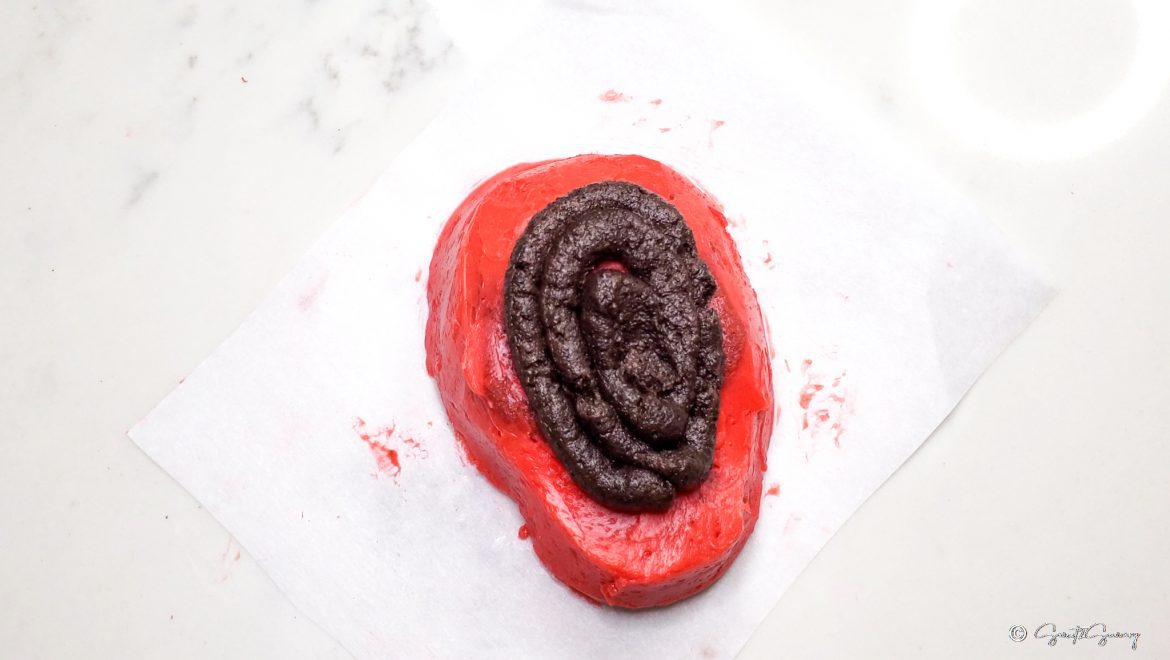
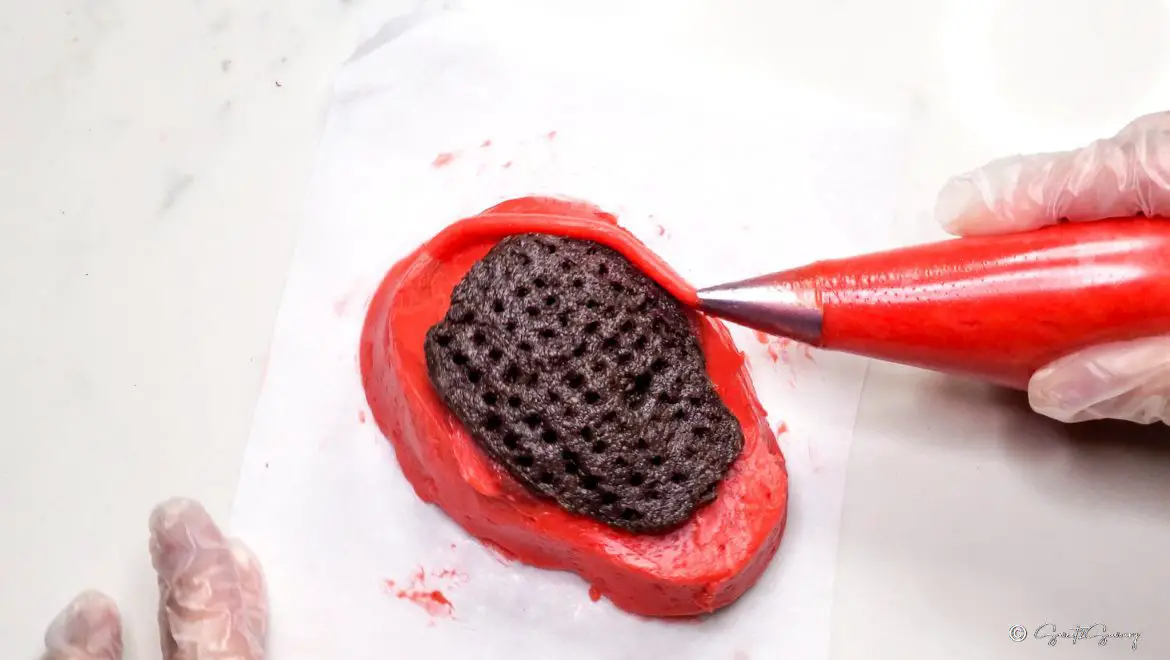
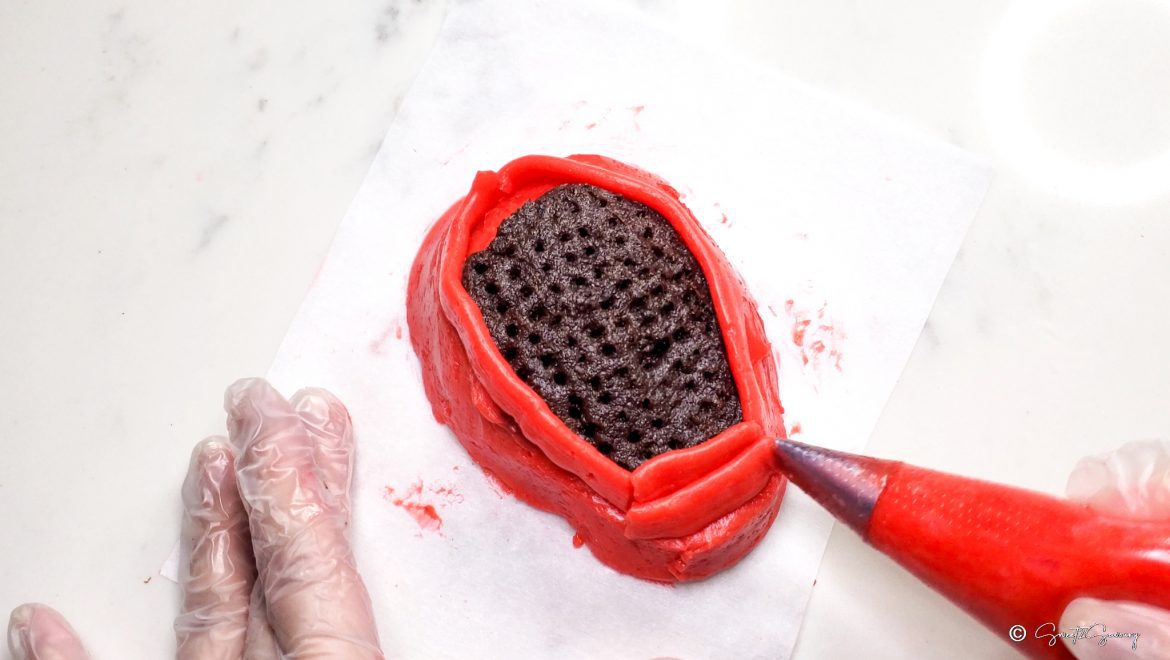
- Pipe a clean line of red buttercream around the edges of the cake and pipe a 'neck' covering where the chin is. Carefully seal the bottom edges with a clean spatula to blend the buttercream and complete the hood look. Smooth out any uneven surfaces with your spatula.
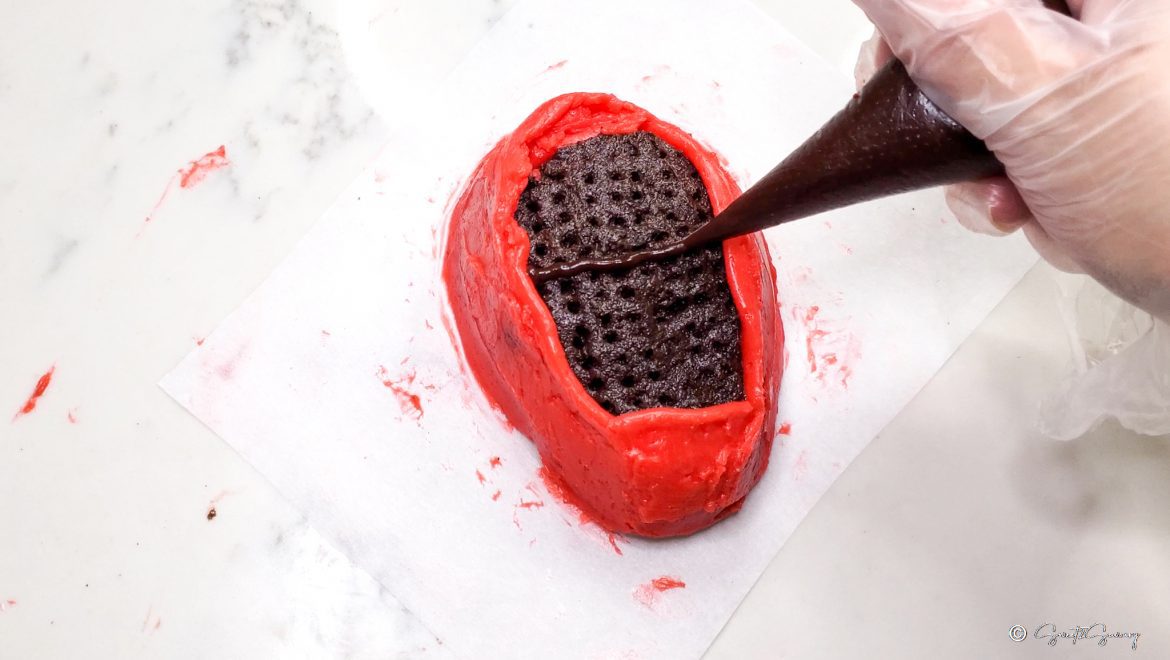
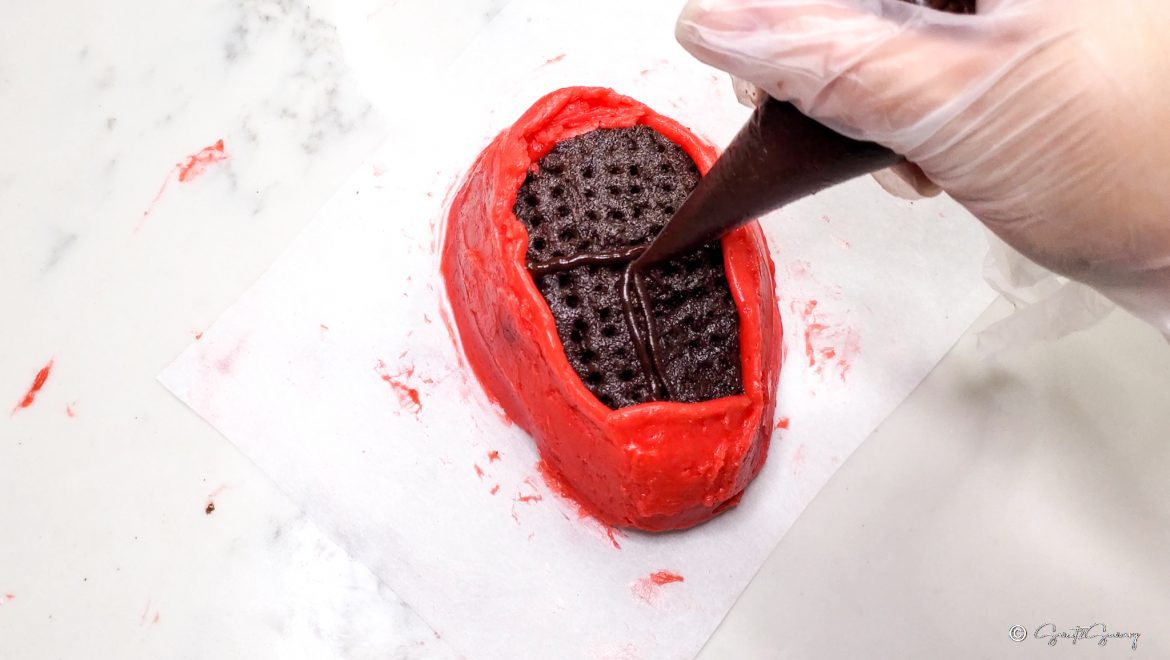
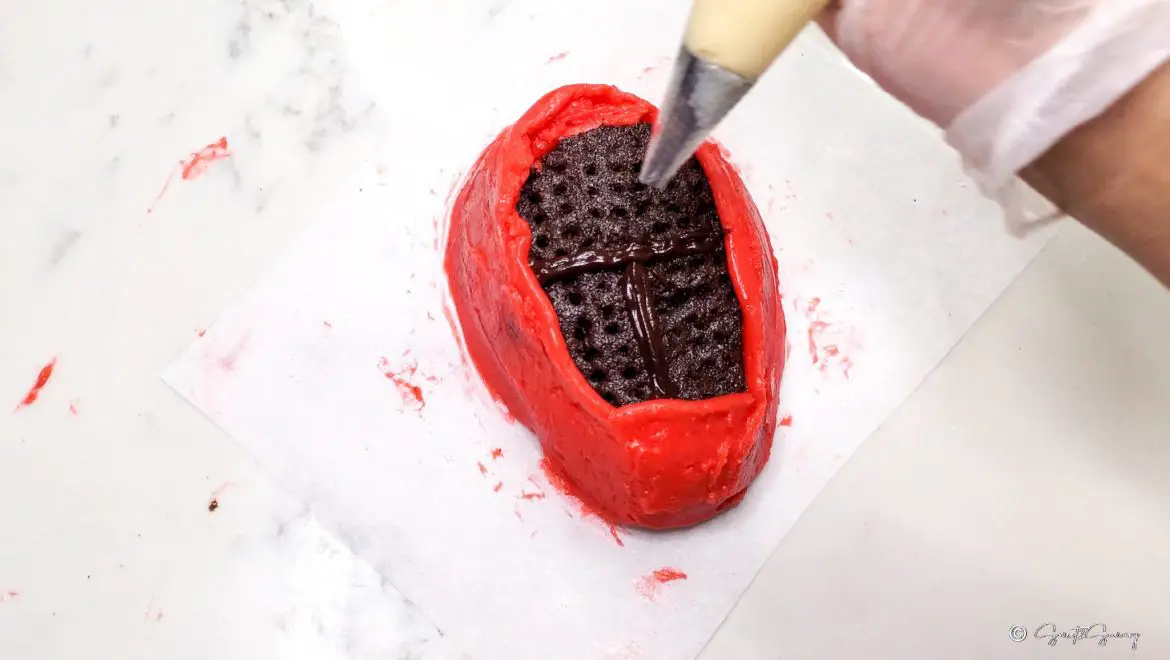
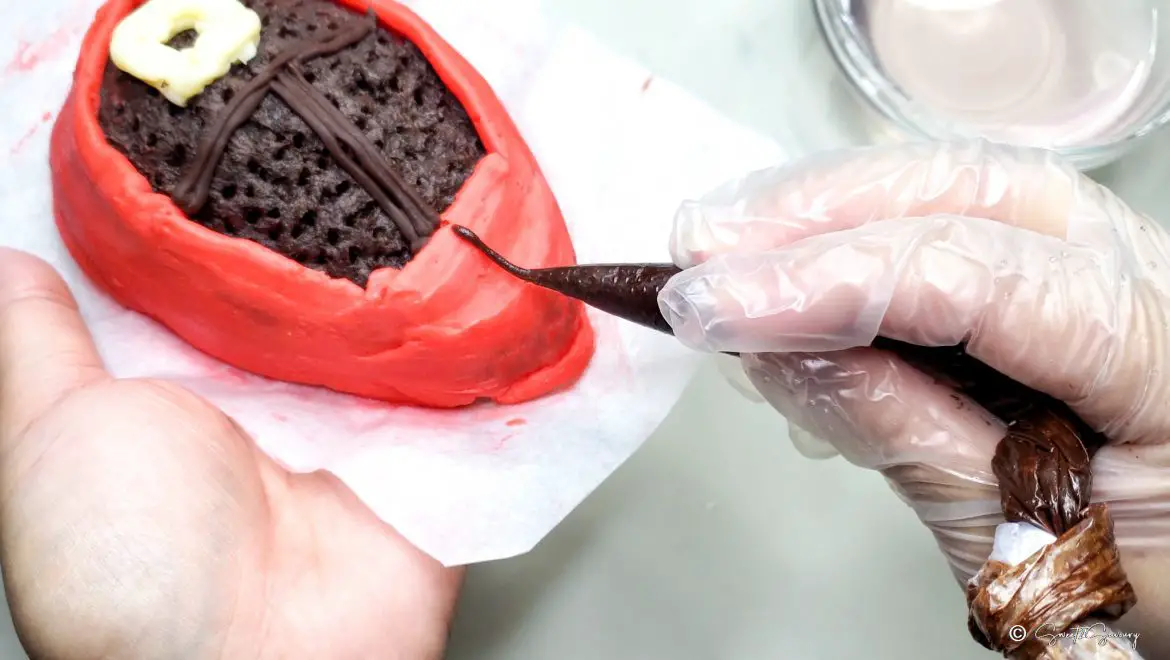
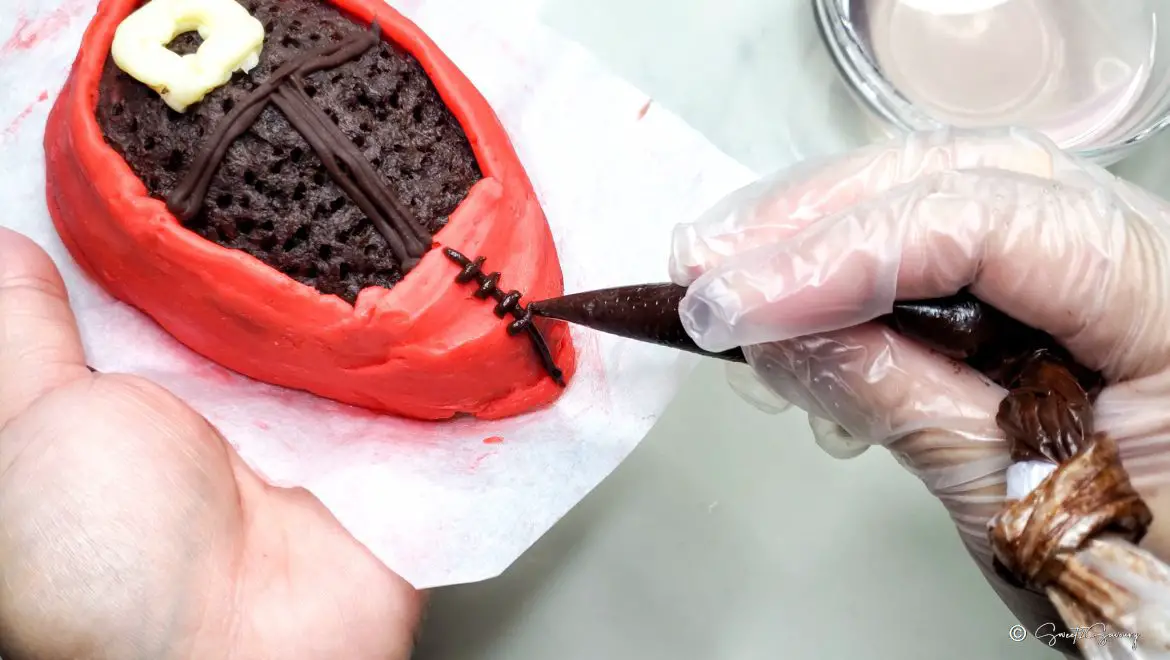
- With the melted chocolate piping bag, pipe a horizontal line across the middle of the mask and 2 vertical lines from the chin to the horizontal line in the middle.
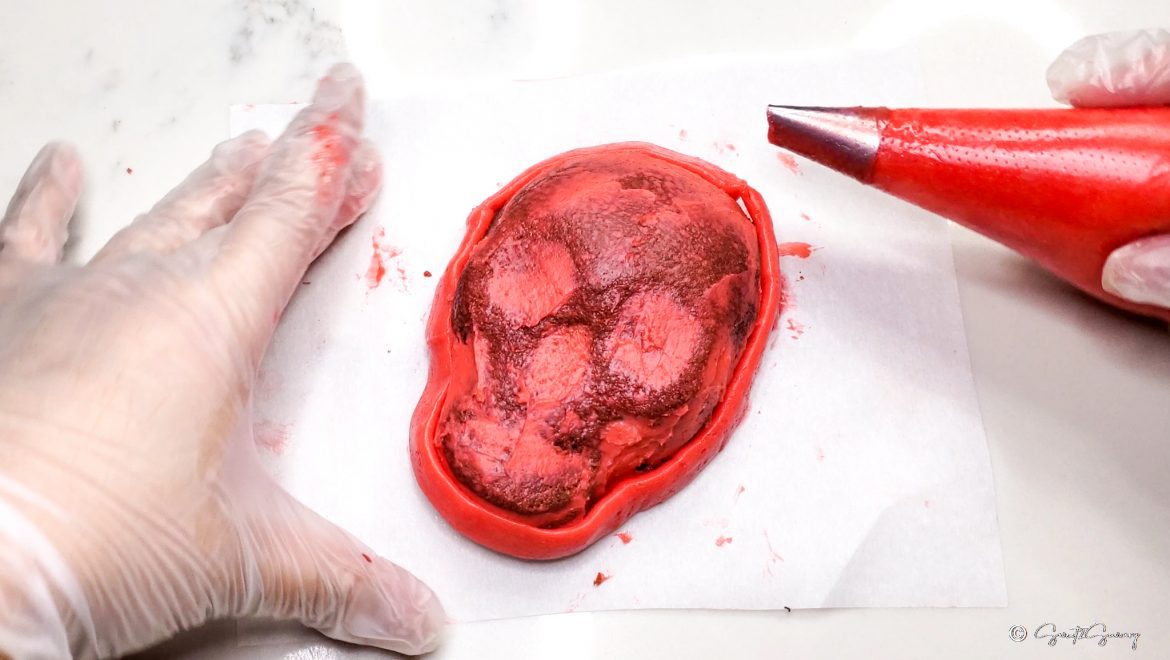
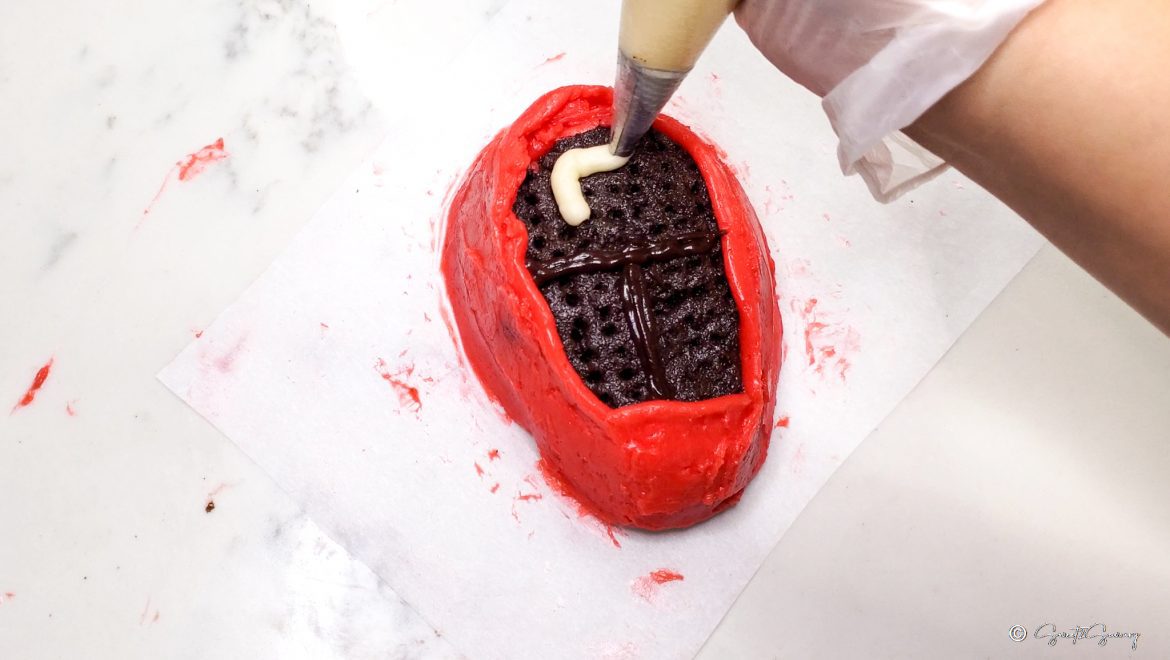
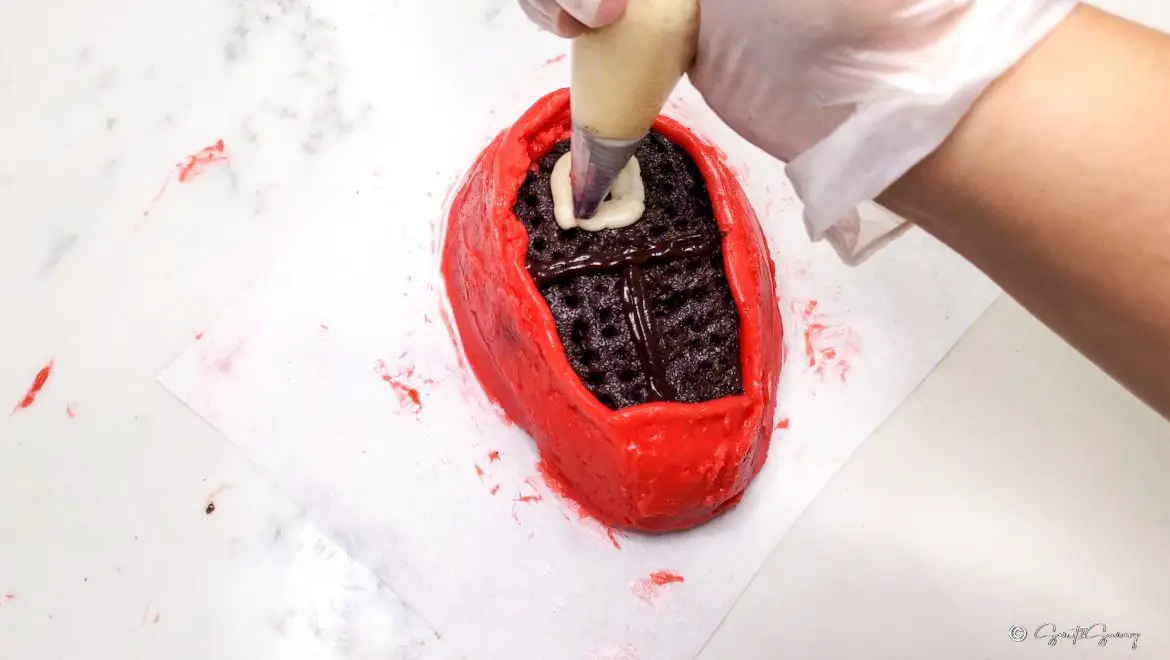
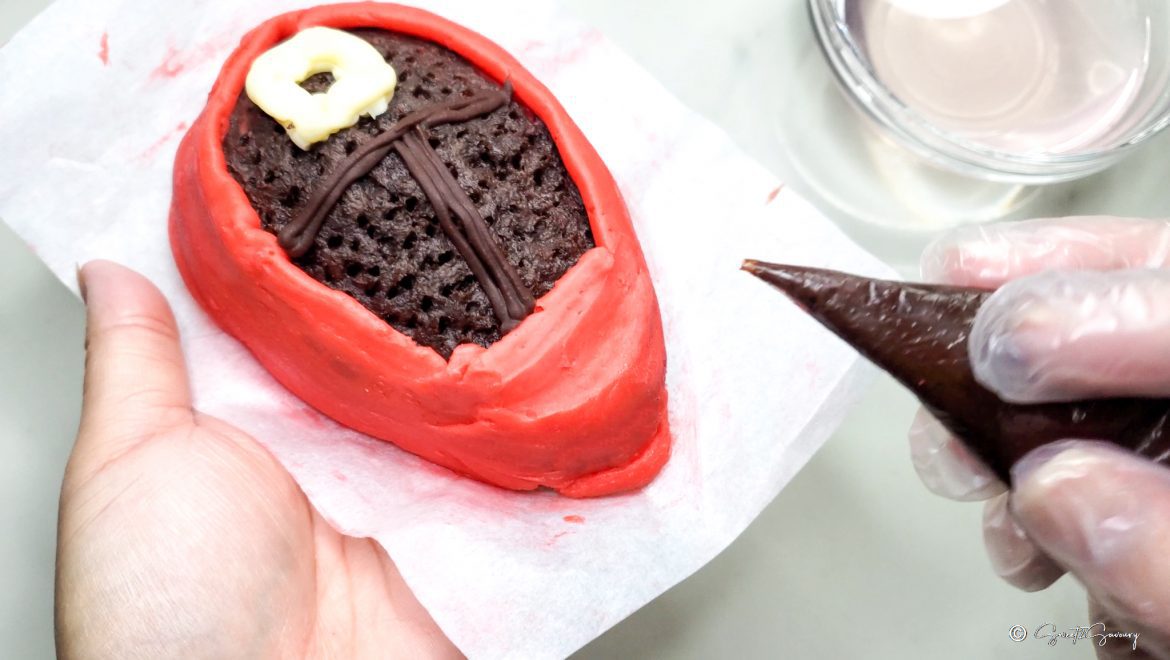
- Lastly, use the plain buttercream piping bag and pipe on a symbol, then refrigerate the cake. You can create a variation on each mask. For example, 1 mask has a square symbol. The next one has a circle and another has a triangle. Repeat steps #2 – #10 until all the cakes have been filled and decorated. Refrigerate cakes uncovered for 30 minutes for the buttercream to firm up.
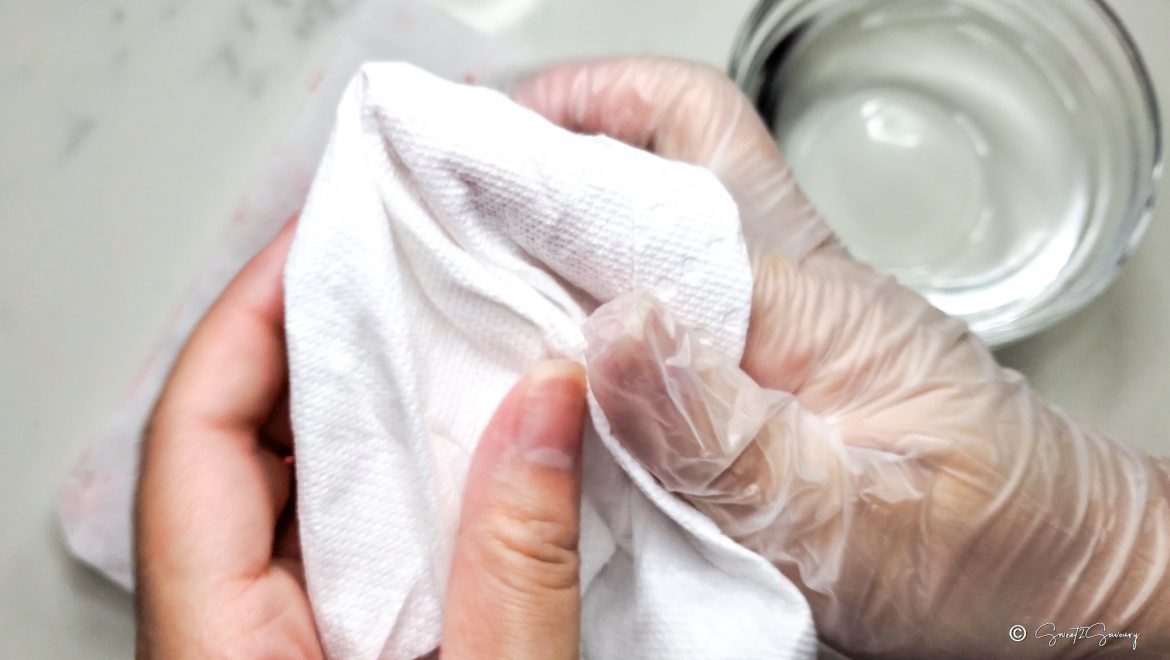
- To ensure that cakes have a very smooth buttercream finish, you can moisten a clean paper towel with warm water. Rub the paper towel all around a cooled cake (you need to do this while the buttercream is still firm) to smooth out any wrinkles or lines you might have in the buttercream.
- Use the melted chocolate bag and pipe a vertical line where the chin is down to the 'neck'. Then draw small lines across the vertical line to create a 'zipper' look for the hood. Place the cake back into the refrigerator.
- Buttercream firms up in the refrigerator. When you are ready to serve them, peel off the parchment paper, place cakes out on a platter for 15 minutes at room temperature so that they can soften. Serve and enjoy!


