
471 
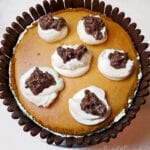


Maple Mascarpone Cheesecake
Be forewarned! This luscious cheesecake is creamy, silky and will leave your guests craving for more!! Best consumed on a cheat day or at sunday brunch.
Print Pin Rate Yields: 20 slices
Ingredients
Crust
- 1¾ cup honey graham cracker crumbs
- ¼ cup maple syrup, cold
- ¼ teaspoon salt
- ⅓ cup unsalted butter, melted
Filling
- 2 cups cream cheese, room temperature
- 1¼ cup maple syrup, room temperature
- ½ teaspoon salt
- 4 large eggs, room temperature
- 2 cups mascarpone cheese, room temperature
Decoration
- 2 cups whipping cream (35% M.F.)
- ¼ cup sugar
- 1 teaspoon vanilla extract
- 1.5 sleeves chocolate fingers
- 5 clusters chocolate
INSTRUCTIONS
Crust
- Preheat oven to 350°F (325°F convection bake) or 177°C .
- In a food processor, blend graham crackers finely to crumbs. (or place crackers inside a re-sealable bag and crush with a rolling pin. Leave the bag unzipped to allow air to escape while rolling). Add Maple syrup, butter, salt and pulsate in processor or mix in a large bowl until combined.
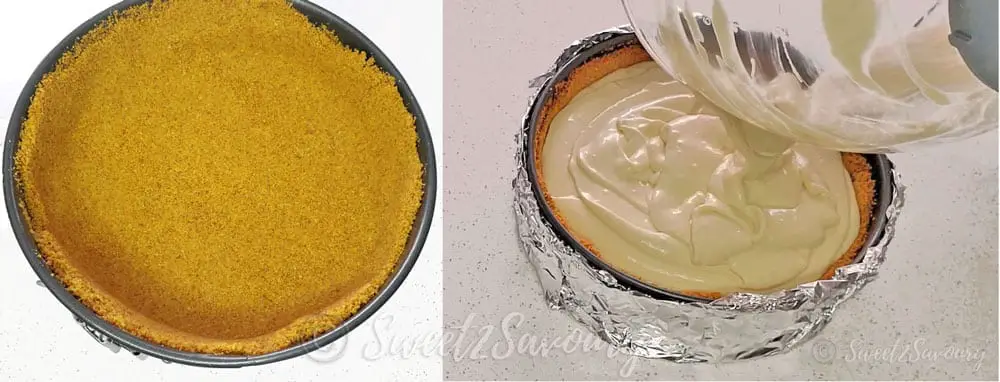
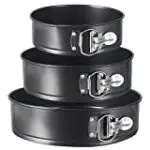
- Grease a 9 inch springform pan covering the bottom and sides with softened butter. Pour crumbs into pan and gently spread the crumbs evenly around the pan. Use a measuring cup or handle free round drinking cup to lightly press an even layer of the crumb into the pan as well as 1/2 way up the side of the pan or to the top (omit this if you prefer a bottom crust).
- Place pan into freezer for 10 minutes (to help harden the shell before baking). Place in the oven and bake for 10 minutes or until it's fragrant and slightly golden in colour. Set aside to cool and reduce oven temperature down to 325°F (300°F convection bake) or 163°C.
Filling
- While the crust is baking, start on the filling. In the bowl of a stand mixer with paddle attachment, on low speed add cream cheese and mix for 3 minutes until smooth. Slowly pour in maple syrup, increase speed to medium and mix for 5 minutes, pause in between to scrape down the bowl (don't skip this step as it will help ensure a smooth filling).
- Reduce speed to low and add one egg at a time (beat for 1 minute after each egg). Once eggs are incorporated, mix in mascarpone cheese and combine thoroughly on medium speed for 5 minutes until the filling has no clumps left. Pause in between and scrape down bowl.
- Pour filling into crust while rotating the pan to distribute filling evenly (filling will be close to the top of the pan). Smooth the surface with a spatula and tap pan onto counter a few times to remove air bubbles.
- Wrap the pan with 4 aluminum foil sheets to cover evenly around the sides (might seem excessive, however you want to prevent water from seeping into the cake while sitting in the water bath*).
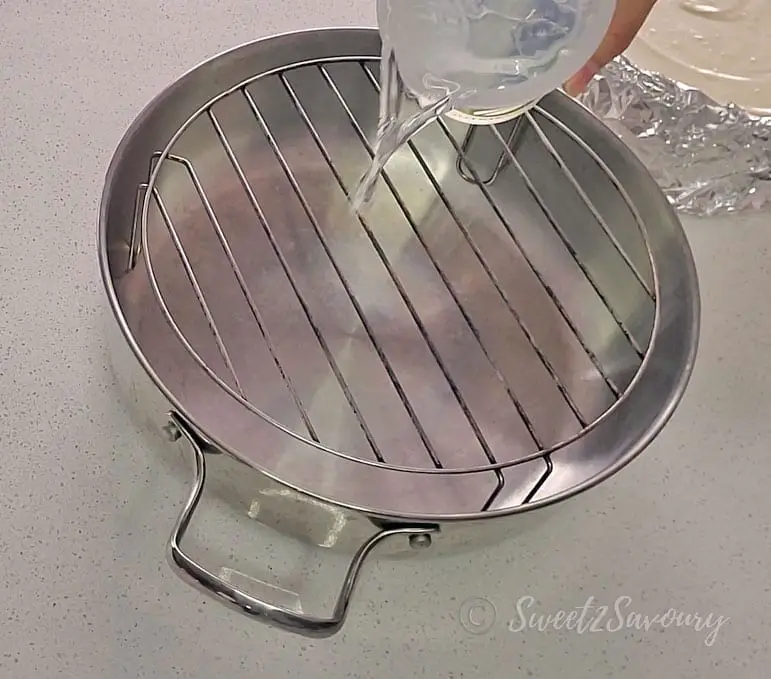
- Pour hot tap water 1 inch up in large oven proof skillet or roasting pan that has a 2 or 3 inch height. Carefully place cake pan inside roasting pan and ensure water level does not rise into the cake filling. Add a little more hot water if needed to ensure water level is at the half way mark of the roasting pan. Slowly and carefully place the roasting/cake pan on the middle rack in the oven. *See notes for more info and options on water bath method*
- Bake for 1 hour with convection bake temperature or 1 hour 15 minutes with regular bake temperature until surface of the cake is a nice golden brown colour.
- Turn oven off, leave oven door cracked open to allow hot air to escape (wedge a wooden spoon in the oven door if needed). Let cake cool down in the oven for 1 hour.
- Carefully move roasting pan onto stove top and lift cake pan out of water bath. Remove aluminum foil. Use a butter knife and carefully loosen sides of the cake by running the knife around the cake. Place cake pan on top of a food can. Gently unlatch the spring form and slide the form down. Place the cake back on the counter and wrap the cake in plastic wrap. Chill in the refrigerator for 4 hours (overnight is even better).
Decoration
- When ready to serve, add whipping cream, sugar and vanilla extract to bowl of stand mixer with whip attachment. Whip cream to stiff peak. (start at low speed and gradually increase speed to medium then high).
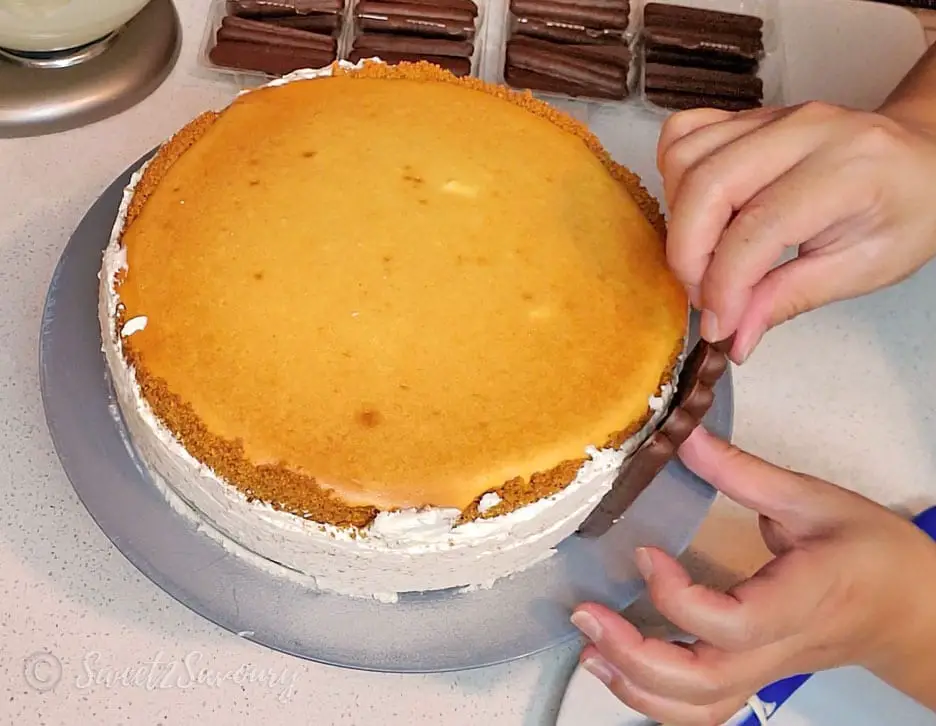
- Smooth whipped cream around the cake in a generous layer. Place chocolate fingers around the cake on top of the layer of whipped cream. Add dollops of whipped cream on top of the cheesecake and place a chocolate cluster on top of each dollop.
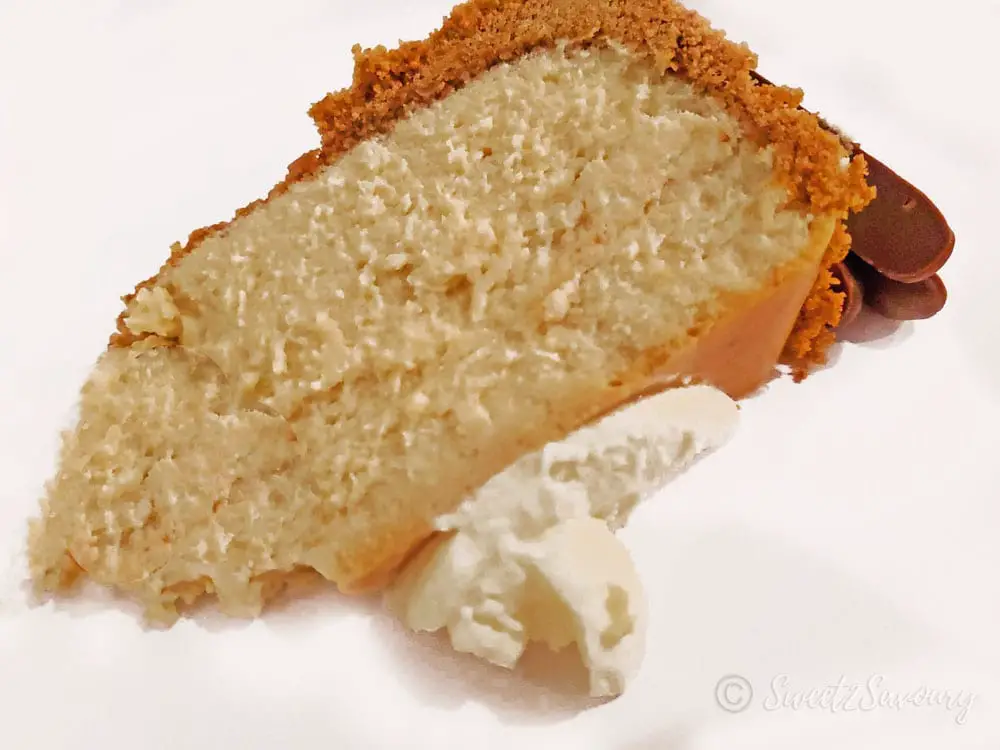
- To cut a clean slice of cheesecake, run knife under hot water and wipe dry with paper towel. Repeat this cleaning process after each cut. Serve and enjoy!
Equipment
Tips
How far in advance should I make this cake?
The cake needs at least 3h of chill time in the refrigerator. (Plan ahead and prepare in the morning or the night before). Room Temperature ingredients. Is this necessary?
This seems like an unnecessary step but it makes a difference when utilizing ingredients at room temperature vs. cold. It makes a difference between having a smooth vs. a clumpy dough or filling. Plan ahead and leave maple syrup, cream cheese and mascarpone cheese on your counter overnight or at least 1 to 2 hours ahead. Can I use regular graham crackers instead?
Instead of honey flavoured graham crackers you can substitute for regular graham crackers. Since I omitted sugar and only used maple syrup for the crust, the honey grahams added more sweetness to it. If you plan to use regular graham crackers add 1 tablespoon of white sugar to your crust. Can I use other decorations?
Of course! I used Chocolate fingers and chocolate clusters to decorate the cake, however don’t be afraid to use your imagination. You can keep it plain and only add dollops of whipped cream on top, or sprinkle confectioner’s sugar and garnish with candied tangerine or lemon slices to finish the look. Maybe you prefer berries instead? Edible flowers? Chocolate shavings? The possibilities are endless! Why cool cake in the oven to room temperature?
Allowing the cheesecake to cool in the oven ensures a very slow and gradual cool down which will help prevent any cracks from forming, post baking. If you introduce the cake from hot to cold air too quickly, it may deflate the cake too fast in which cracks may result. If you don’t care for this and plan on decorating the surface of the cake then you can skip this and simply allow the cake to cool on your stove top. *Water bath? Why this method?
There are two benefits to a water bath. One is that it adds moisture to the oven and prevents the cheesecake surface from cracking. Two is that it provides a slower and more even heat distribution which helps the cheesecake cook to the perfect silky texture we’re after. I started out wrapping the outside of the cake pan with aluminum foil (at least 4 layers) with the intent of placing it into the water bath to prevent water from seeping into the cake. When I tested placing my 9 inch cake pan into my 10 inch ovenproof skillet without water (you can also use a roasting pan), I didn’t like the snug fit because I was worried that there wouldn’t be enough water for the bake time required. To be on the safe side, I decided to put a wire rack inside the skillet and filled it with hot water instead and then placed the cake pan on top of this setup. To recap, you have three options for the water bath:
- put a standing wire rack inside your skillet or roasting pan filled with water and place the cake pan on top of this wire rack
- place the cake pan directly into the water bath (make sure it’s a 12 inch or larger skillet / pan)
- put the cake pan on the middle oven rack with the water bath pan on the bottom oven rack
Nutrition Facts
Maple Mascarpone Cheesecake
Serving Size
100 g
Amount per Serving
Calories
411
% Daily Value*
Fat
32
g
49
%
Saturated Fat
19
g
119
%
Cholesterol
125
mg
42
%
Sodium
247
mg
11
%
Potassium
130
mg
4
%
Carbohydrates
27
g
9
%
Fiber
1
g
4
%
Sugar
20
g
22
%
Protein
5
g
10
%
Vitamin A
1118
IU
22
%
Vitamin C
1
mg
1
%
Calcium
108
mg
11
%
Iron
1
mg
6
%
* Percent Daily Values are based on a 2000 calorie diet.
Did you make this? I would love to see your creation!Tag me @sweet2savoury on Instagram and hashtag it #sweet2savoury