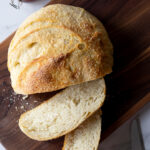
Foolproof Sourdough Bread with a perfectly Crispy Crust and Soft Center
Servings: 1 loaf
Calories: 1607kcal
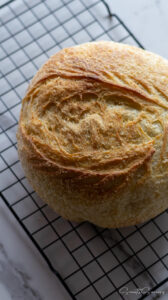
This sourdough has a golden, crispy crust and an airy, soft center—please note that this recipe does not include making a sourdough starter from scratch. This guide is perfect for those who already have a sourdough starter ready to go!
Print Recipe
Ingredients
For the Poolish (pre-ferment)
- ¾ cup unbleached bread flour
- ½ cup (minus 2 teaspoons) filtered water room temperature
- ½ cup sourdough starter room temperature
For the Dough
- 2¼ cup unbleached bread flour
- ¾ cup filtered water room temperature
- 1 teaspoon salt kosher or sea salt
- 1 teaspoon white sugar
- 1 Tablespoon olive oil extra virgin
Instructions
FOR THE POOLISH (PRE-FERMENT)
- In a medium glass bowl, mix unbleached bread flour, filtered water, and sourdough starter until combined. Cover with plastic wrap and a clean towel, and let it sit until it doubles in volume and small bubbles have formed, indicating the pre-ferment is active. Usually takes between 2 - 4 hours depending on the room temperature or cold ingredients used. In cooler climates, place the bowl in the oven with the oven light on for gentle warmth. In warmer climates, leave it on the counter to rise. *See Tips for more information.*
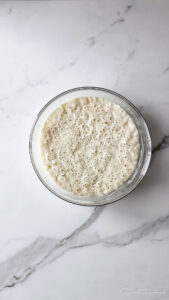
FOR THE DOUGH
- Use a dough hook to mix the Poolish, bread flour, and water in your stand mixer at low speed until just combined. Stop the machine, cover the bowl with a clean towel, and let it rest for 20 minutes for the Autolyse phase. *See Tips for more information.*
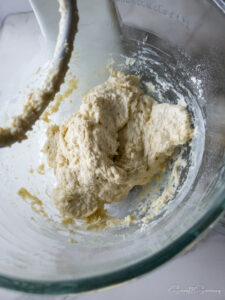
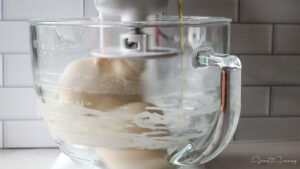
- After the autolyse, add 1 teaspoon kosher salt and 1 teaspoon white sugar. Mix at medium speed for 7 minutes until the dough is pliable and pulls away from the bowl. Then, reduce the speed to medium-low and drizzle in a little extra virgin olive oil to prevent sticking before stopping the standmixer.
- Drizzle a small amount of extra virgin olive oil on parchment paper, then place the dough on it, shaping it into a round loaf with the seam side down. Coat the dough evenly with the oil on the parchment paper. Using olive oil instead of flour helps prevent the dough from drying out and adds flavour, but use it sparingly.
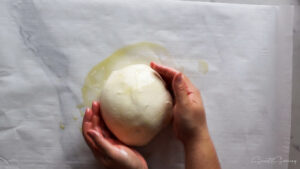
- Transfer the dough to a large bowl and loosely cover it with plastic wrap, placing a kitchen towel on top. The initial proofing takes 2 to 4 hours, until it has doubled in size and is puffy.
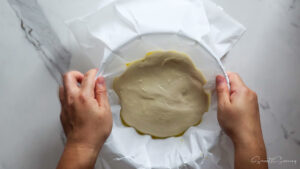
LAMINATING THE DOUGH
- To laminate dough means to stretch and fold it to strengthen the gluten and trap air. After the first proofing, do the following:1. Remove the towel and plastic wrap (save for reuse).2. Lift the dough from the bowl and fold it like an envelope: - Stretch and fold the top, then the bottom to the center. - Repeat with the left and right sides, folding to the center.3. Pinch and twist the dough to seal, then place it seam-side down on parchment. 4. Gently reshape the loaf, lift the parchment, and return it to the bowl. No extra oil is needed unless the dough sticks. 5. Cover again and set a timer for 40 minutes. Repeat this process three more times, each after 40 minutes. Flip the dough over first before you start stretching and folding the dough each time you laminate it. This will ensure that the seam remains on the same side throughout the process.
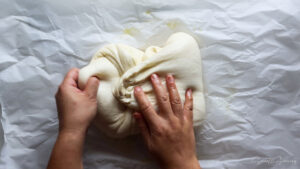
- After your final proofing, stretch, fold, and pinch the dough. Then, cover the bowl with plastic wrap and a clean hand towel. Refrigerate it for overnight cold fermentation. Ensure there’s enough space in the fridge for the dough to rise without being compressed. This overnight refrigeration is the longest hands-off time you'll spend with the dough before baking it the next day.
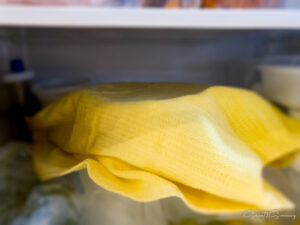
THE NEXT DAY
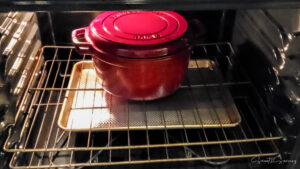
- When you're ready to bake, preheat your oven to 450°F (232°C). If you are using a convection setting, adjust the temperature to 425°F (218°C). Make sure to position your oven racks on the lowest and mid-lowest level. While the oven preheats, place a baking tray on the lowest rack and your Dutch oven on the mid-lowest rack. The baking tray will help prevent the bottom of your bread from burning during baking in the Dutch oven.
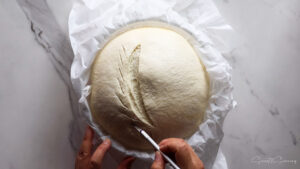
- Score your dough with a sharp lame or clean Exacto knife.
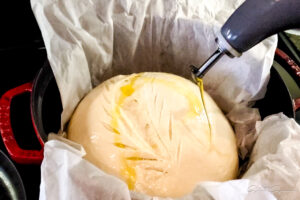
- Using oven mittens, carefully remove your preheated Dutch oven and place it on your stovetop. Take off the lid and transfer your dough, along with the parchment paper, into the pot. Using a spray bottle filled with cold filtered water, mist the dough generously. Then drizzle a little extra virgin olive oil (EVOO) on top and, if desired, sprinkle some sea salt over the surface. With oven mittens close the lid and return the Dutch oven to the mid-lowest rack above the baking pan. Set your timer for 30 minutes.
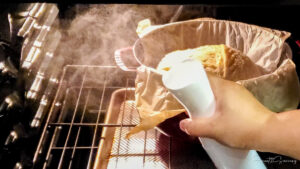
- After 30 minutes, carefully remove the lid of the Dutch oven using oven mittens and rotate the pot 180° (ensures even baking). Spray additional water on the surface of your bread as well as inside the oven. Then, close the oven door and continue baking the bread without the Dutch oven lid until it turns golden brown. This will take about 10 - 15 minutes.
- Let your baked sourdough bread cool on a wire rack for 1 hour before slicing. This cooling time allows the bread to develop a delicious, crispy crust while retaining a soft center.
Notes
- Using room temperature ingredients, such as sourdough starter and filtered water, will significantly reduce fermentation time. If you plan on making this recipe, leave your ingredients out the night before to ensure they reach room temperature.
- If your kitchen is cooler (like mine!), to ferment your dough, place the bowl in the oven with the oven light on for gentle warmth. In warmer climates, just leave it on your counter.
- Bread flour is a must, due to its higher protein content, which helps absorb water and develop stronger gluten for a better rise and texture. Unbleached flour is preferred for its denser texture benefits, but bleached bread flour can be used if unbleached is unavailable.
- What is the significance to score bread?
Scoring dough refers to making cuts on the surface of your risen dough with a "lame" (pronounced 'lahm'). This technique isn't just for looks; it helps control how the loaf expands while baking. By directing the expansion through the cuts you make, you can achieve a better shape and texture for your bread. - Why does it take 2 days to make this recipe?
The first day is dedicated to preparing the dough and allowing it ample time to ferment while laminating it (stretching and folding). This fermentation period is crucial for developing a stronger gluten structure, which enhances gas retention during baking. The result is a loaf that has a crispy exterior and an airy interior.
The second day results from refrigerating your dough (cold proofing) overnight after fermentation before baking it the next day. Cold proofing enhances gluten structure development and improves bread flavour by slowing down yeast activity, which creates a longer fermentation period and results in a better sour flavor. Additionally, it makes scoring the bread easier. - What is Autolyse (pronounced 'aw-toe-lease')?
It is the process of resting the dough after mixing the sourdough starter, flour and water, but before adding other ingredients like salt and sugar. This step is essential for initiating gluten development and ensuring that the flour fully absorbs the water. - Why is it important to use filtered water to make sourdough bread?
Tap water often contains chlorine (and other chemicals), which can slow down or weaken the bacteria in your starter. This can result in poor fermentation and a dough that doesn't rise properly. To avoid disappointment, use filtered water from the start. Additionally, letting this water reach room temperature before you begin will help the dough rise faster than if you used cold water.
Nutrition
Serving: 1loaf | Calories: 1607kcal | Carbohydrates: 300g | Protein: 48g | Fat: 21g | Saturated Fat: 3g | Polyunsaturated Fat: 4g | Monounsaturated Fat: 11g | Sodium: 2350mg | Potassium: 376mg | Fiber: 10g | Sugar: 5g | Vitamin A: 8IU | Calcium: 67mg | Iron: 3mg
