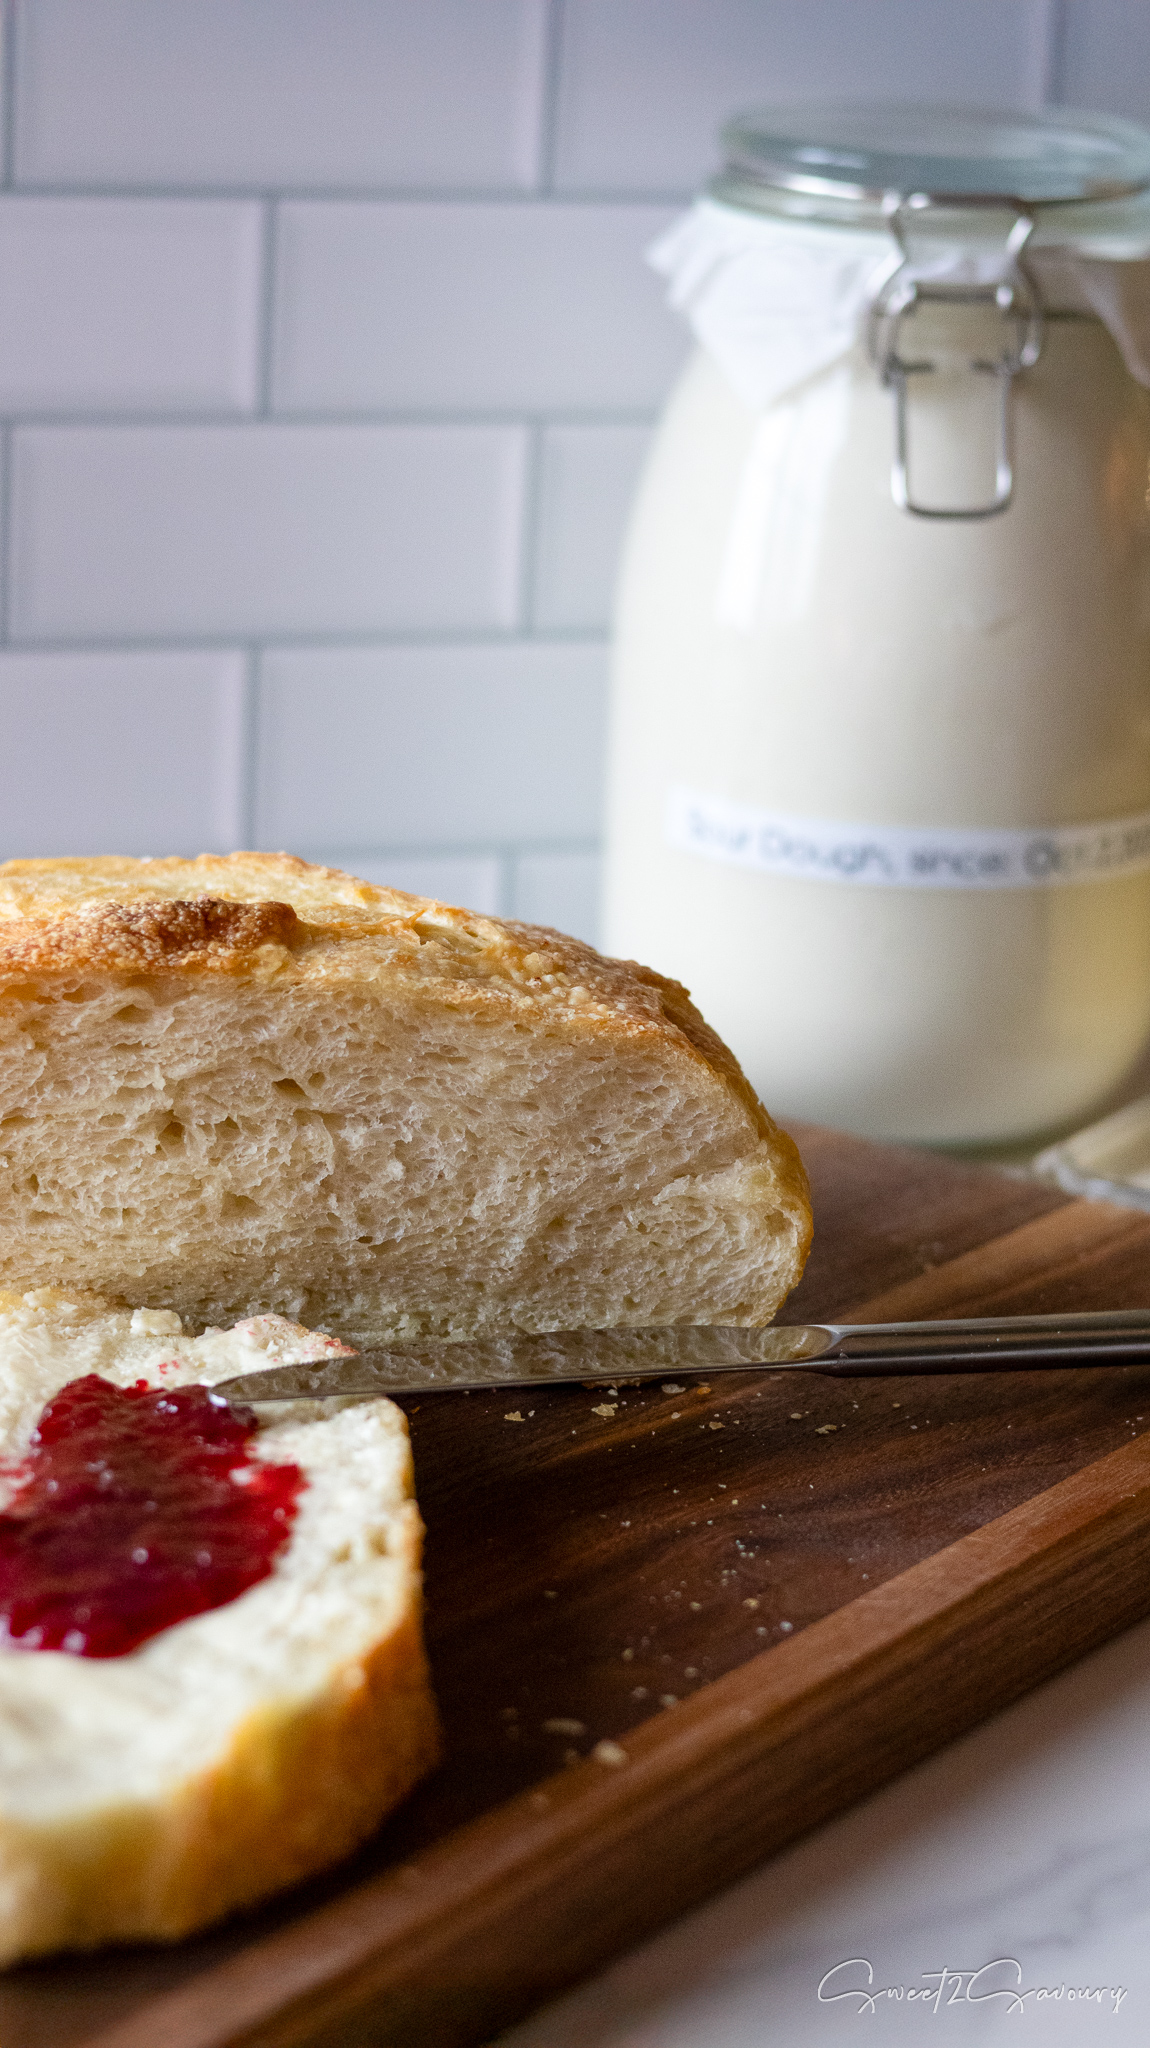
Foolproof Sourdough Bread (Crispy Crust & Soft Center)
Do you love the smell of fresh bread baking? Imagine sinking your teeth into a slice of homemade sourdough with a deeply golden, blistered crust and a pillowy, airy center. My foolproof sourdough recipe makes it easier than you think to achieve bakery-quality results at home!
I have spent over three years tweaking and perfecting this exact loaf in my kitchen. By using a pre-ferment (poolish) and a cold overnight proof, this mostly hands-off method develops incredible complex flavours and that signature open crumb. Yes, it takes about two days from start to finish, but the active hands-on time is surprisingly short, and the results are entirely worth the wait.

Why You’ll Love This Recipe
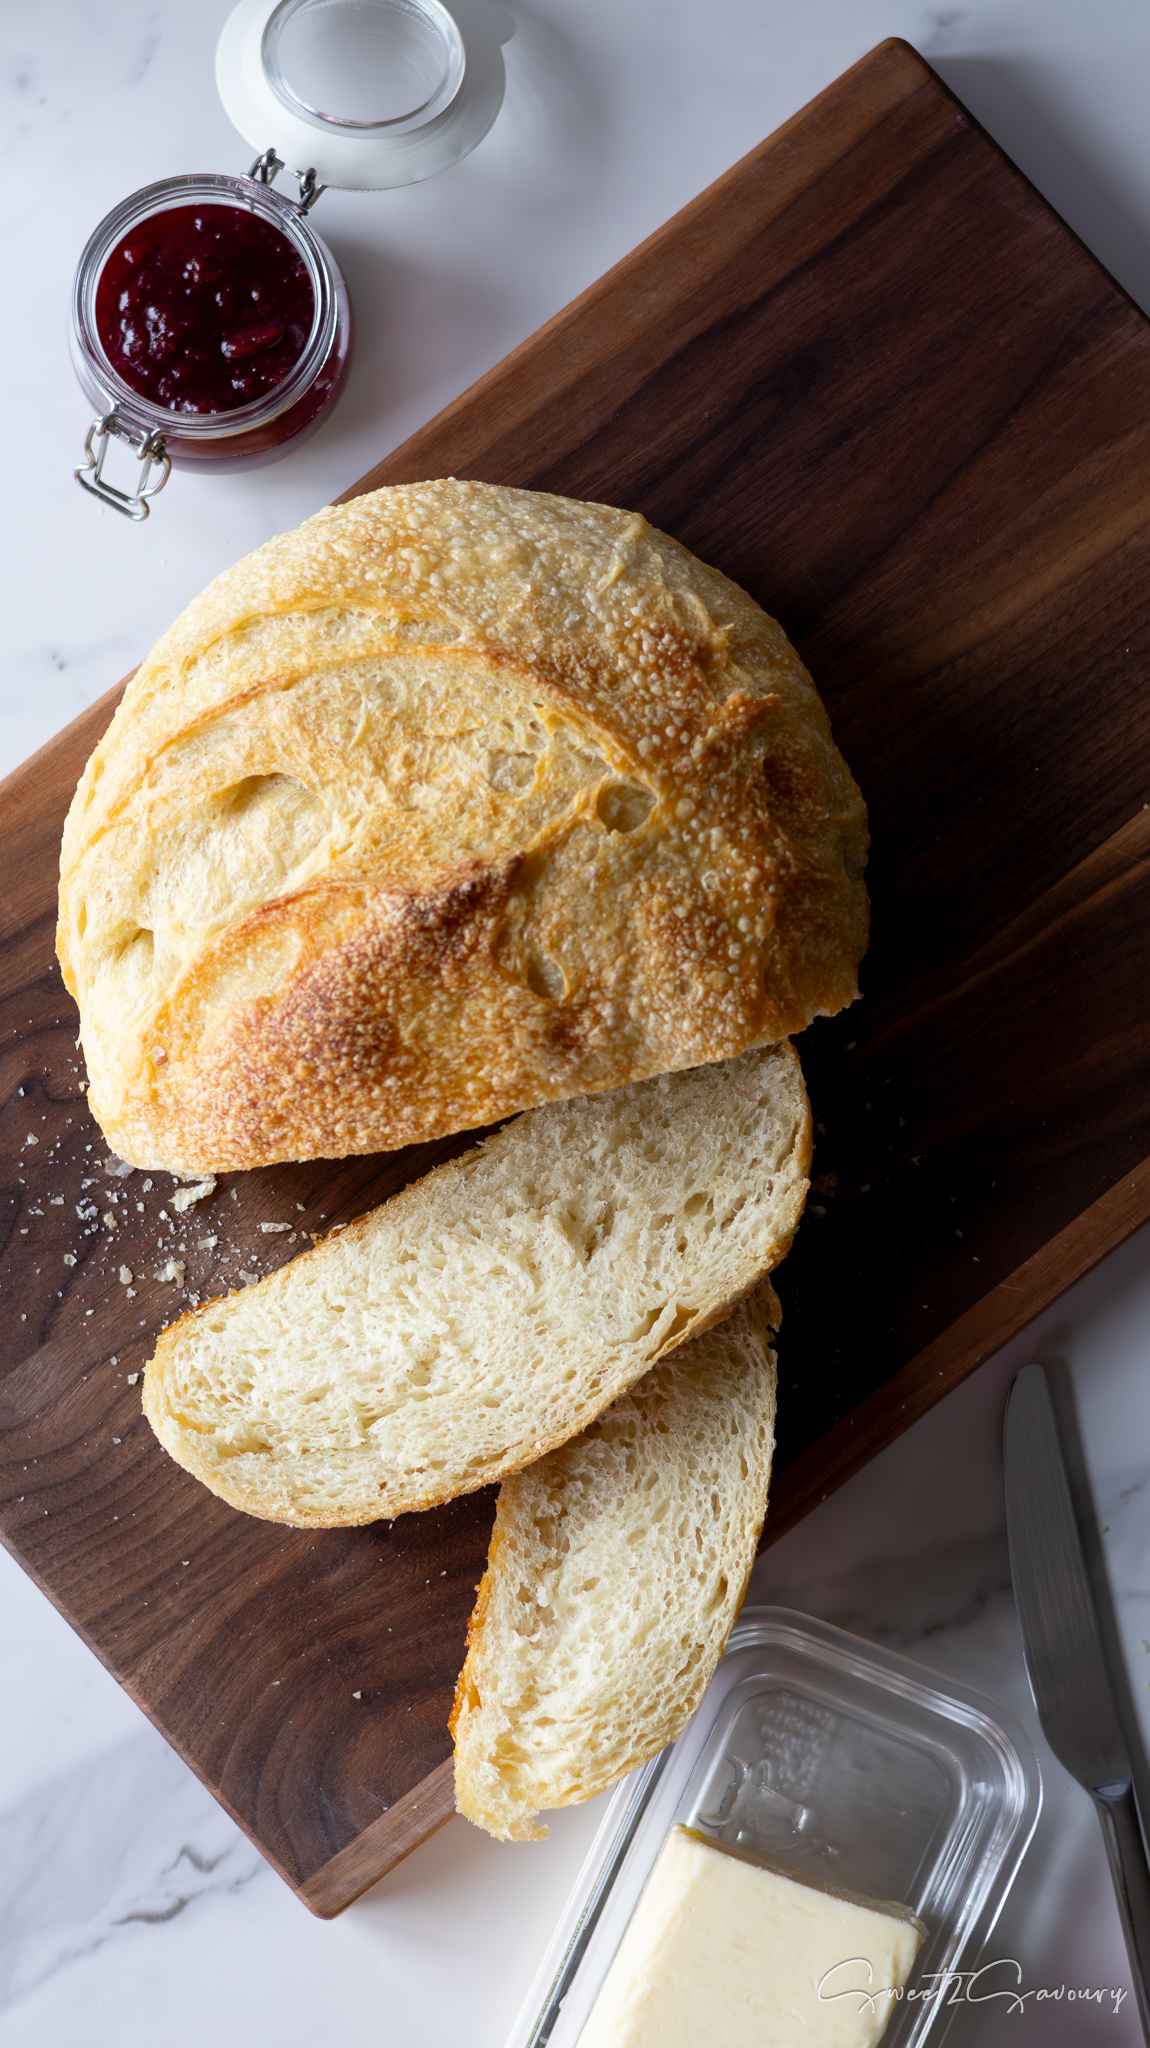
- Incredible Texture: You will achieve the holy grail of sourdough—a crackly, crispy exterior with a soft, chewy interior.
- Deep Flavour: The long fermentation process builds a perfectly balanced, tangy sourdough flavour.
- Predictable Results: This method uses autolyse and a poolish to ensure your dough is strong, stretchy, and easy to handle.
- No Kneading Machine Required: While you can use a stand mixer, this dough is easily managed by hand using simple stretch-and-fold techniques!
(Note: This recipe requires an active, bubbly sourdough starter. It does not include instructions for making a starter from scratch!)
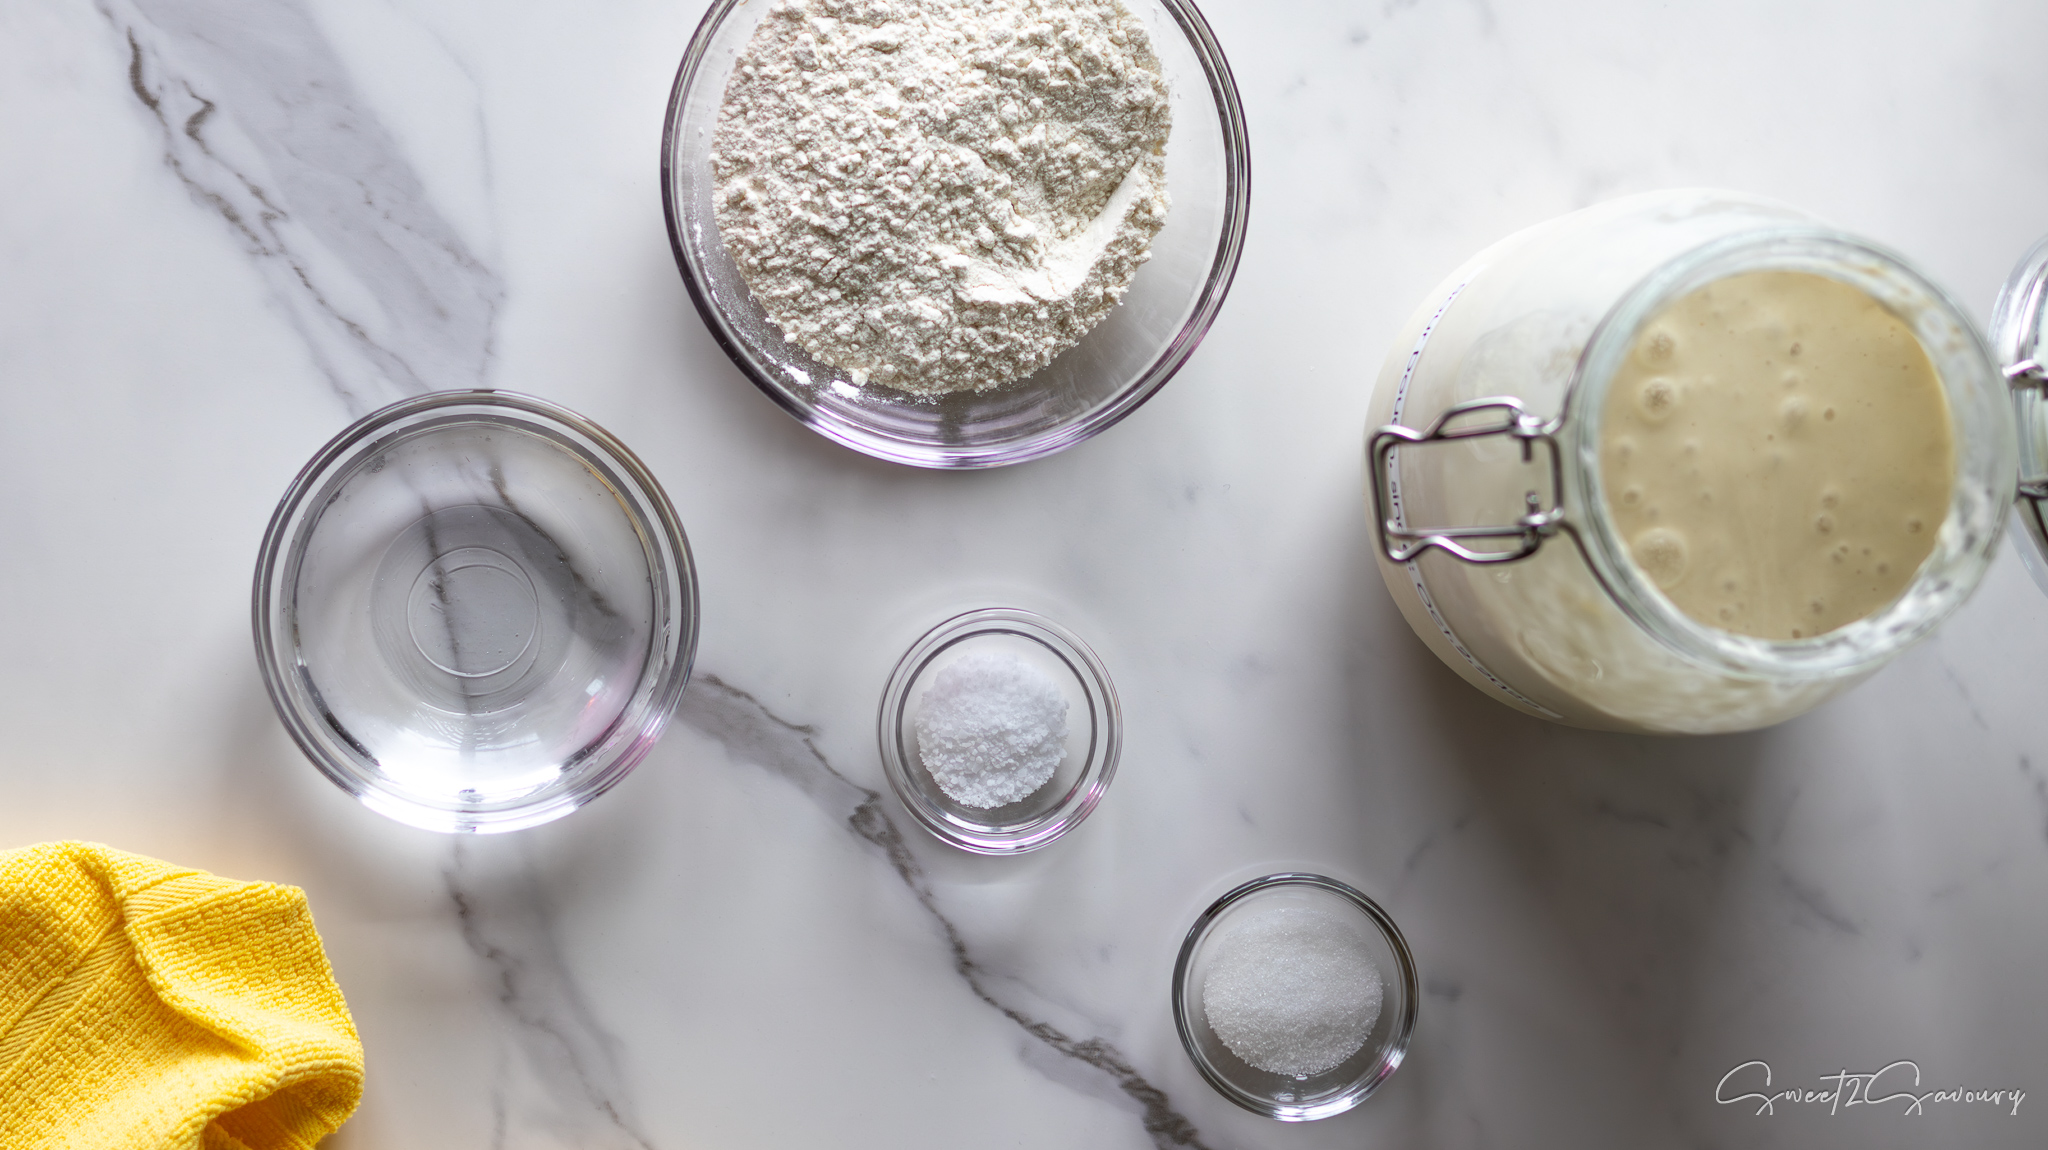
Ingredients & Tools You Will Need
For the Poolish (Pre-ferment):
- Sourdough Starter: It must be active, bubbly, and fed (at room temperature).
- Bread Flour: Unbleached bread flour is essential for the gluten development needed to trap air bubbles.
- Filtered Water: Room temperature. Always use filtered water! The chlorine in tap water can weaken the wild yeast in your starter.
For the Main Dough:
- Bread Flour & Filtered Water: To build the structure of the final loaf.
- Kosher or Sea Salt: Enhances the flavour and regulates yeast activity.
- White Sugar: Just a touch to feed the yeast and encourage a beautiful golden crust.
- Extra Virgin Olive Oil: To coat the dough and prevent it from drying out during bulk fermentation.
Essential Sourdough Tools:
- Dutch Oven: A large 5Qt or 7Qt Dutch oven traps steam during baking, which is the secret to a crispy crust!
- Lame or Razor Blade: For scoring the dough to control expansion.
- Water Spray Bottle: To create extra steam in the oven.
- Ice Cubes: Ensure extra steam stays trapped in the Dutch oven during the start of the baking process.
How to Make Foolproof Sourdough (Step-by-Step)
Phase 1: Prep the Poolish (Day 1, Morning)
I recommend starting this around 8:00 AM on a weekend!
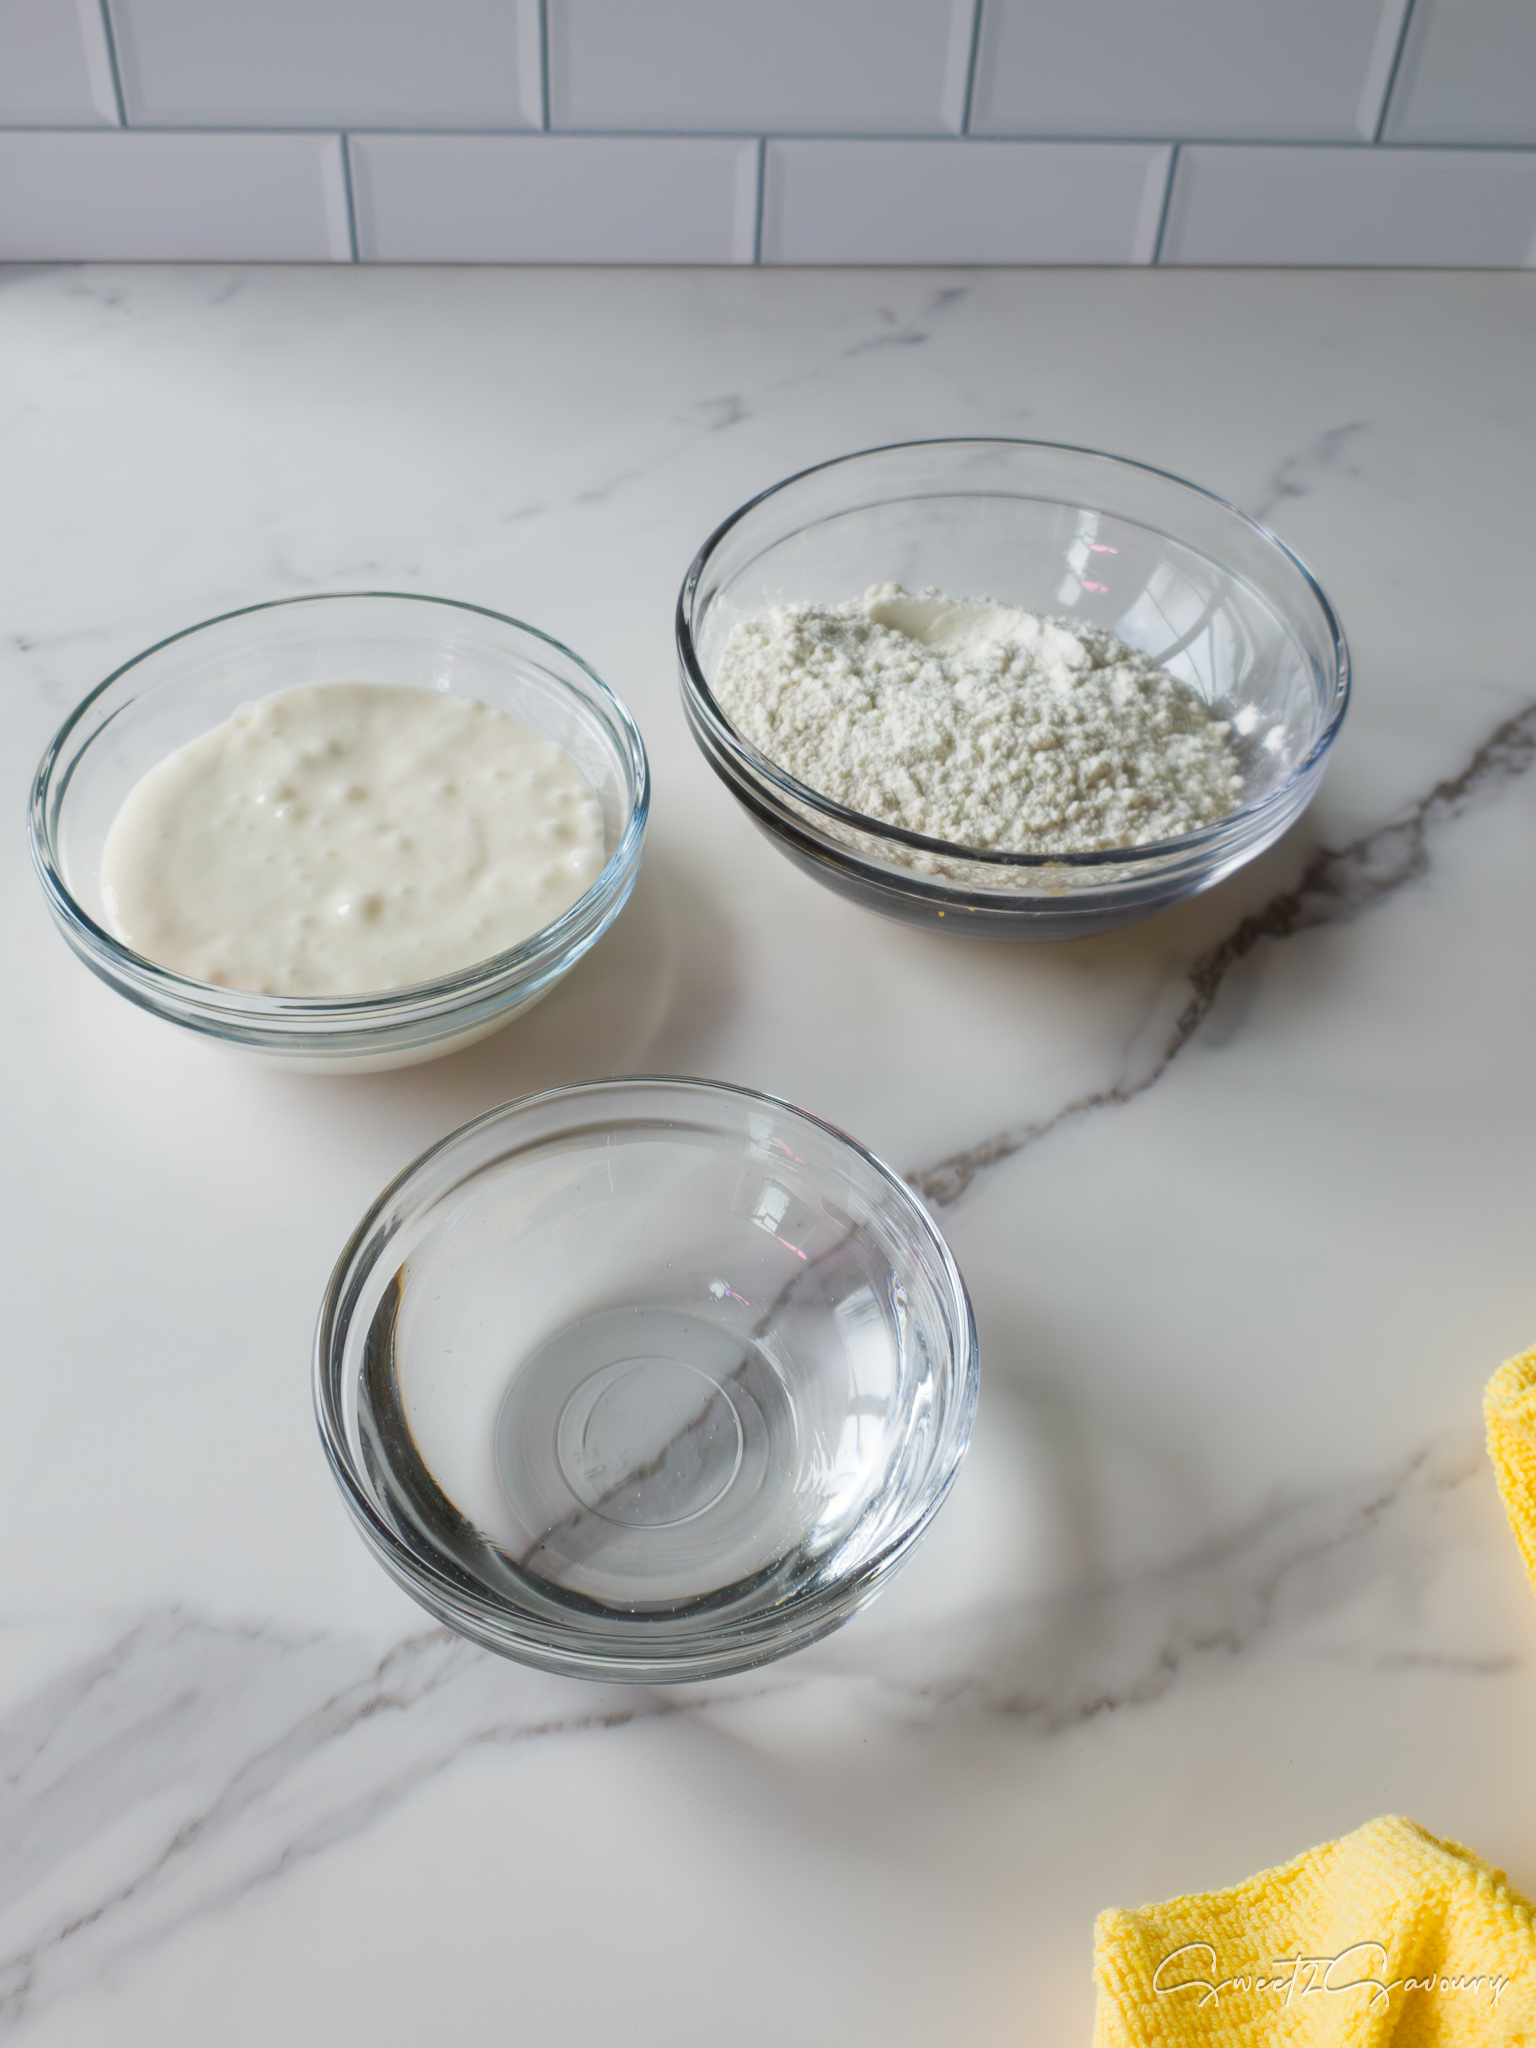
- In a medium glass bowl, combine the unbleached bread flour, room-temperature filtered water, and active sourdough starter.
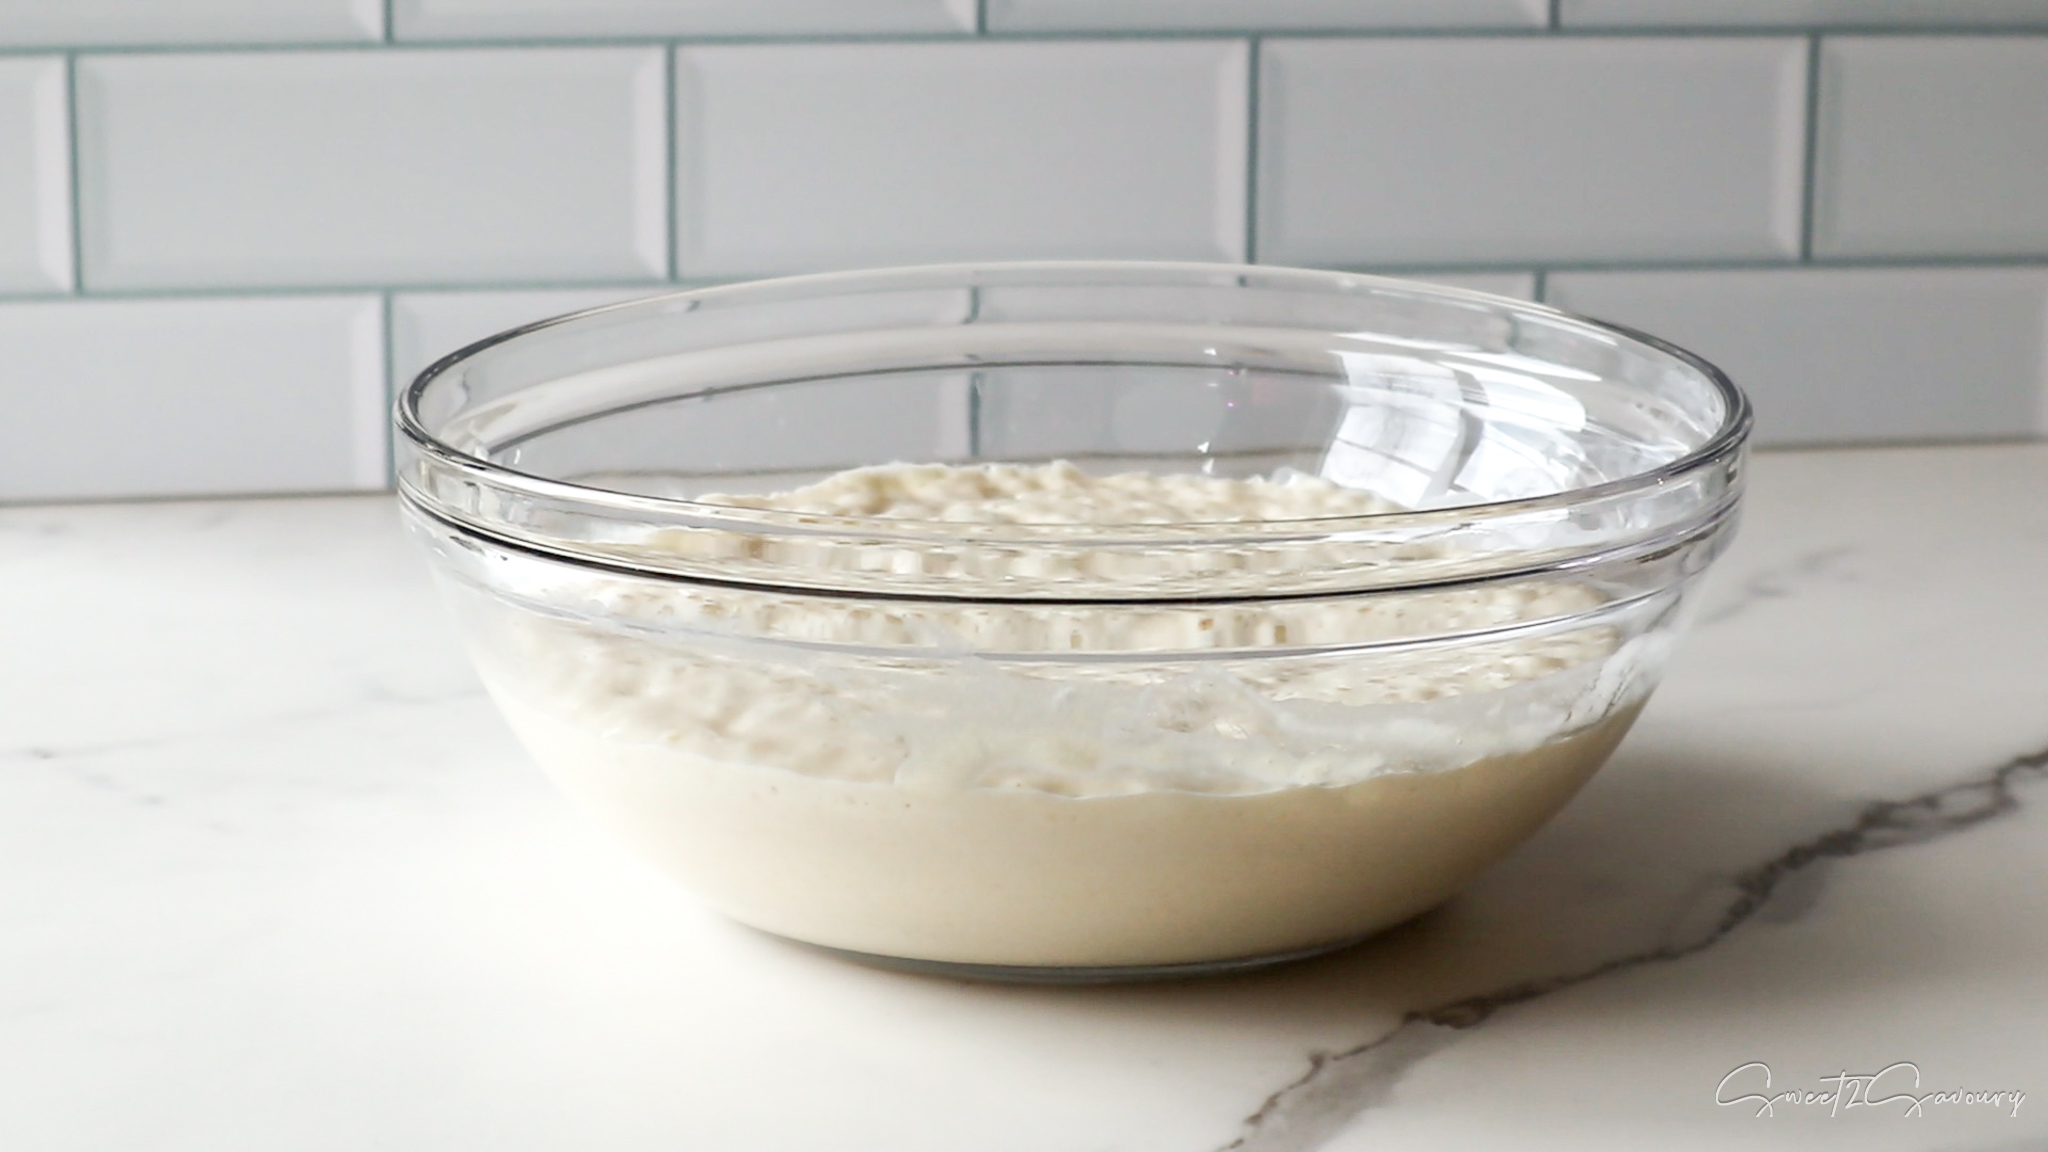
- Stir until fully combined, cover with plastic wrap and a clean kitchen towel, and let it sit at room temperature for 2 to 4 hours. You will know it’s ready when it has doubled in volume and is full of small bubbles. This step makes the poolish we need for the bread dough.
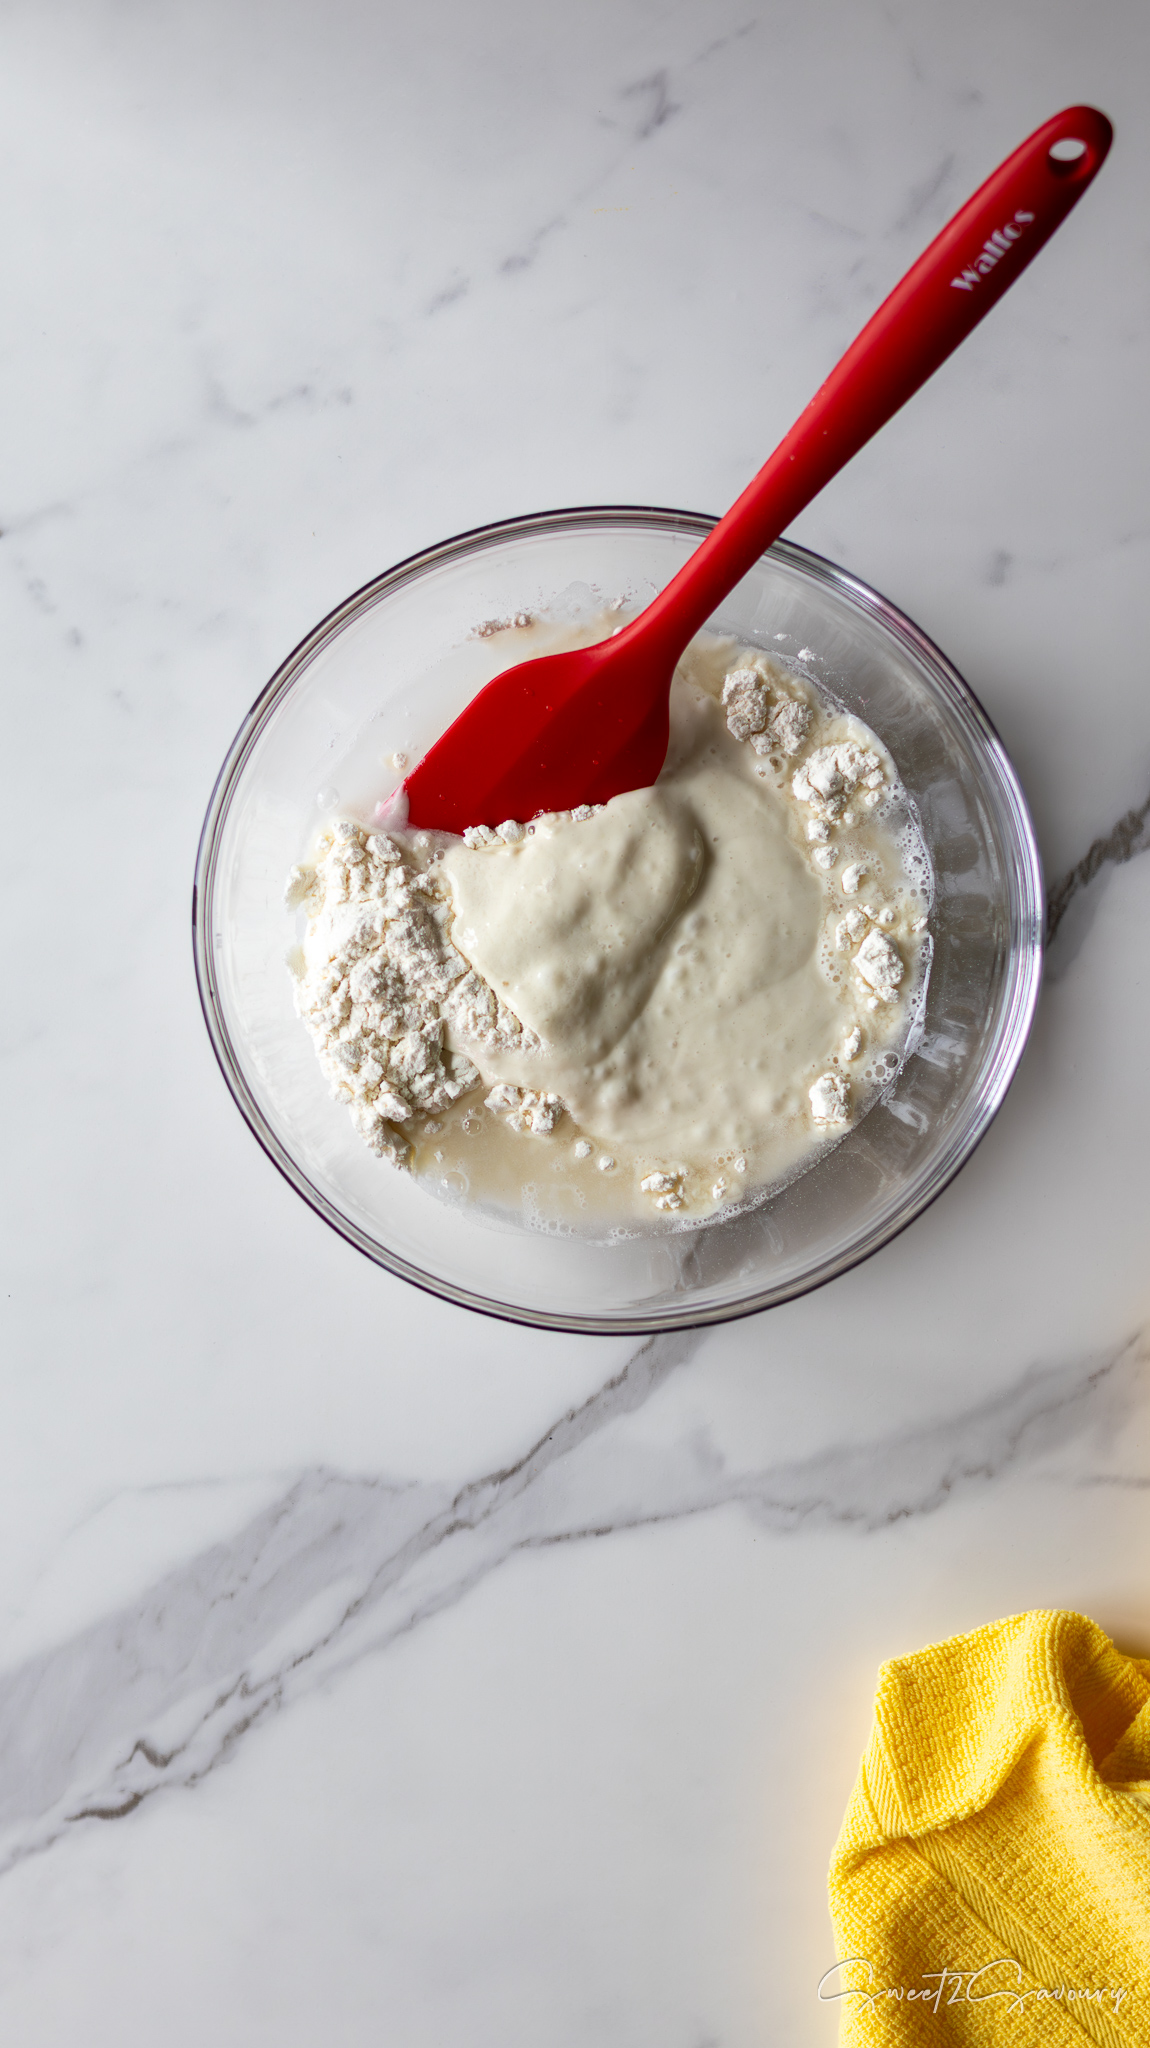

Phase 2: Autolyse (Hydrating the Dough)
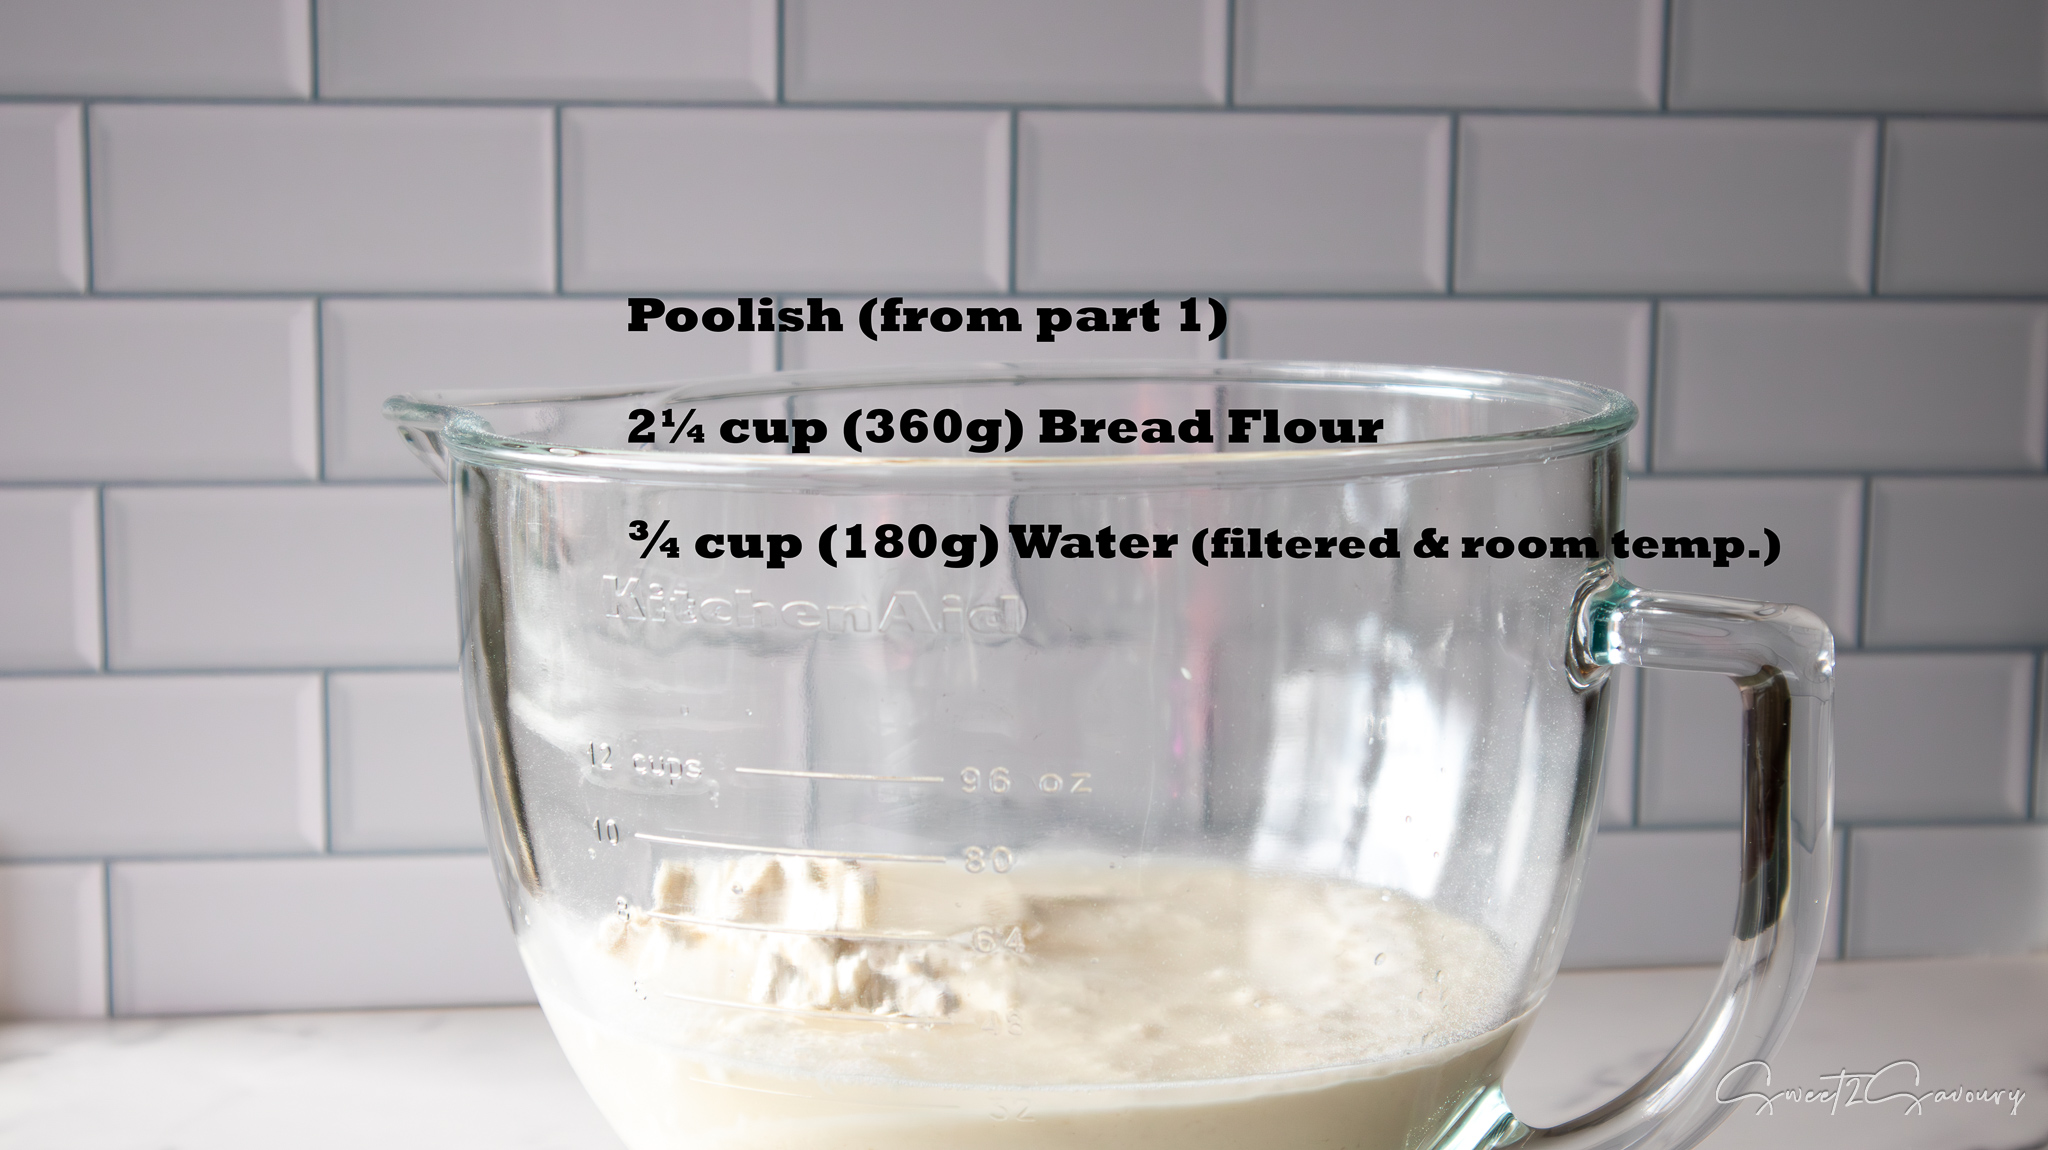
- Mix: In the bowl of a stand mixer, combine the bubbly poolish, the remaining bread flour, and water. Mix on low speed until a shaggy dough forms.
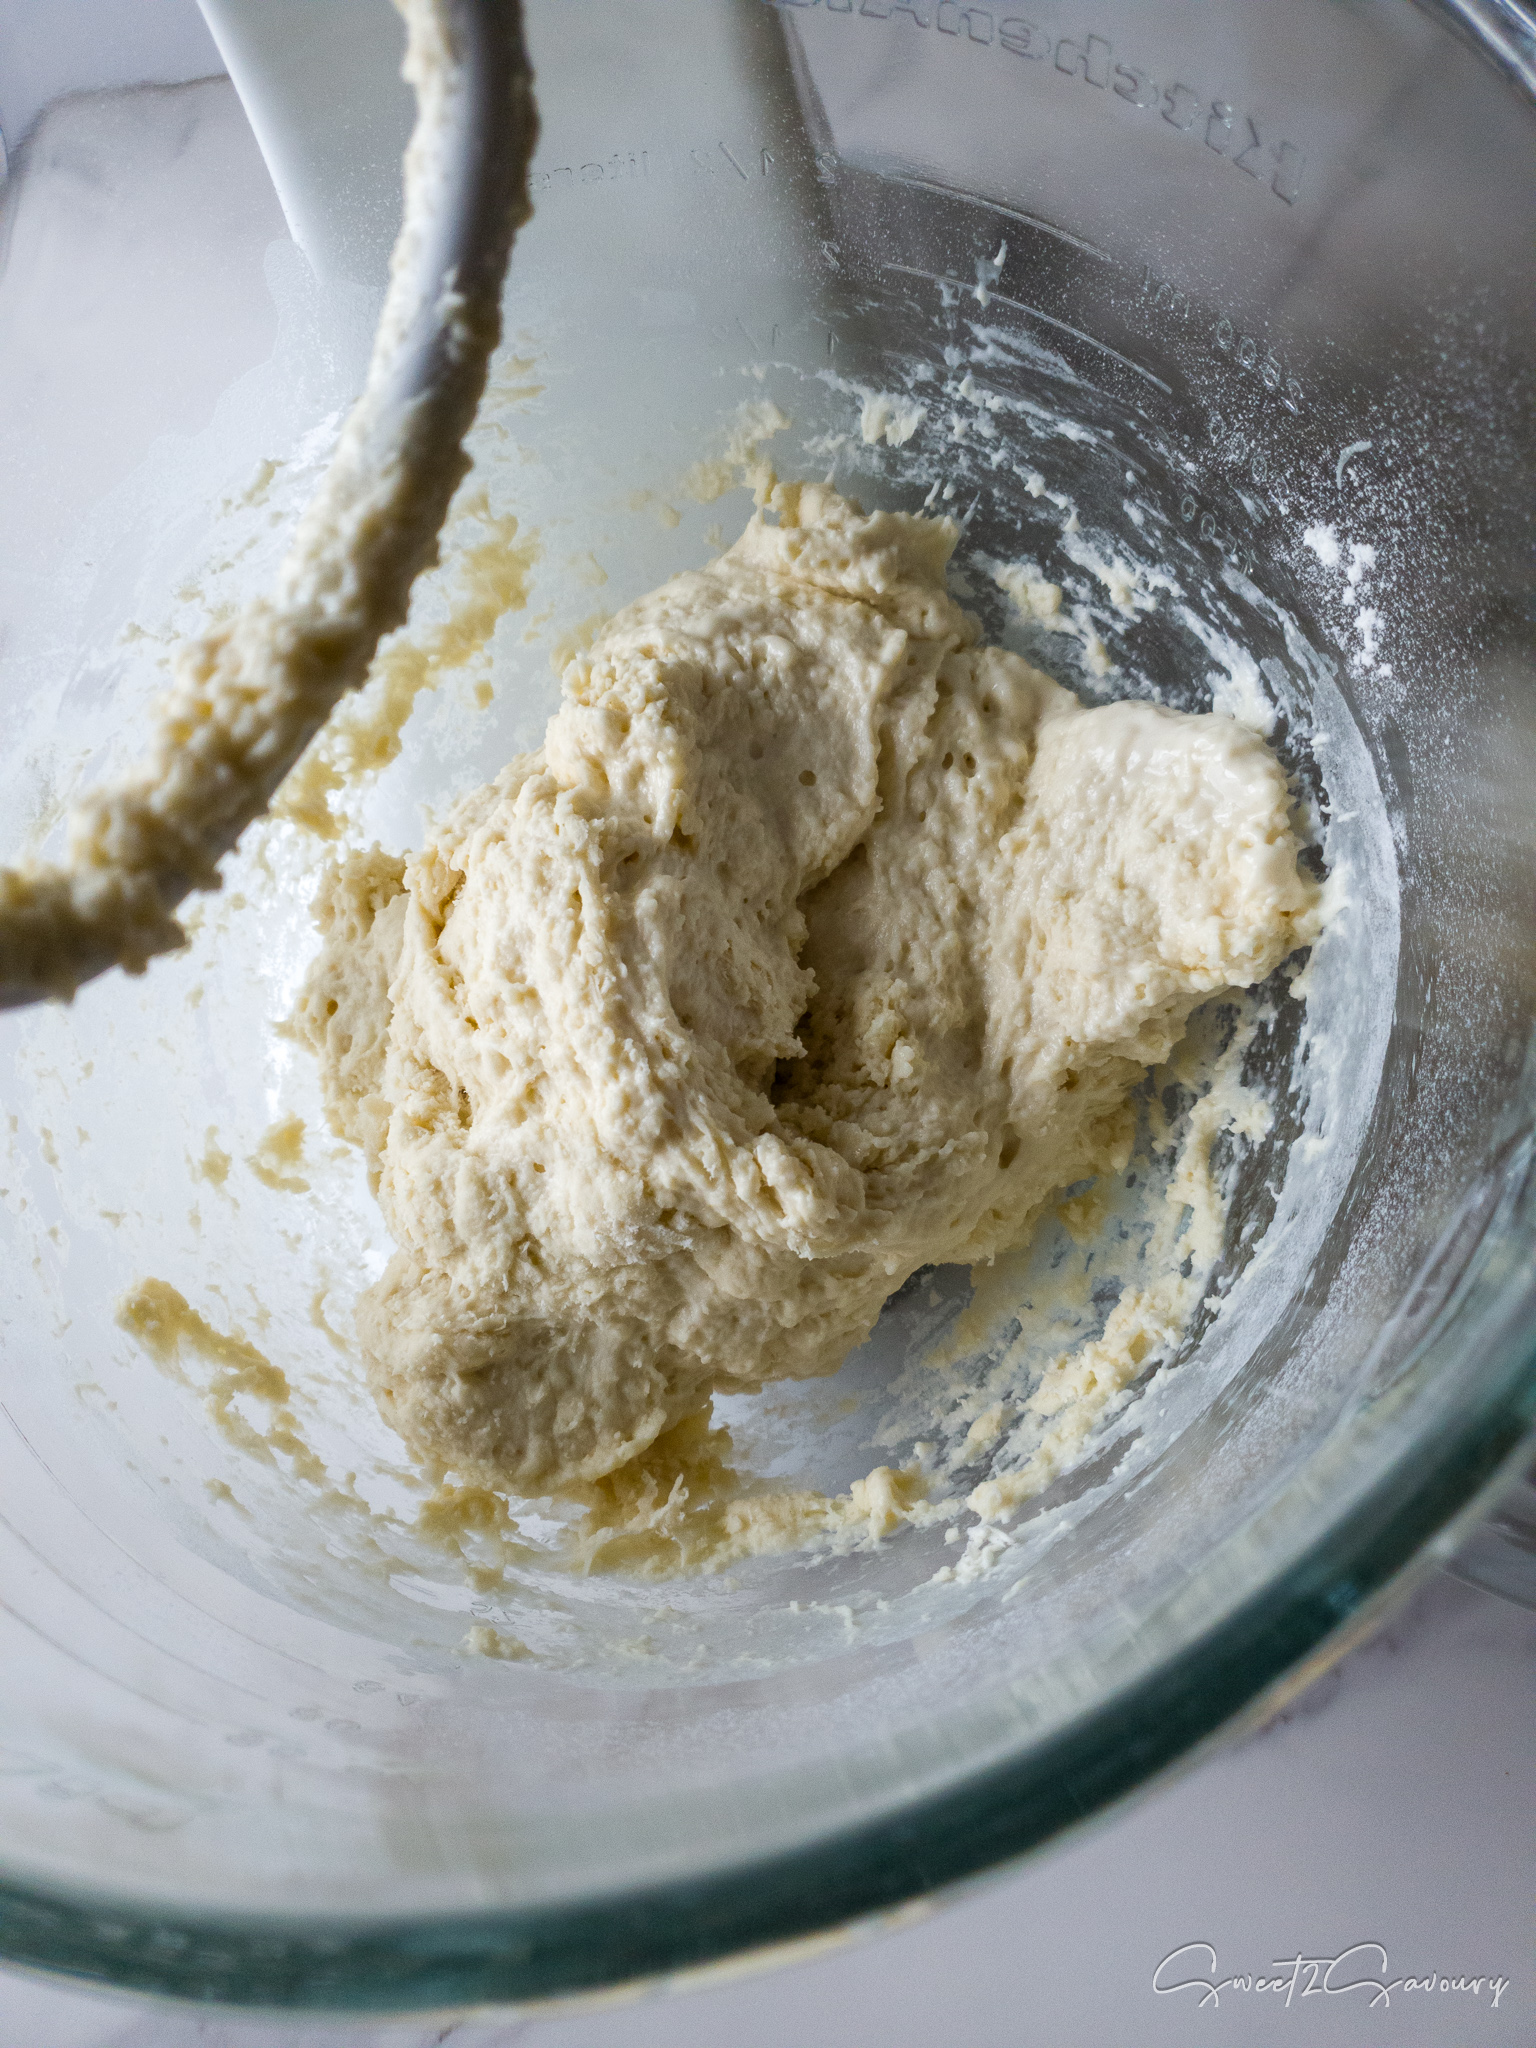
- Rest (Autolyse): Stop the mixer, cover the bowl, and let the dough rest for exactly 20 minutes. This allows the flour to fully absorb the water / poolish and jump-starts gluten development before adding the salt.
Phase 3: Knead & Bulk Fermentation
- Add Salt & Sugar: After the 20-minute rest, add the salt and sugar to the dough.
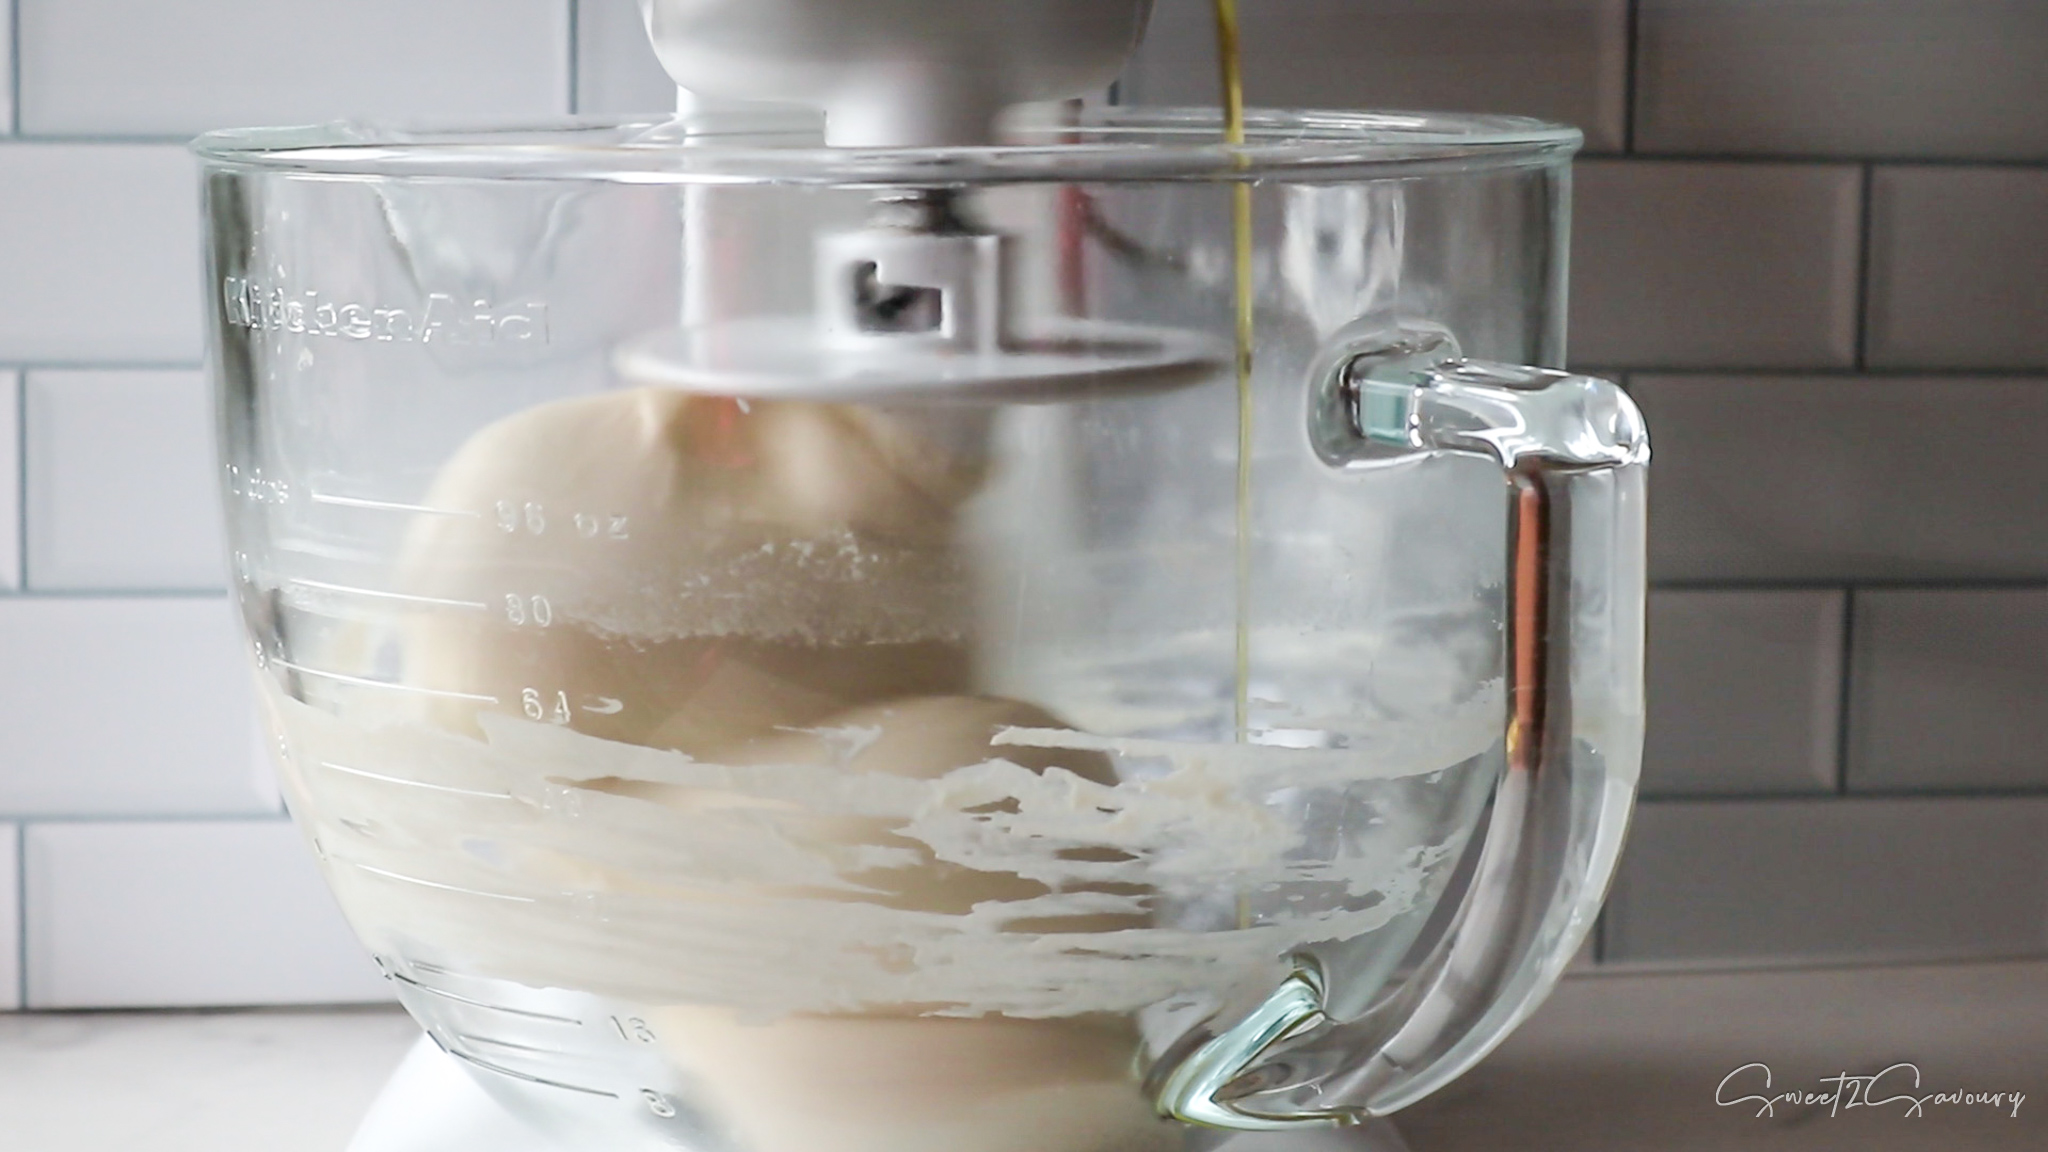
- Knead: Mix on medium speed for 7 minutes (or knead by hand for 15 minutes) until the dough is smooth, pliable, and pulls away from the sides of the bowl. While the machine is still running, drizzle olive oil over the dough to coat it and make it easier to remove from the dough hook.
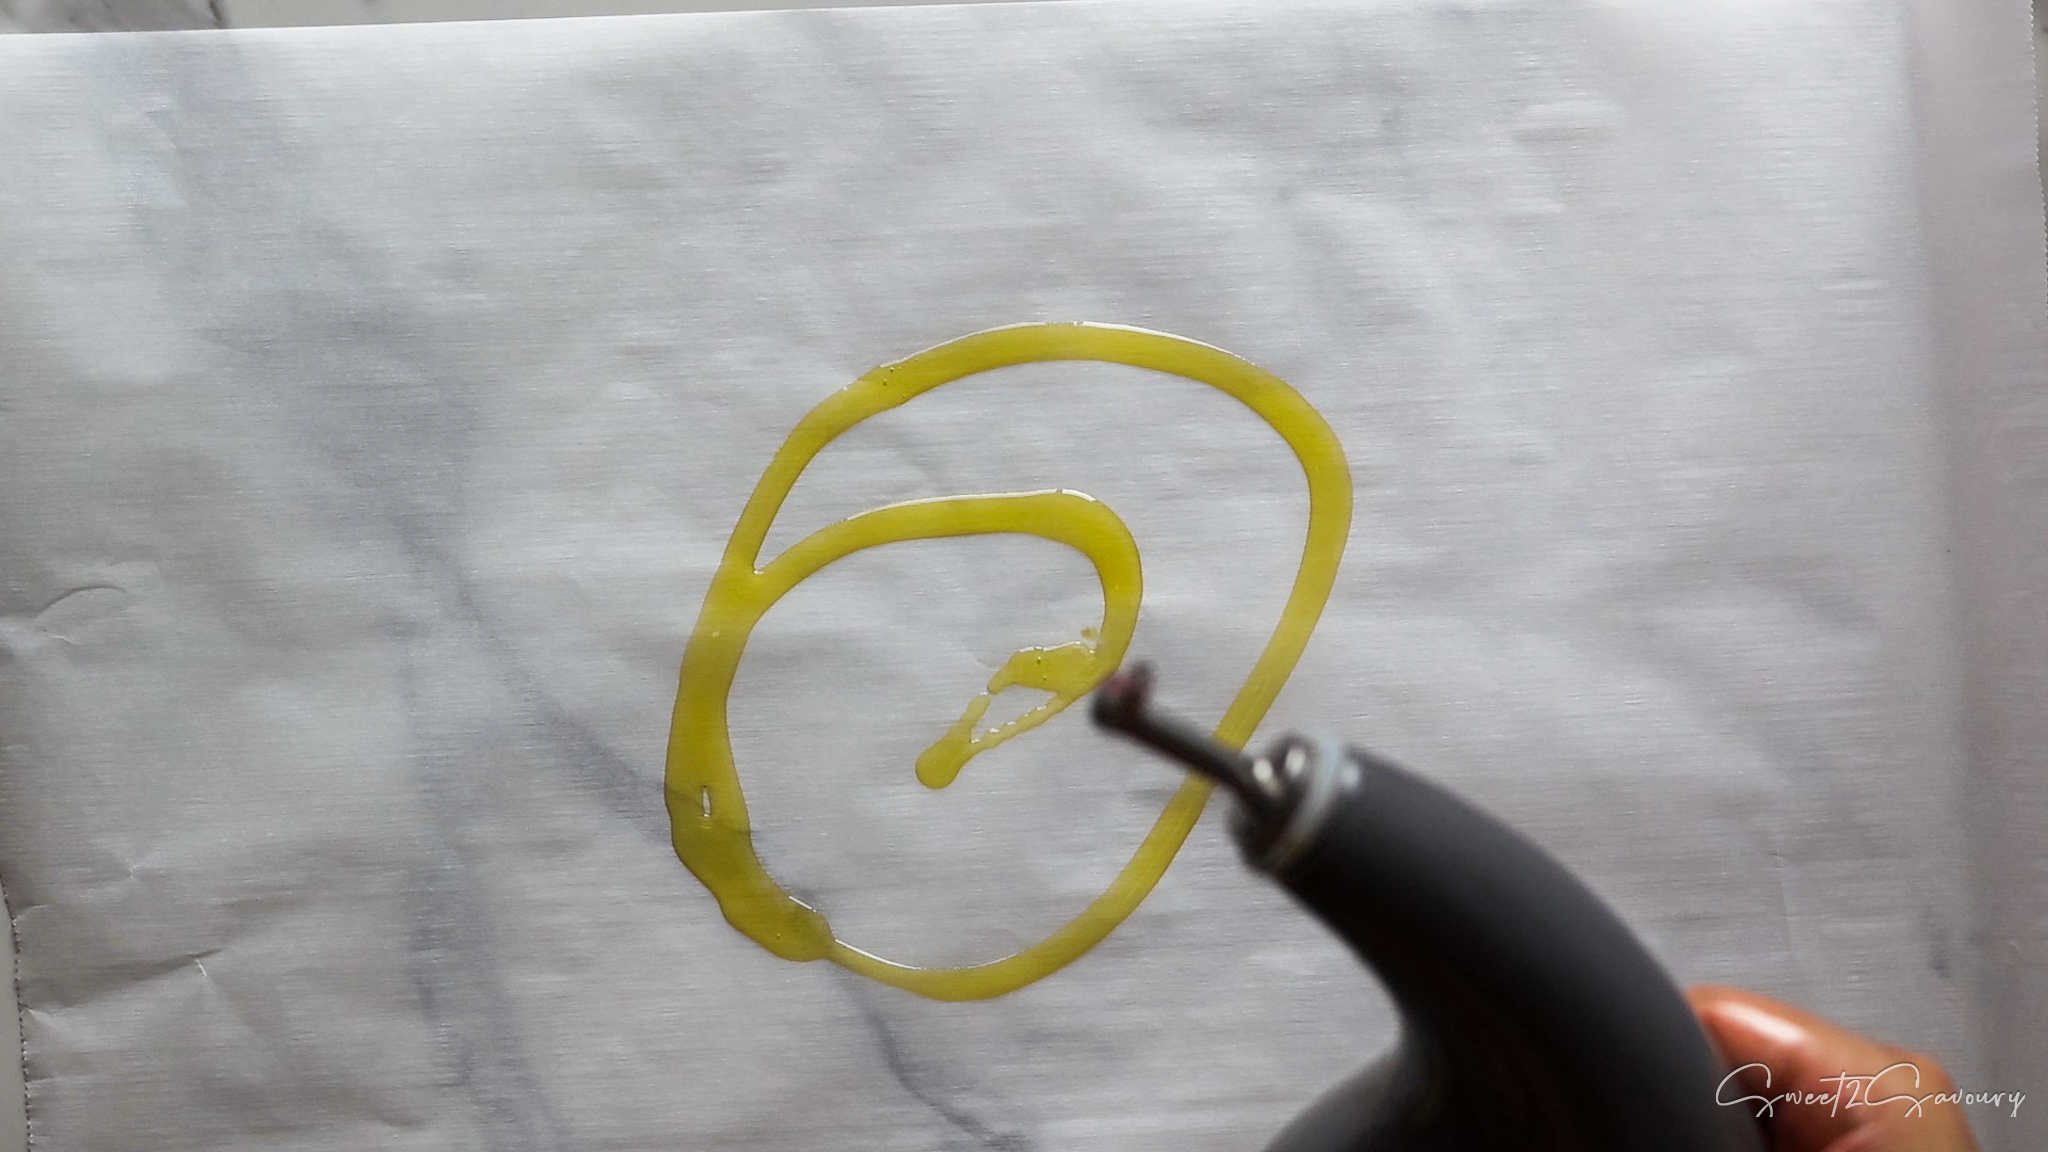
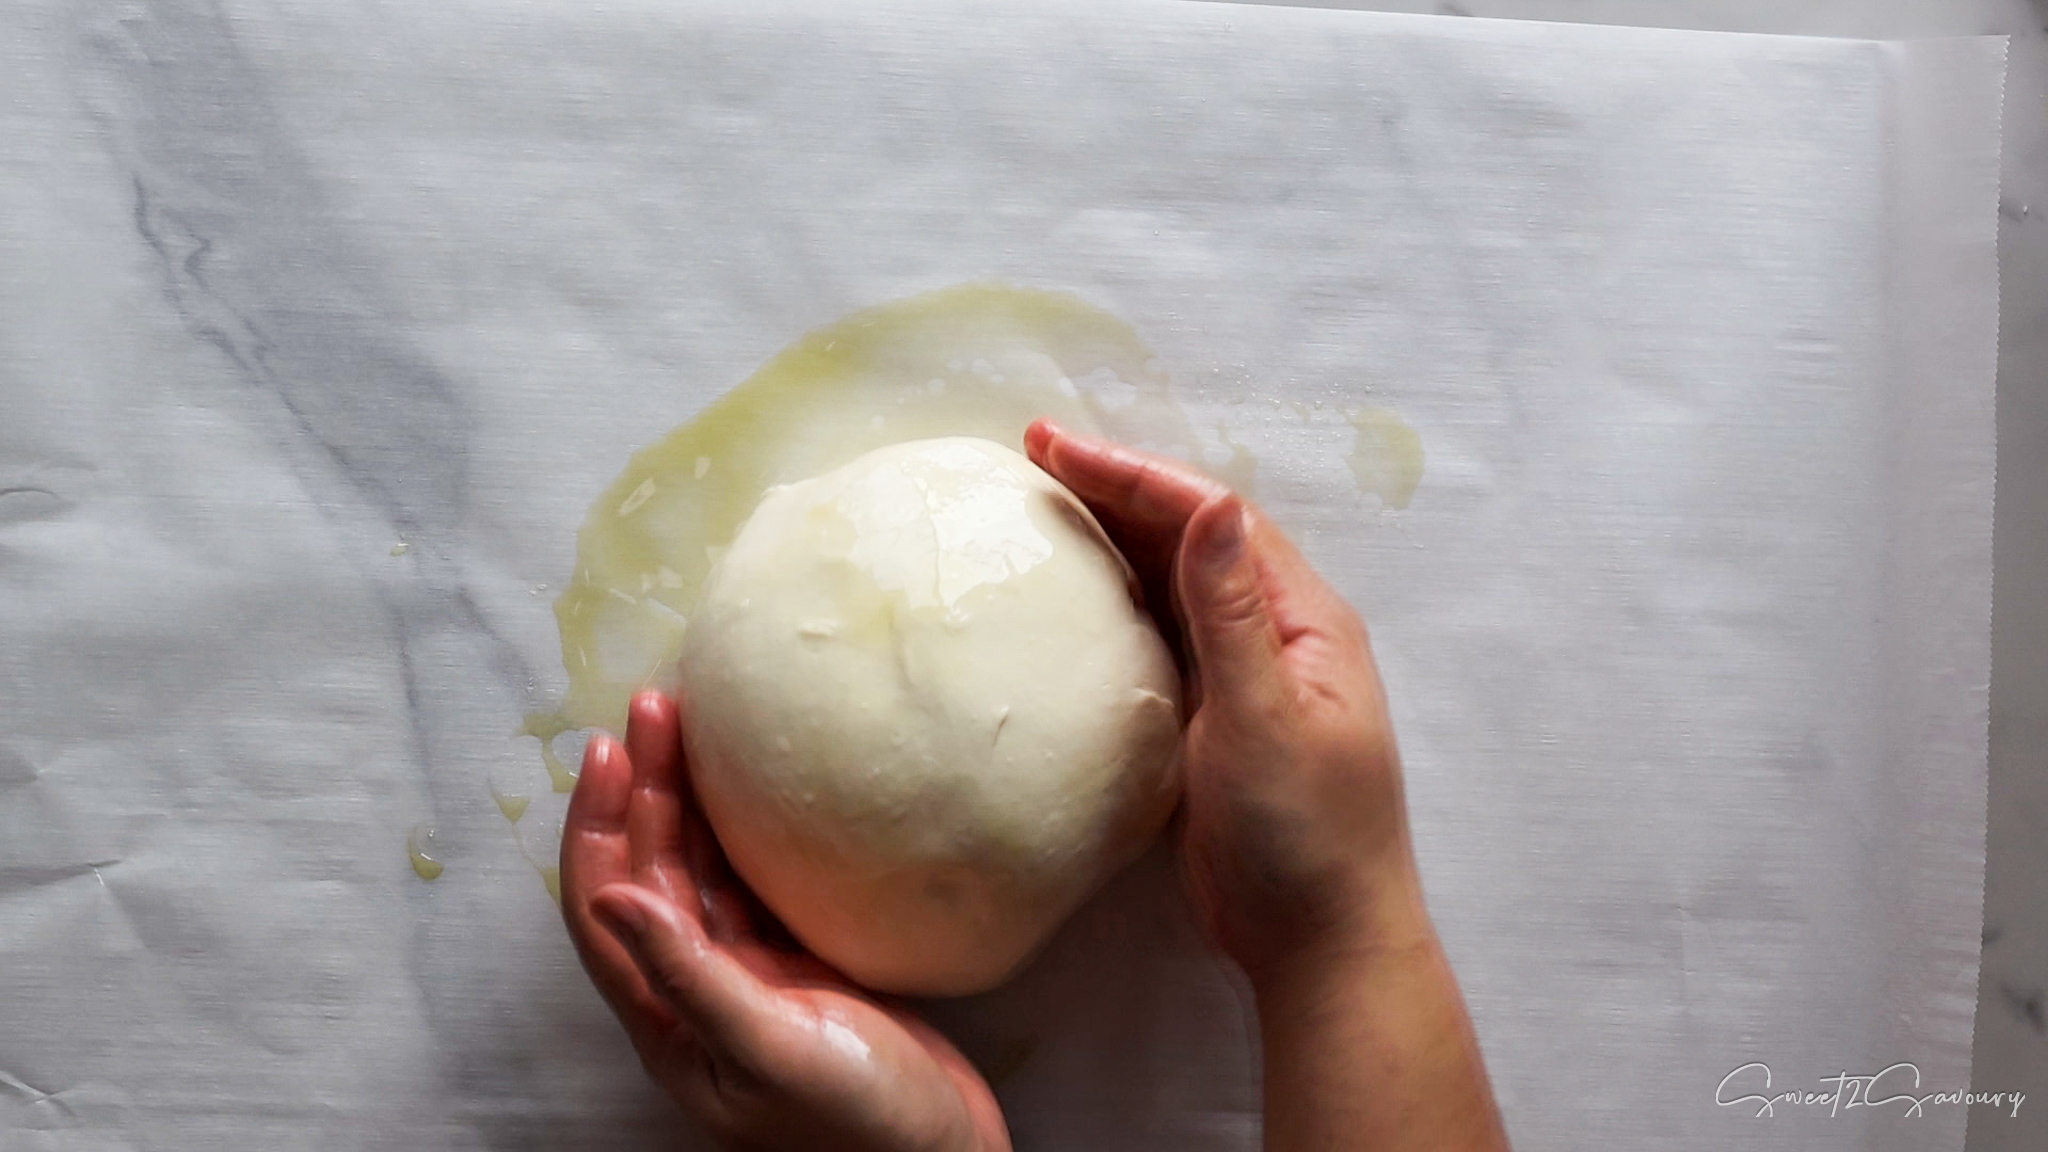
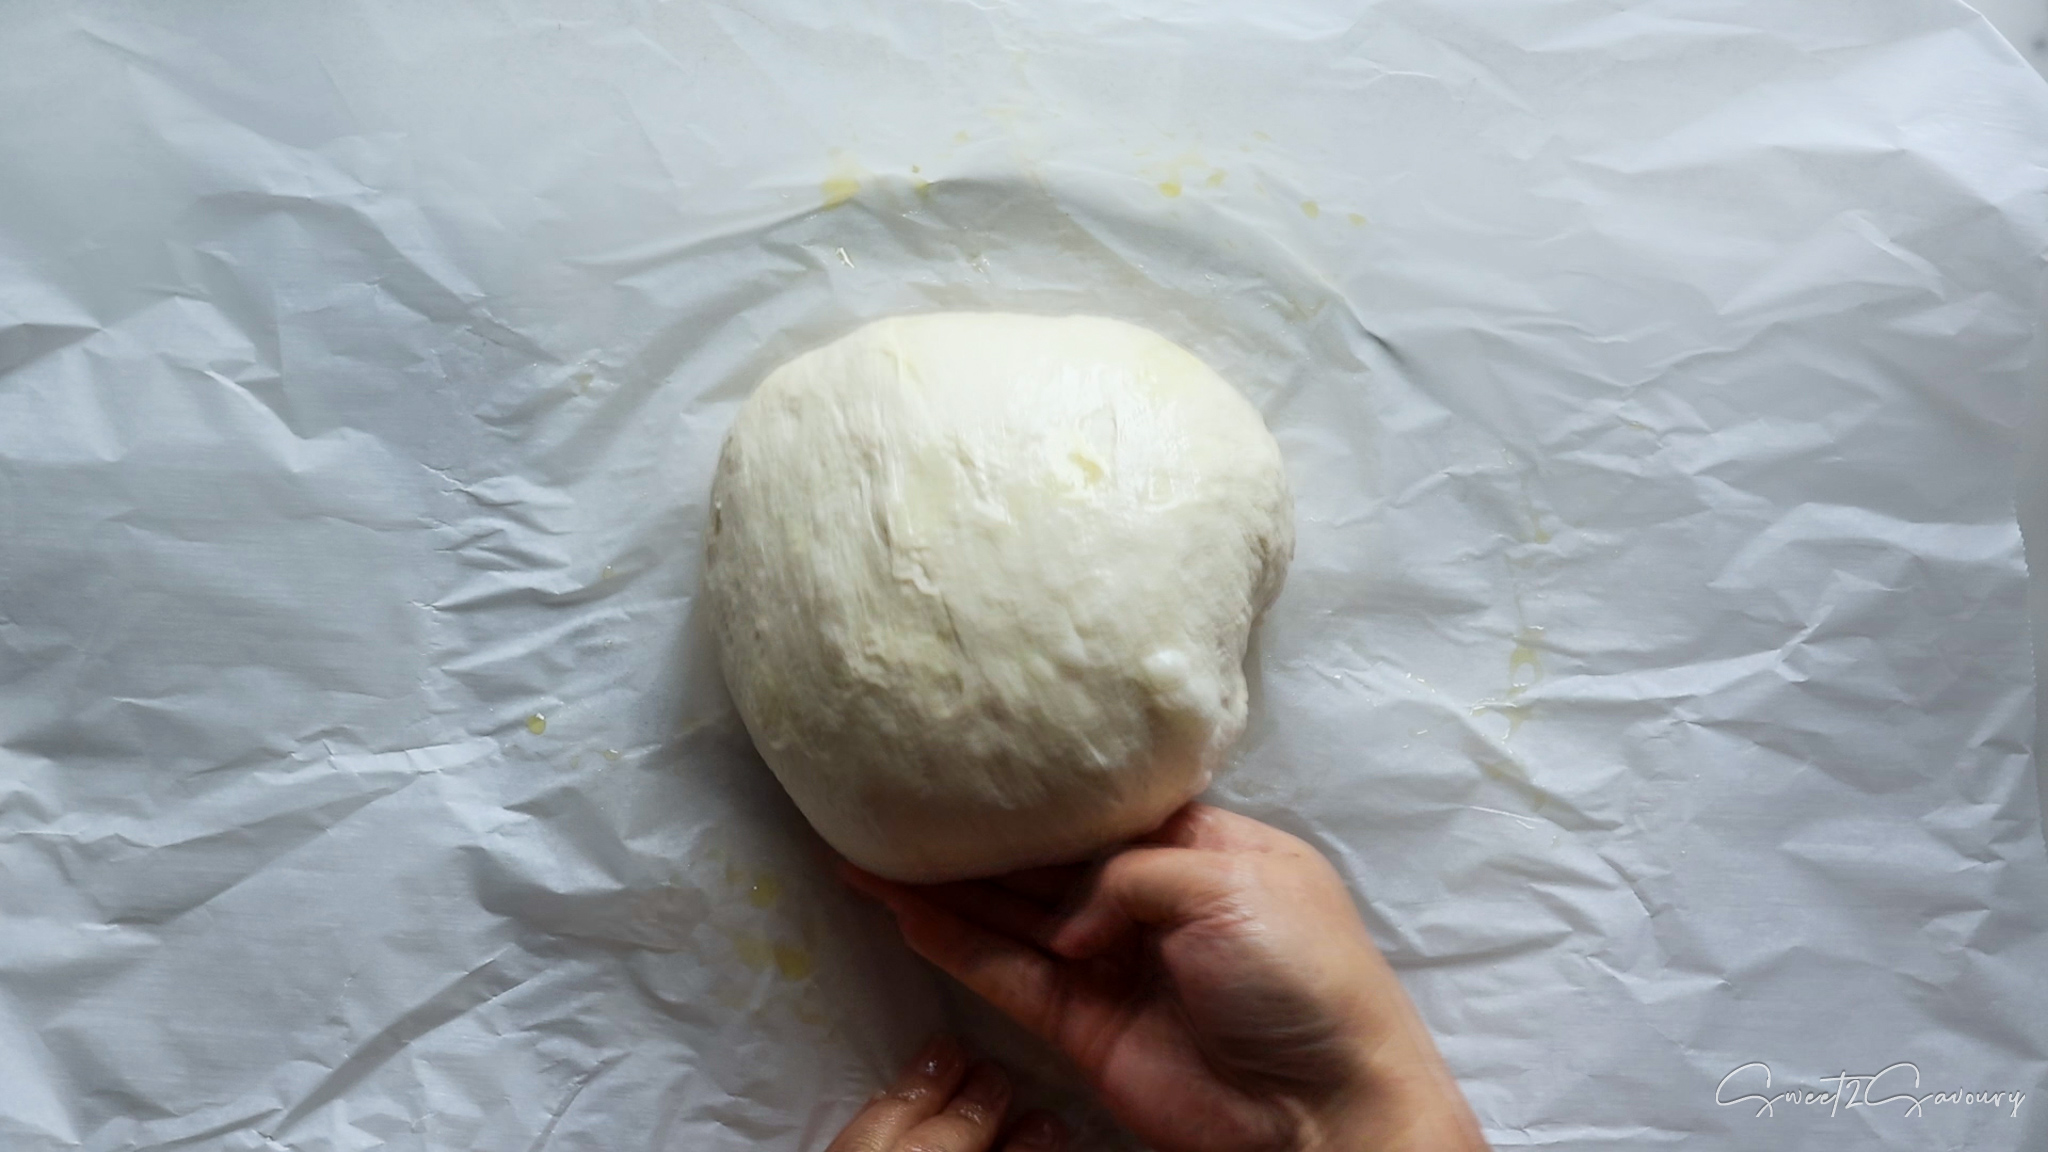
- First Proof: Drizzle a little olive oil onto a sheet of parchment paper. Shape the dough into a smooth, round ball (seam side down) and place it in a large bowl. Cover loosely with plastic wrap and a towel. Let it rise in a warm spot for 2 to 4 hours, or until doubled in size and puffy.
Phase 4: Lamination & Stretching
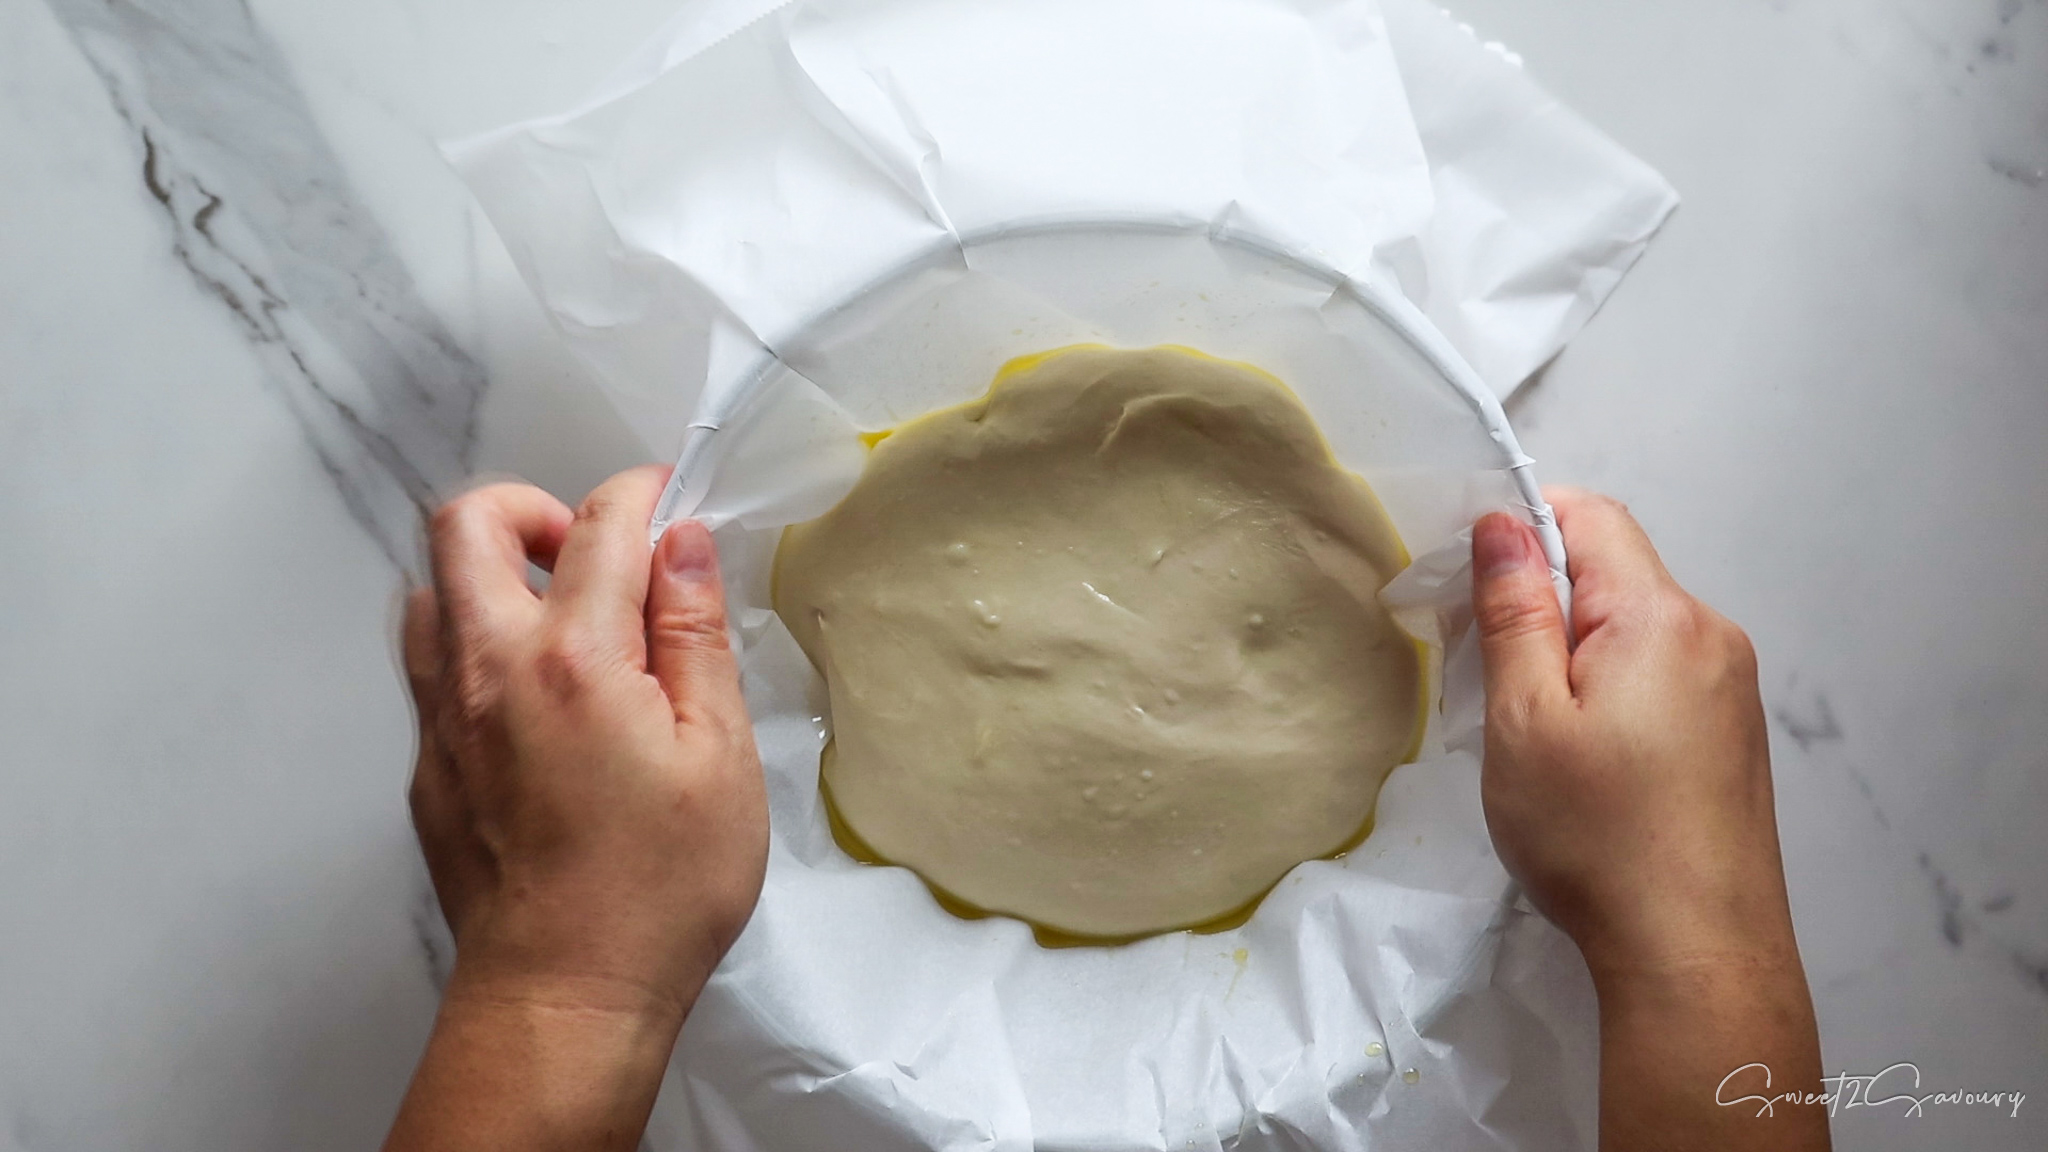
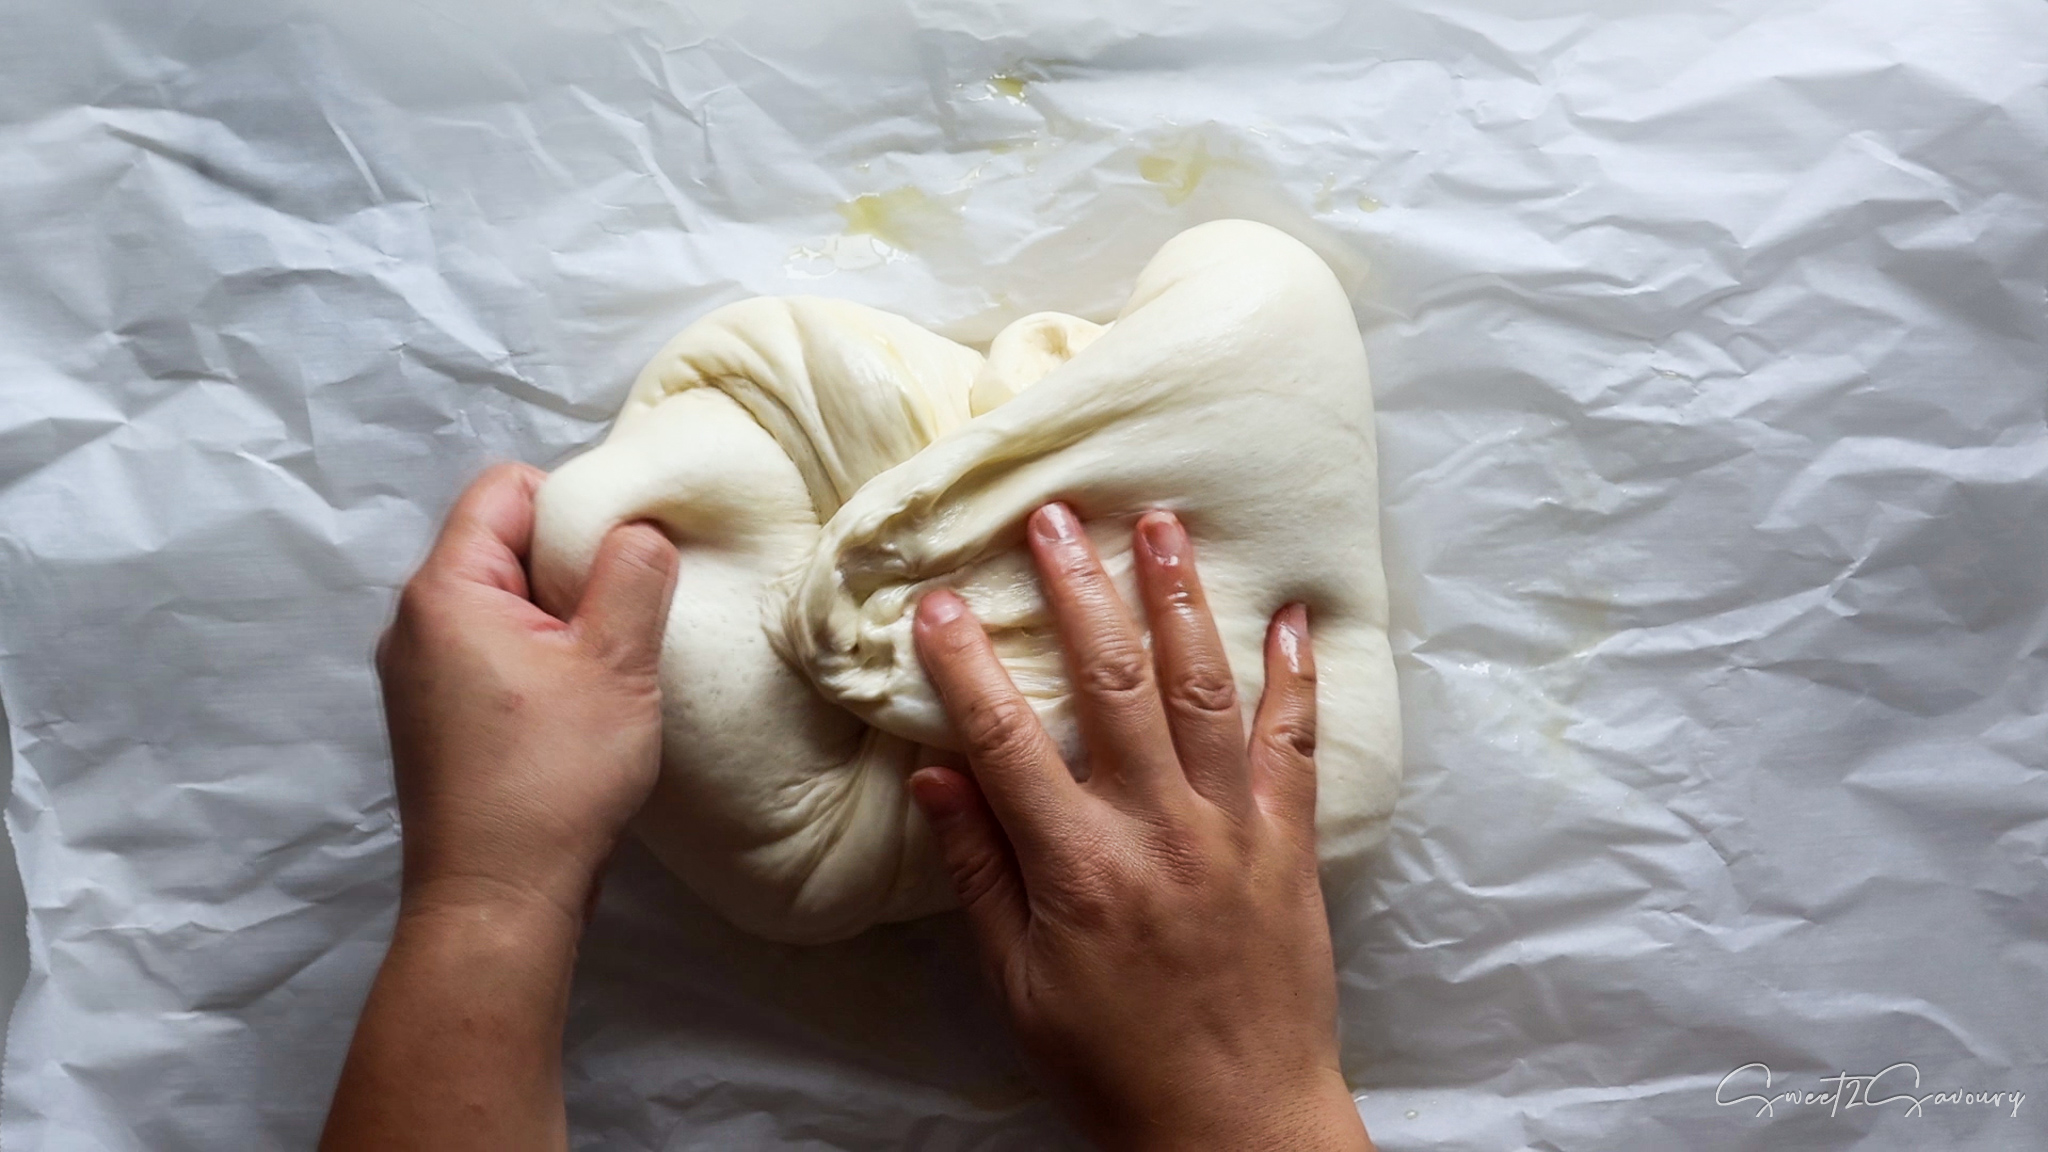
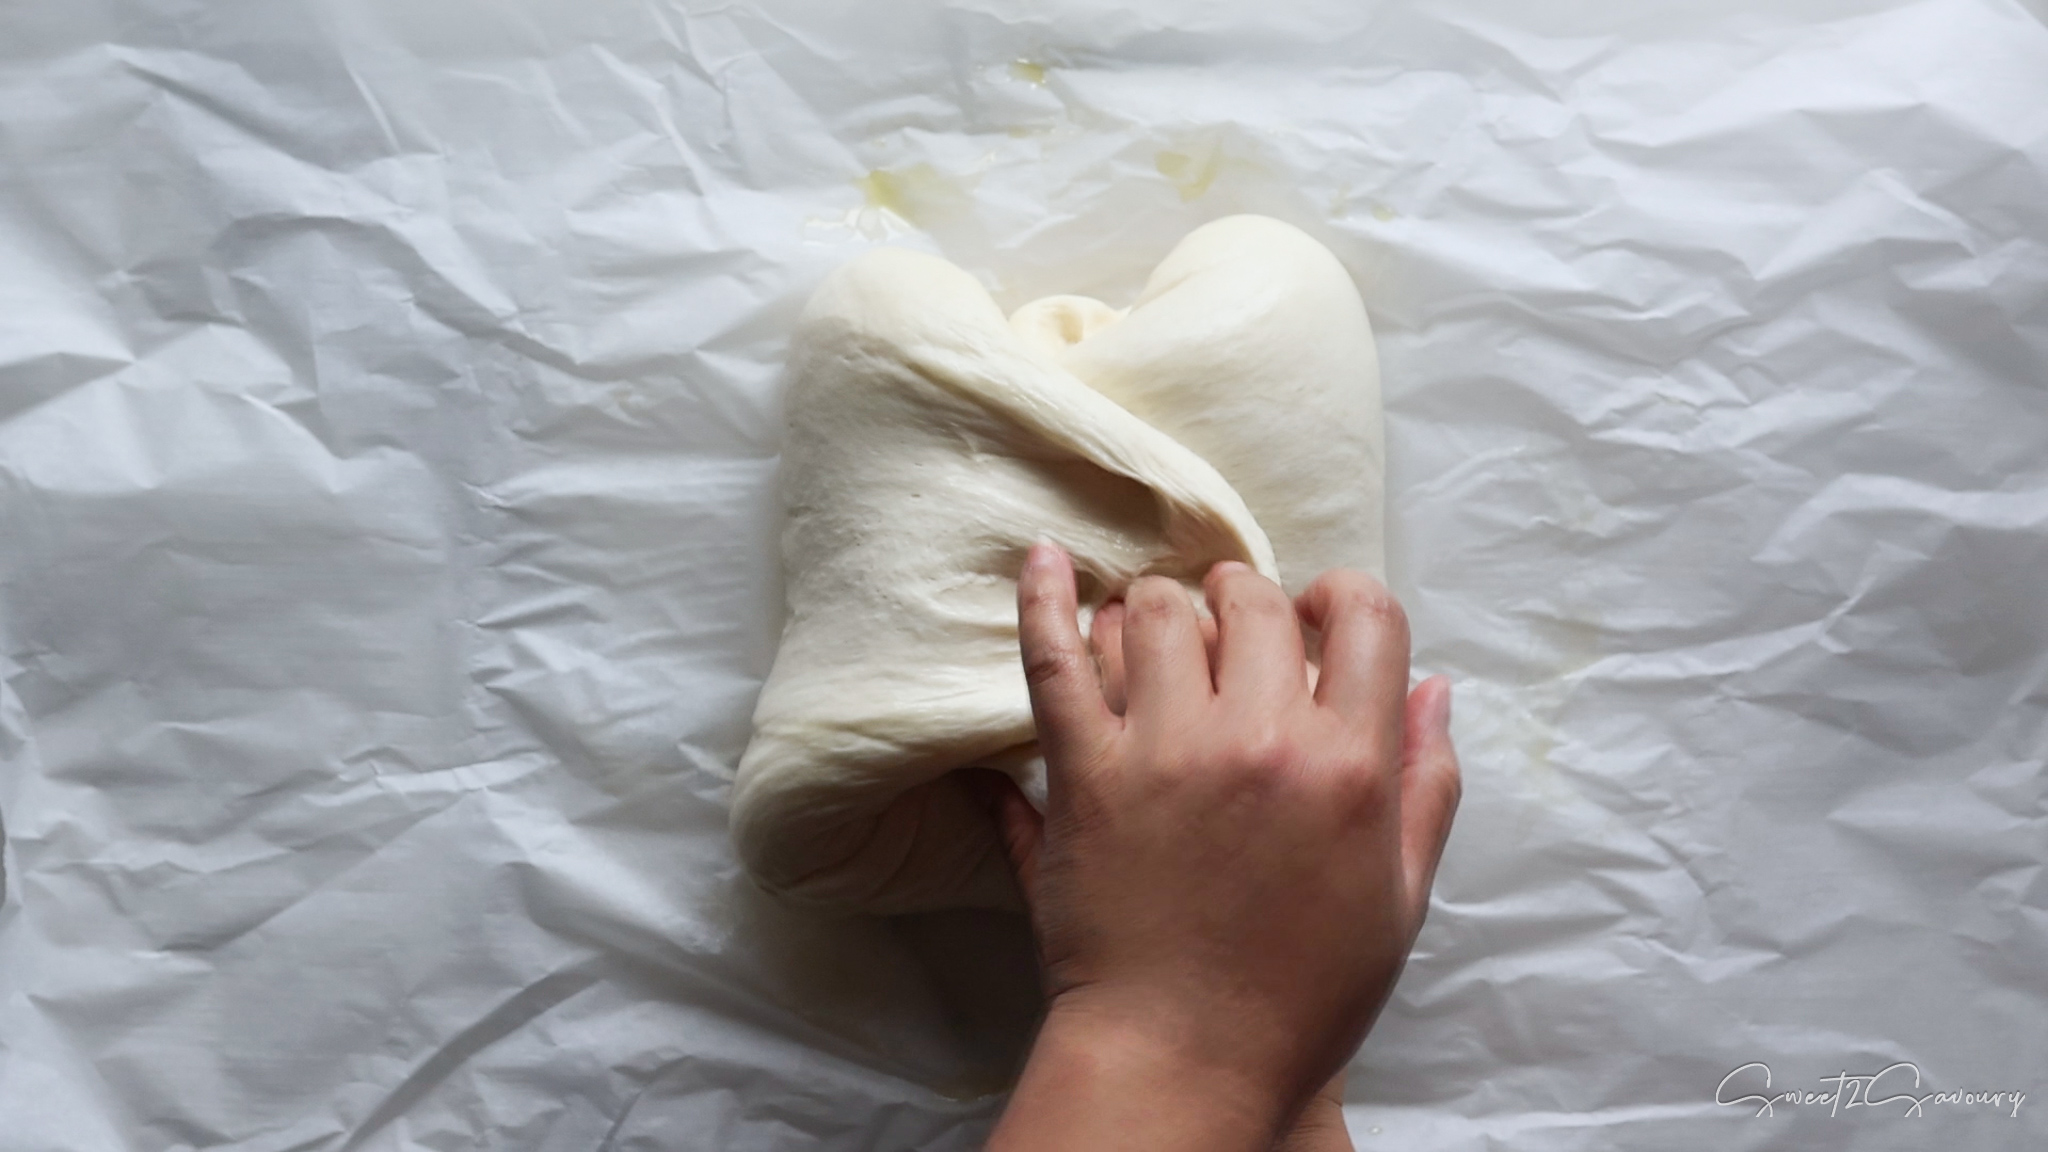
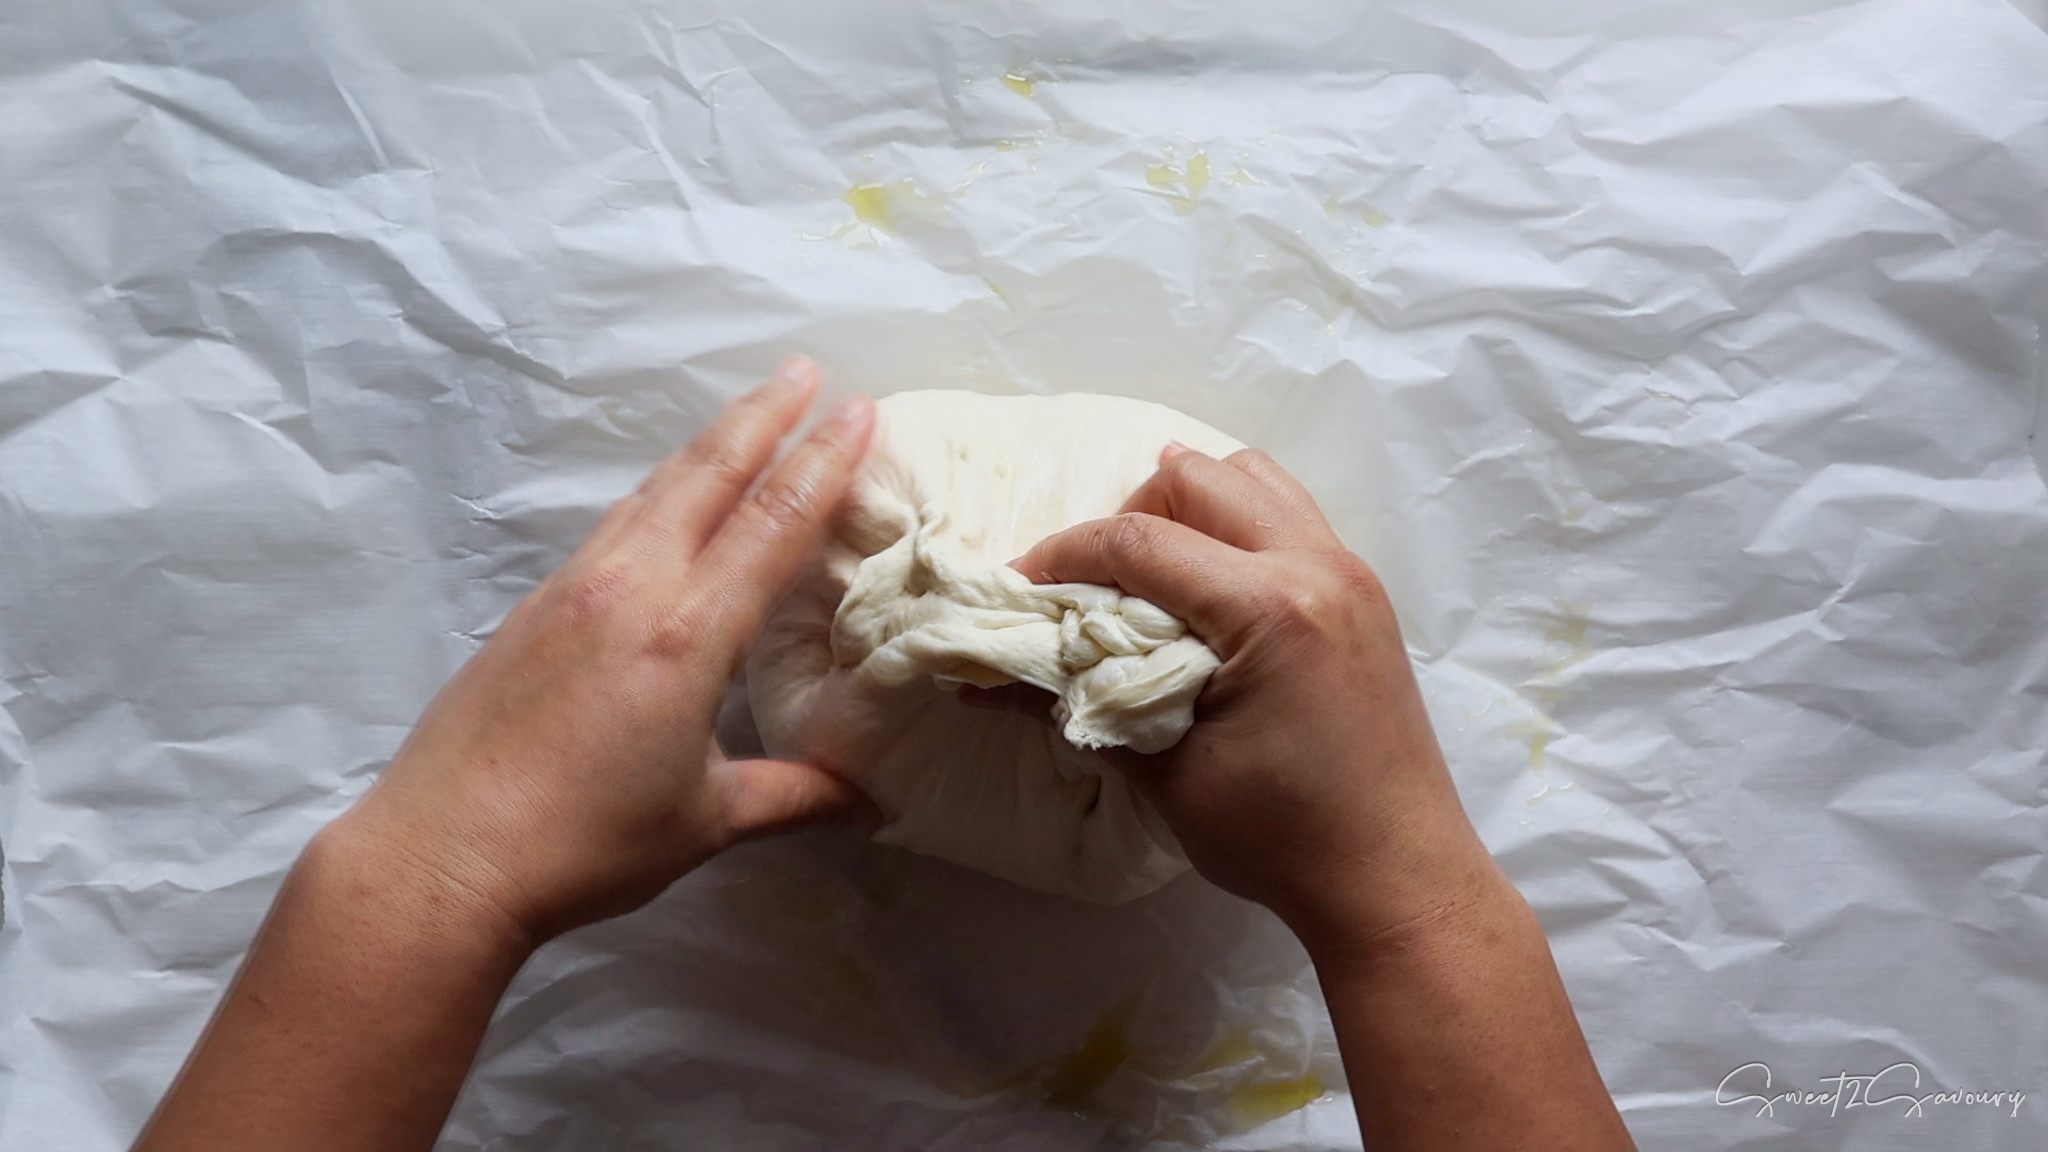
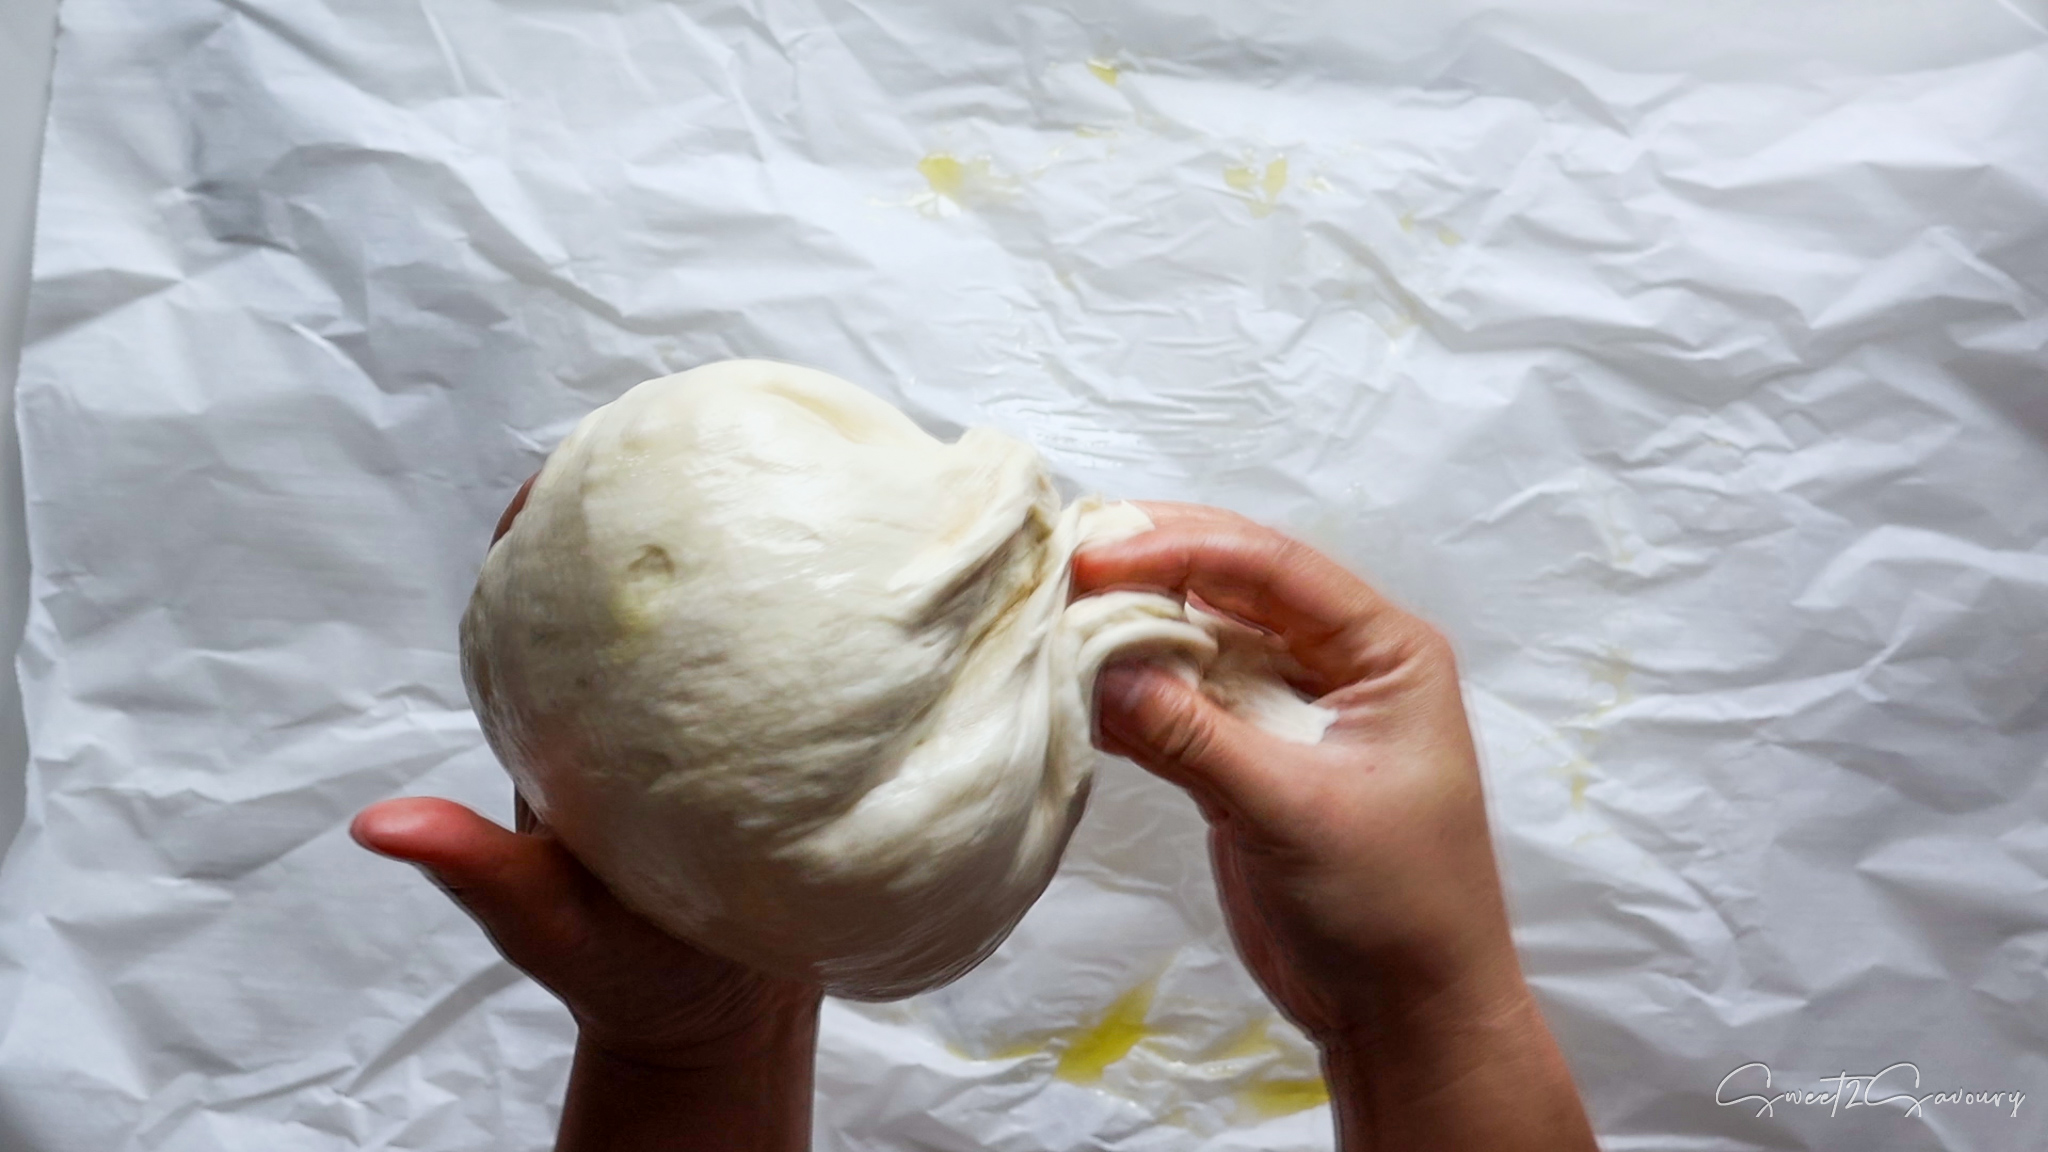
- Once doubled, lift the parchment with the dough onto the counter.
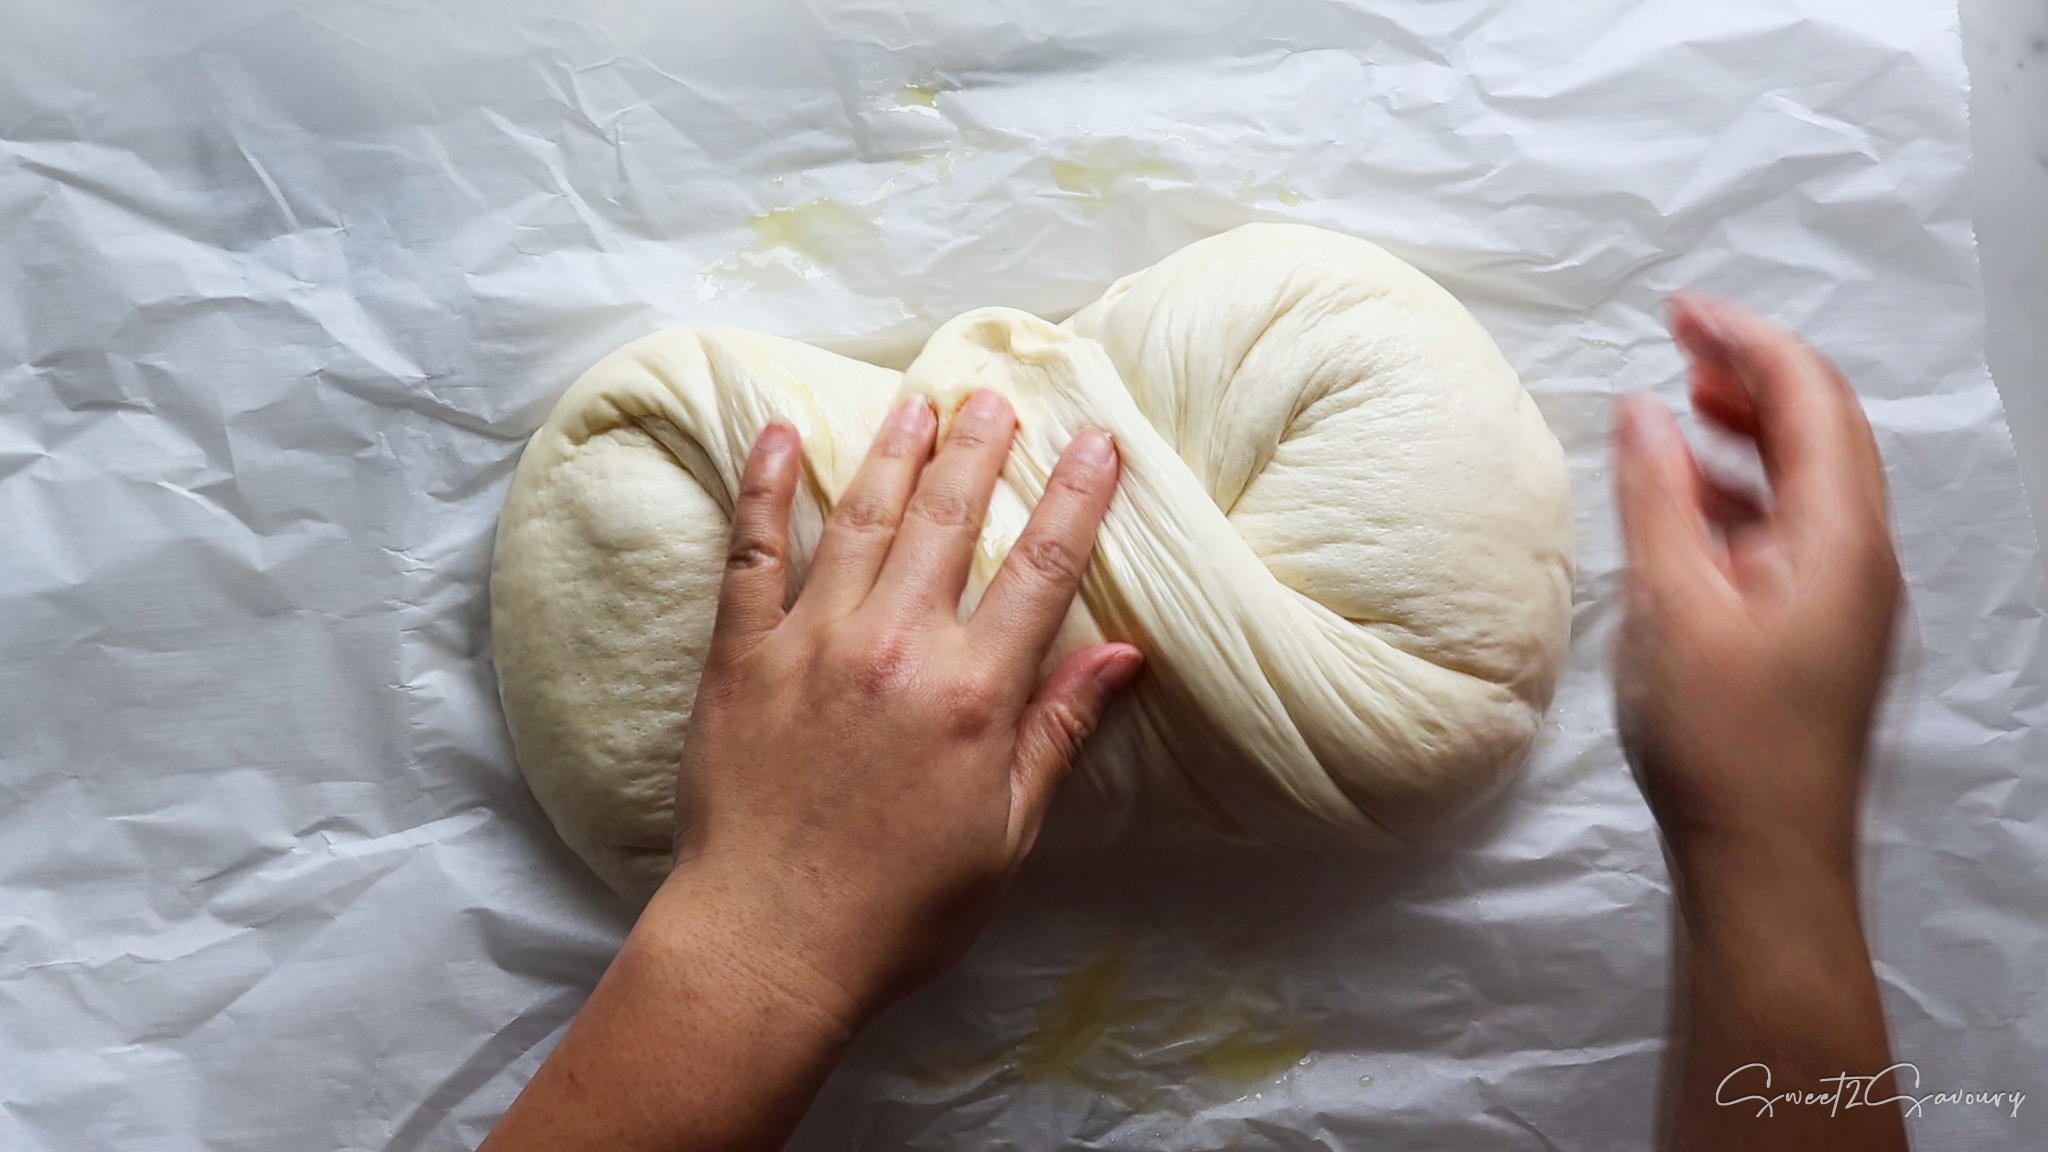
- Stretch and Fold: Gently stretch the dough outwards into a large rectangle, then fold it over itself (like an envelope) to trap air and strengthen the gluten structure.
- Shape it back into a tight round loaf, place it back on the parchment paper and cover it again with plastic wrap and a hand towel.
- Set a timer for 40 minutes. Then repeat steps 1 to 3.
- Repeat step #4, two more times. You should have stretched and folded the dough a total of 3 times after the initial rise.

Phase 5: Cold Proof (Overnight)
- Place the covered bowl into the refrigerator to cold-proof overnight (12 to 15 hours). This slows down the yeast, deepens the sour flavour, and makes the dough much easier to score the next day!
Phase 6: Score and Bake (Day 2, Morning)
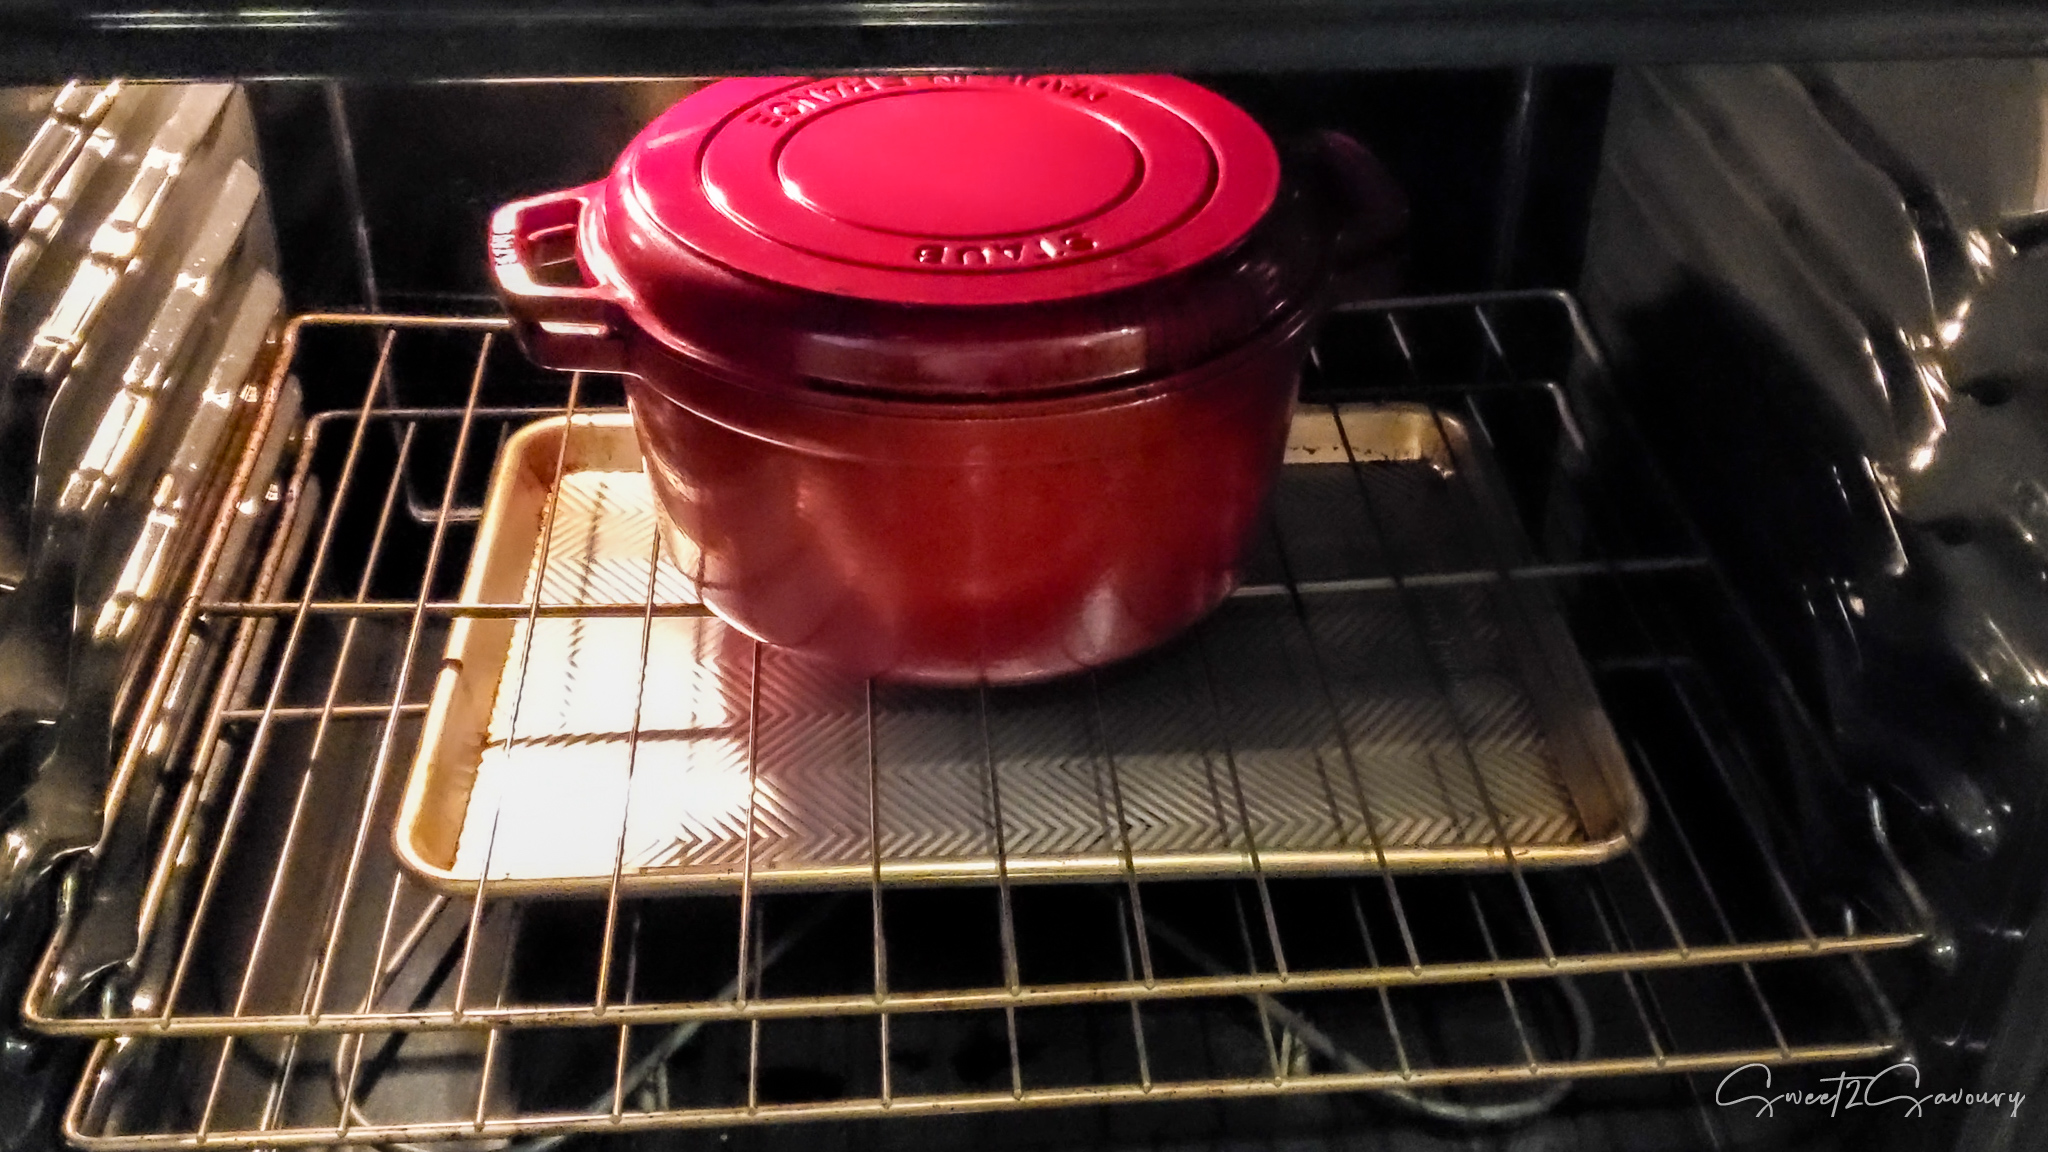
- Preheat: Place your empty Dutch oven (with the lid on) into the oven and preheat to 475°F (246°C). I also place a baking sheet on the rack underneath to prevent the bottom of the loaf from browning too fast.
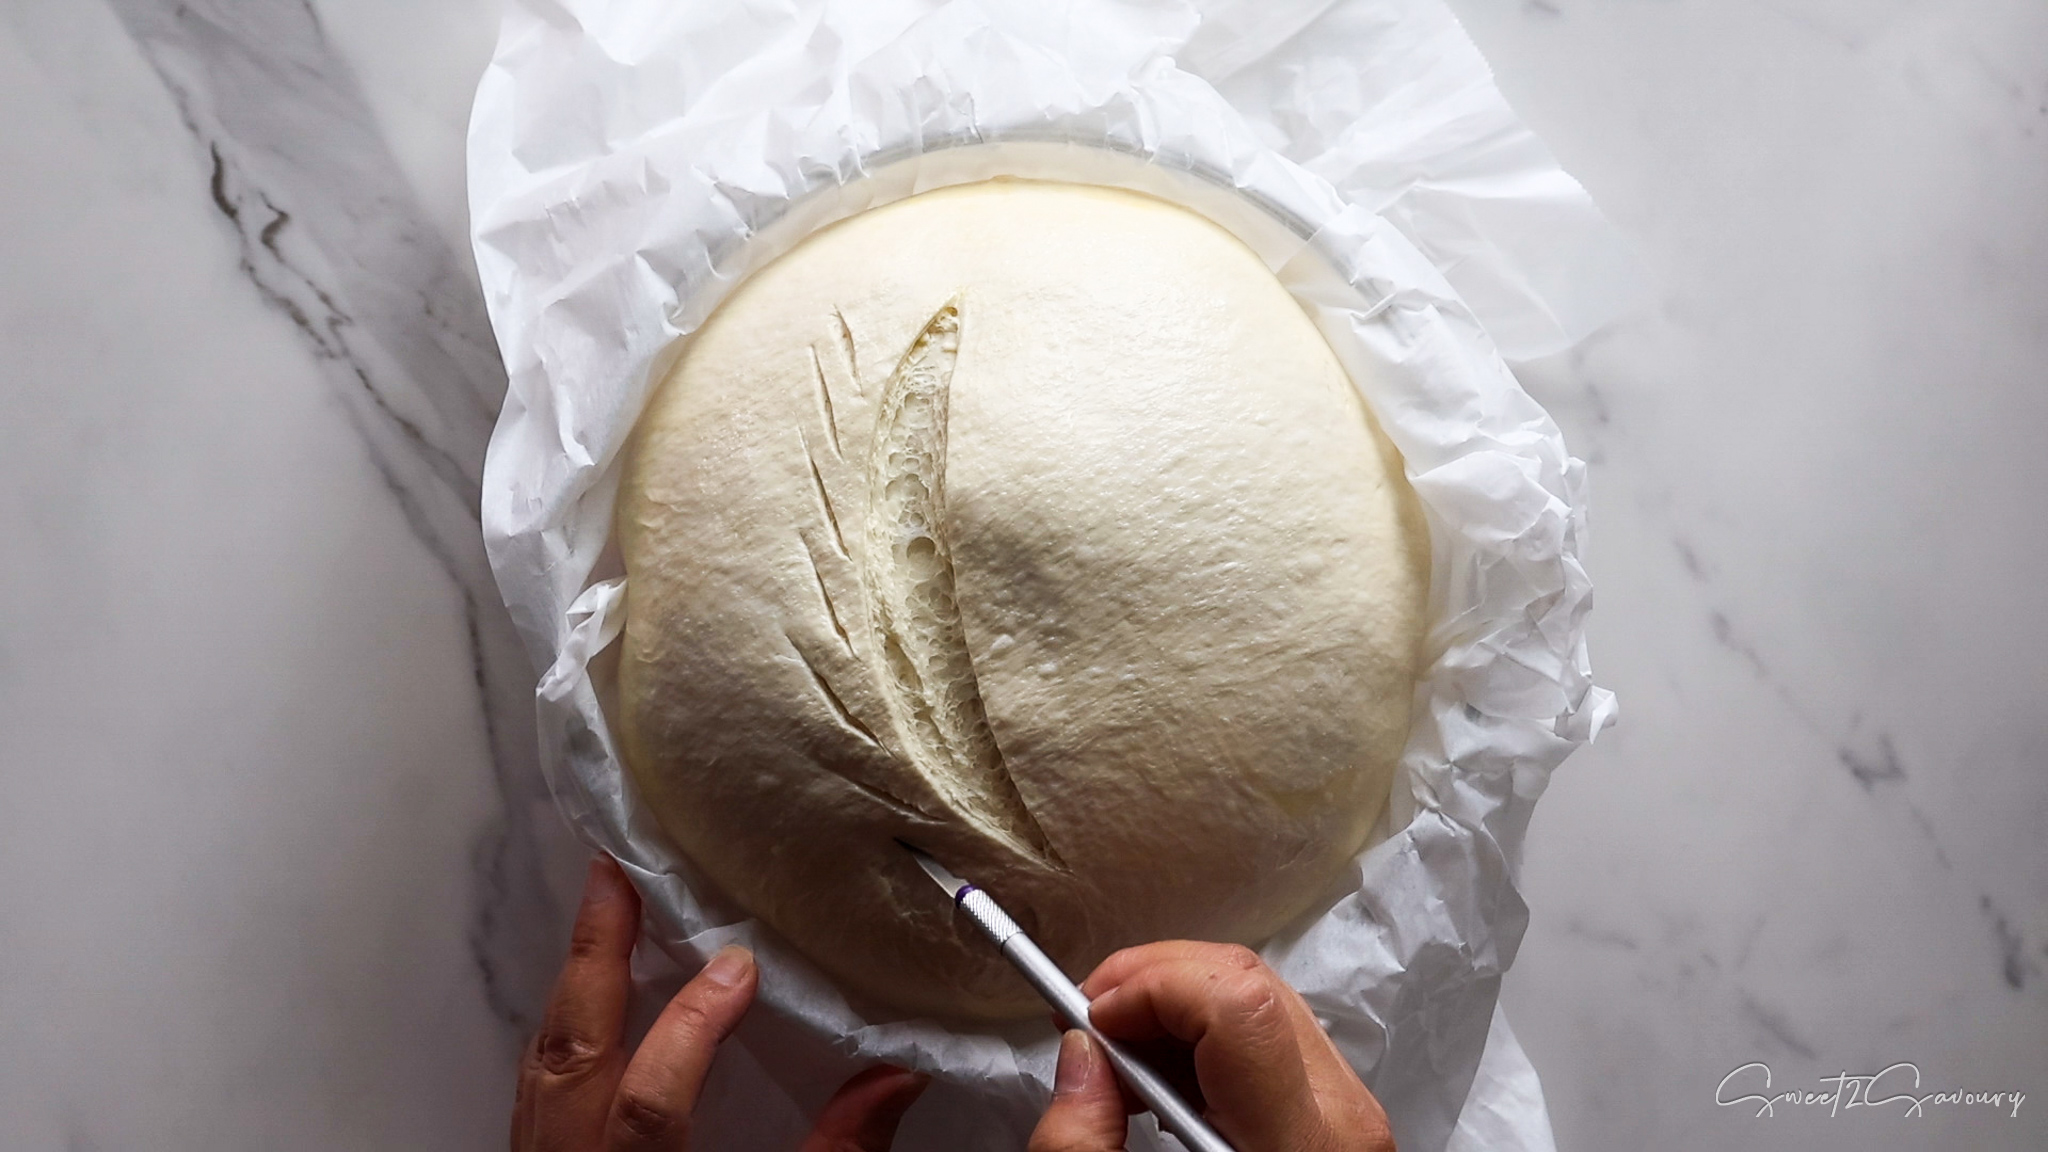
- Score: Using a lame or razor blade, quickly and confidently make a deep slash (or decorative pattern) across the top of the dough. Drizzle olive oil and lightly sprinkle sea salt on top of the bread loaf
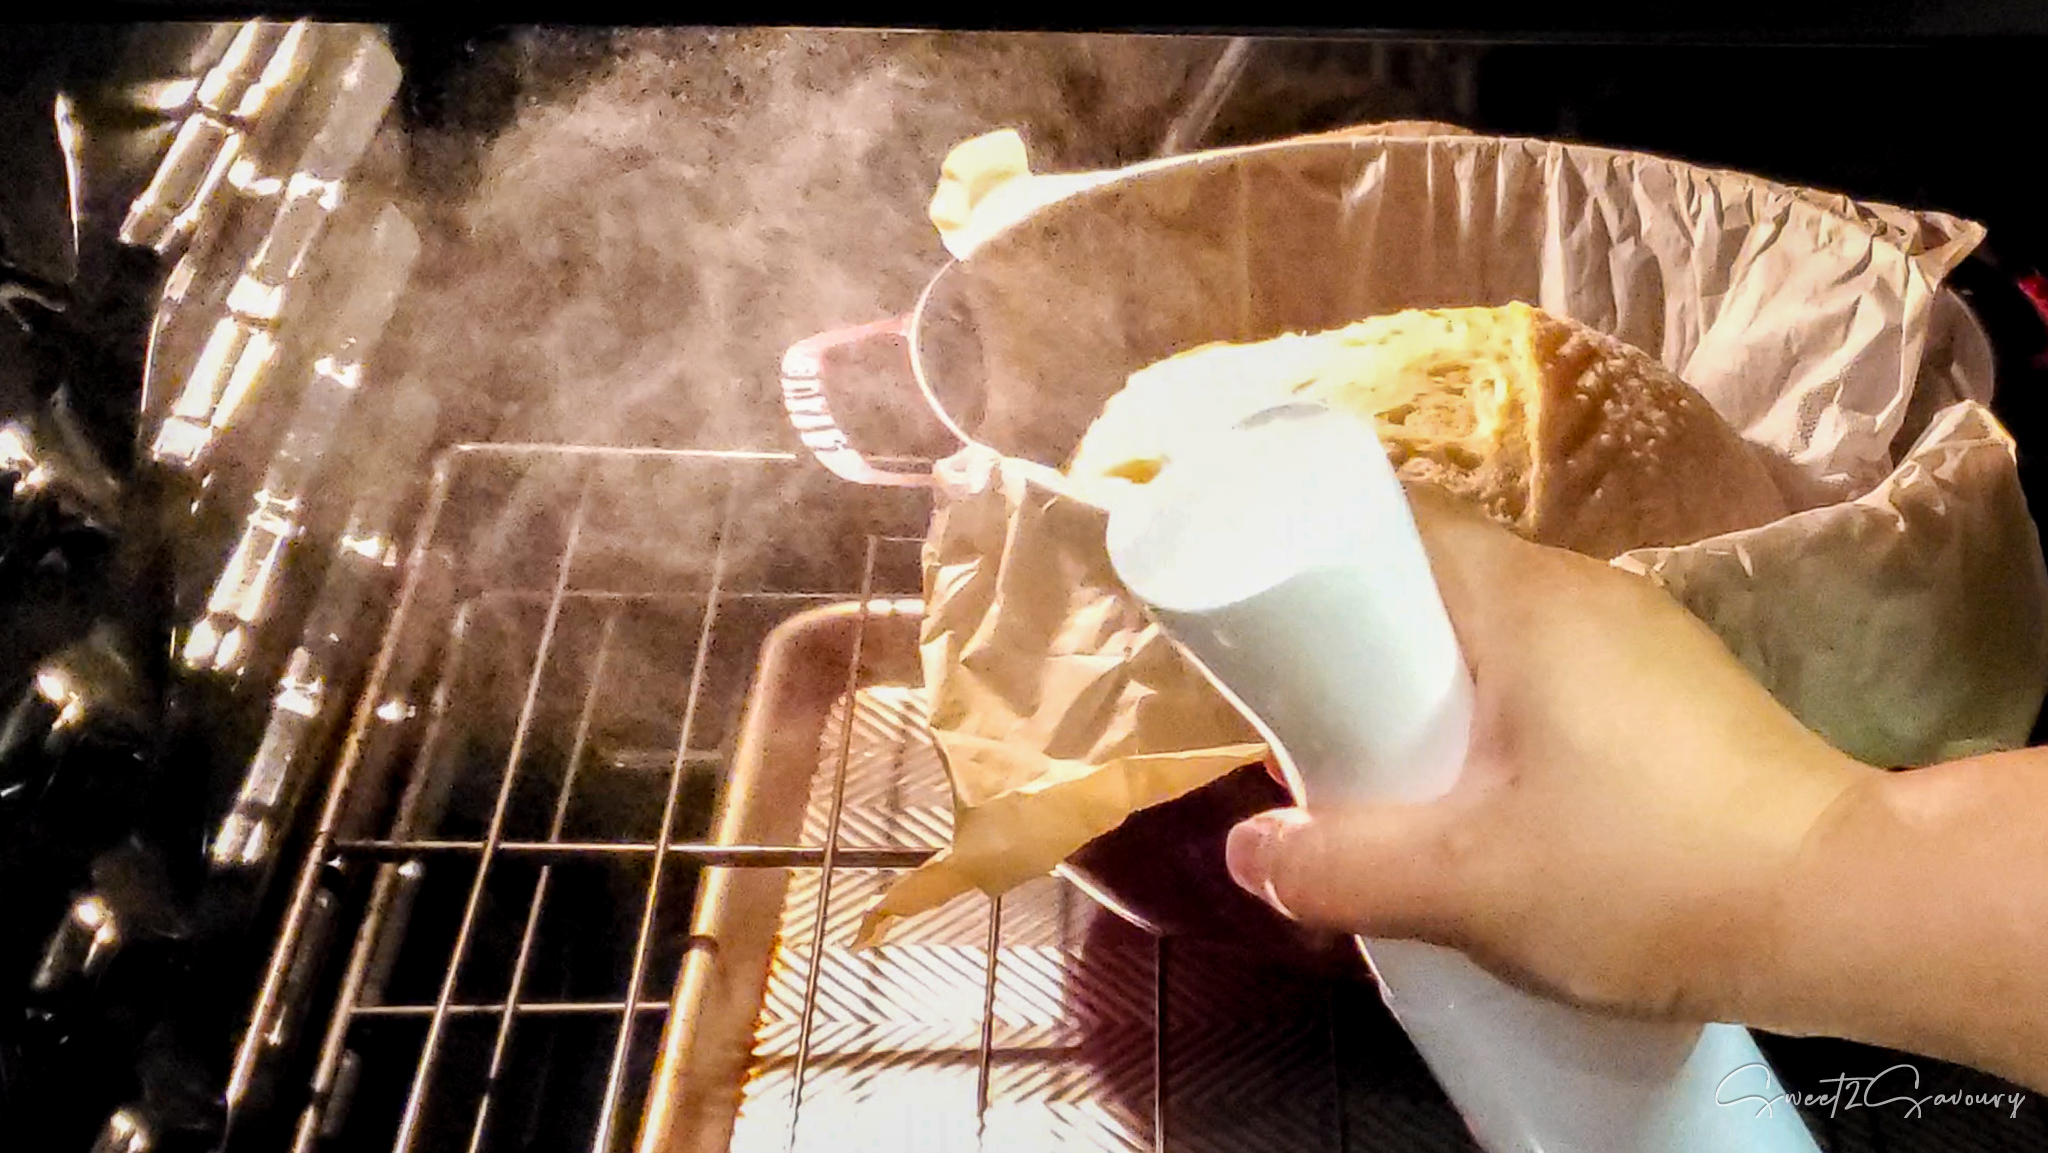
- Bake with Steam: Add a handful of ice cubes into the Dutch oven. Carefully use the parchment paper to lower the bread into the Dutch oven, on top of the ice cubes (be very careful not to touch the pot with your hands; use gloves if necessary). Spray the top side of the bread with a water spray bottle, quickly put the lid on, and bake for 3540 minutes.
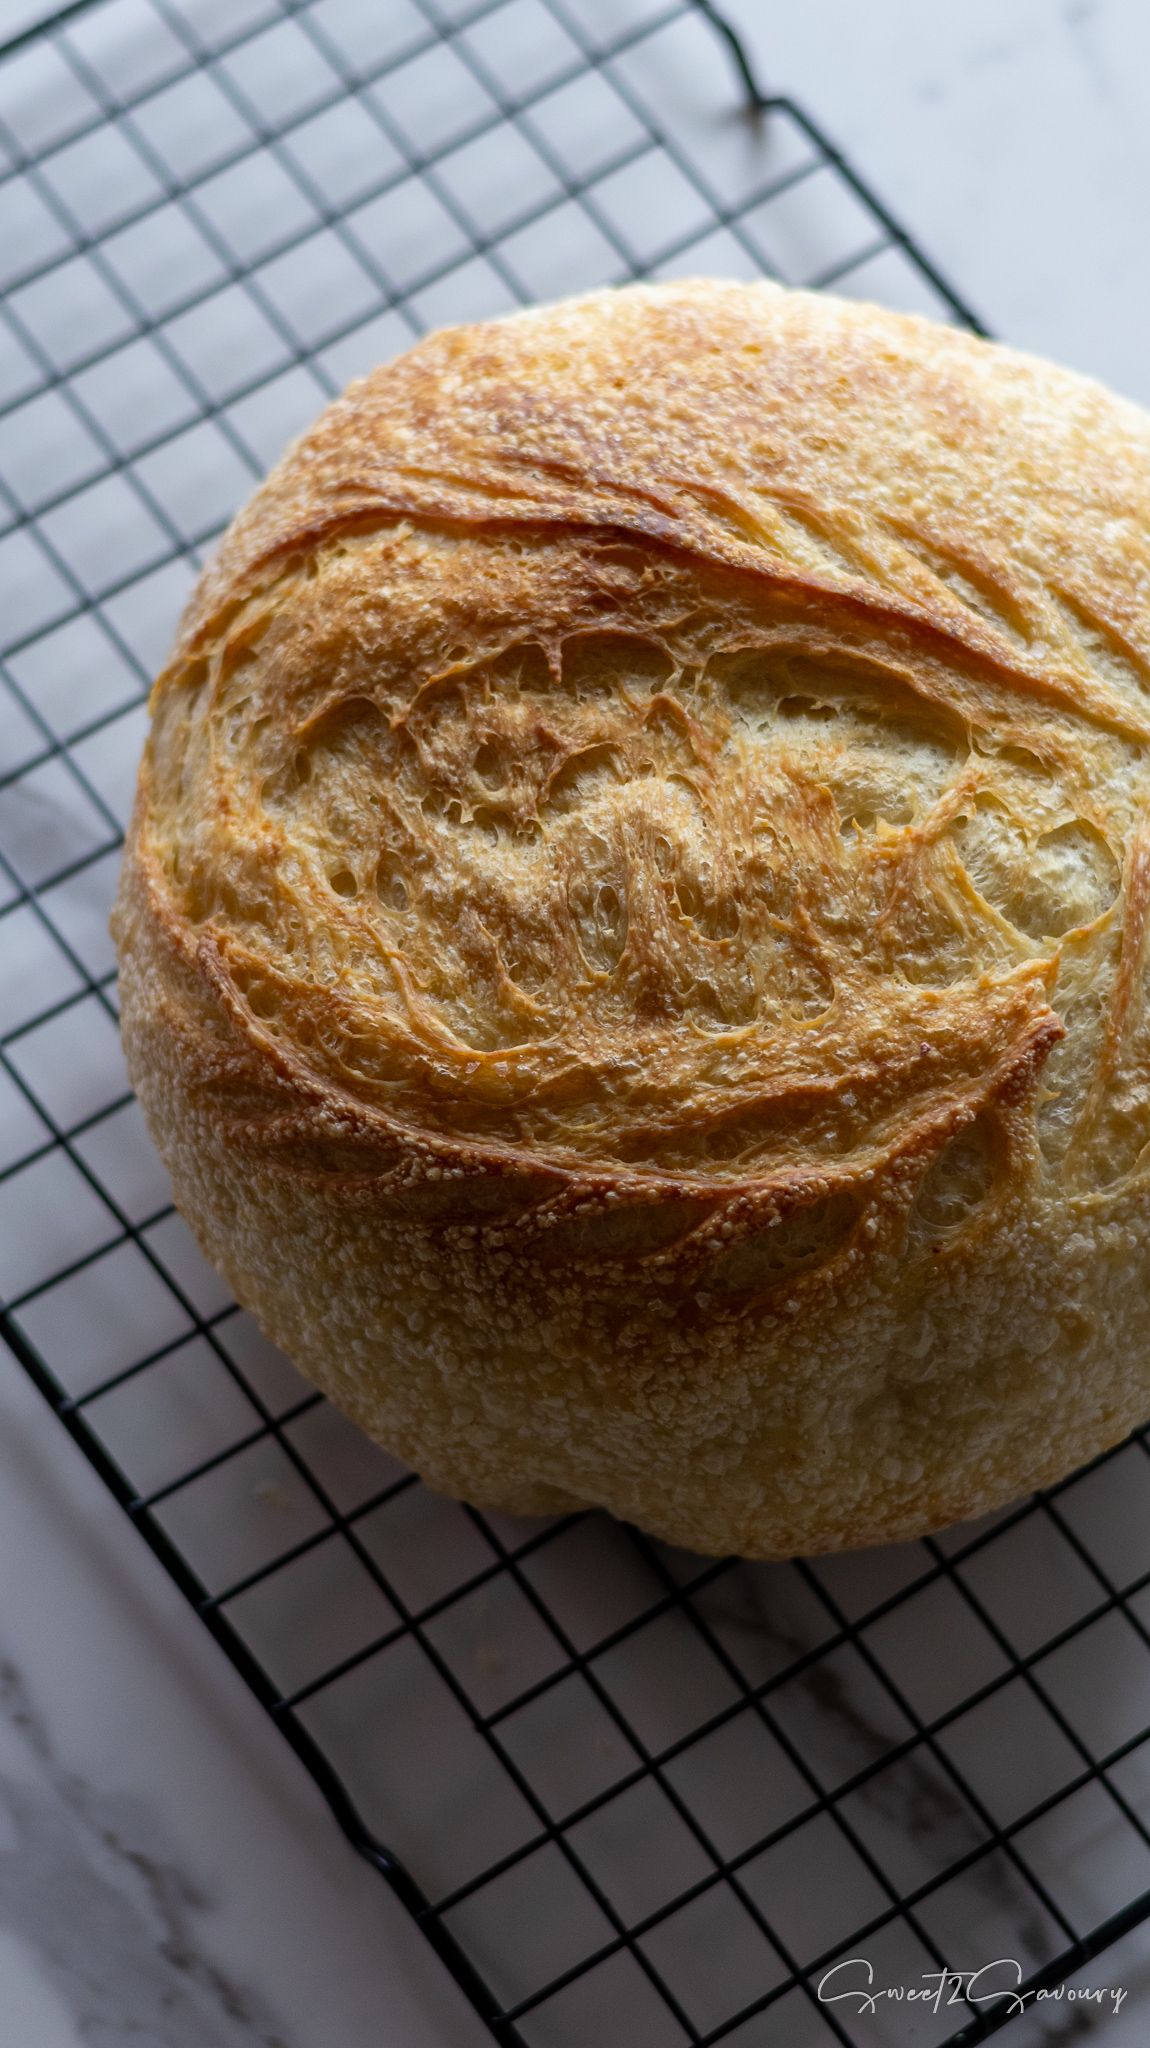
- Bake Uncovered: Remove the lid, spray the loaf with water spray once more, and bake for another 10 – 15 minutes until the crust is deeply golden brown and crispy. Let the bread cool completely on a wire rack before slicing!
💡Pro Tips for Sourdough Success
- Weigh Your Ingredients: For sourdough, using a digital kitchen scale to measure in grams is infinitely more accurate than using measuring cups. Flour compaction can completely change the hydration level of your dough!
- Don’t Rush the Cooling: I know it is incredibly tempting to cut into a hot loaf of bread, but you must let it cool for at least 1 hour. The bread is still cooking internally as it cools. Cutting it while hot will result in a gummy, sticky center!
- Read the Dough, Not the Clock: Fermentation times will vary widely based on your kitchen’s temperature. In a warm summer kitchen, bulk fermentation may only take 2 hours. In the winter, it could take 4+. Watch for the dough to be bubbly and doubled in size, regardless of the time.
What to Serve with Fresh Sourdough
There is nothing better than a thick slice of sourdough slathered in butter, but it is also the perfect vehicle for soaking up savoury broths and sauces! Serve it alongside:
- Easy Pork & Pumpkin Soup with Coconut Milk: The ultimate dunking companion.
- Red Wine Braised Beef Short Ribs: Use a slice of toasted sourdough to wipe the plate clean of that incredible braising sauce!
Frequently Asked Questions
Why do I need to score the bread?
Scoring isn’t just to make the bread look pretty! It creates a designated weak point for the dough to expand as it rapidly rises in the hot oven (called “oven spring”). Without scoring, your bread will burst open randomly along the sides or bottom.
What is an “Autolyse”?
Autolyse (pronounced aw-toe-lease) is the process of mixing just your flour, water, and starter, and letting it rest before adding the salt. Salt tightens gluten, so giving the flour time to hydrate on its own makes the dough much stretchier and easier to work with!
Can I bake this without a Dutch oven?
A Dutch oven is highly recommended because it traps the steam evaporating from the dough, which keeps the crust soft enough to expand before finally hardening into that crispy crust. If you don’t have one, you can bake the bread on a heavy baking sheet or pizza stone, and place a cast-iron skillet full of boiling water on the bottom rack of your oven to create steam.
Pin it for later
Foolproof Sourdough Bread (Crispy Crust & Soft Center)
Ingredients
- ¾ cup unbleached bread flour
- ½ cup (minus 2 teaspoons) filtered water room temperature
- ½ cup sourdough starter room temperature
- 2¼ cup unbleached bread flour
- ¾ cup filtered water room temperature
- 1 teaspoon salt kosher or sea salt
- 1 teaspoon white sugar
- 1 Tablespoon olive oil extra virgin
Method
- In a medium glass bowl, combine the unbleached bread flour, room-temperature filtered water, and active sourdough starter. Stir until fully combined. Cover with plastic wrap and a clean kitchen towel.
- Let it sit at room temperature for 2 to 4 hours, or until it has doubled in volume and is full of small bubbles. (Note: If your kitchen is cool, place the bowl in the oven with the oven light on).
- In the bowl of a stand mixer, add the bubbly poolish, bread flour, and filtered water. Using a dough hook, mix on low speed until just combined into a shaggy dough.
- Stop the mixer, cover the bowl with a clean towel, and let it rest for exactly 20 minutes. (This process is called autolyse and helps develop gluten).
- After the 20-minute rest, add the kosher salt and white sugar to the bowl. Mix on medium speed for 7 minutes (or knead by hand for 15 minutes) until the dough is smooth, pliable, and pulls away from the sides of the bowl. Reduce the speed to low and drizzle the olive oil in to coat the dough evenly.
- Transfer the dough to a piece of parchment paper, shape it into a round ball (seam side down), and place it in a large bowl. Cover loosely with plastic wrap and a towel.
- Let it rise in a warm spot for 2 to 4 hours, or until it becomes puffy and doubles in size.
- Lift the parchment with the dough onto the counter. Gently stretch the dough outwards into a large rectangle, then fold it over itself (like an envelope). Shape it back into a tight round loaf, place it back on the parchment, and cover it again. Set a timer for 40 minutes.
- After 40 minutes, flip the dough over (keeping the seam on the same side) and repeat the stretch and fold process.
- Repeat this stretching and resting process 2 more times, waiting 40 minutes between each fold.
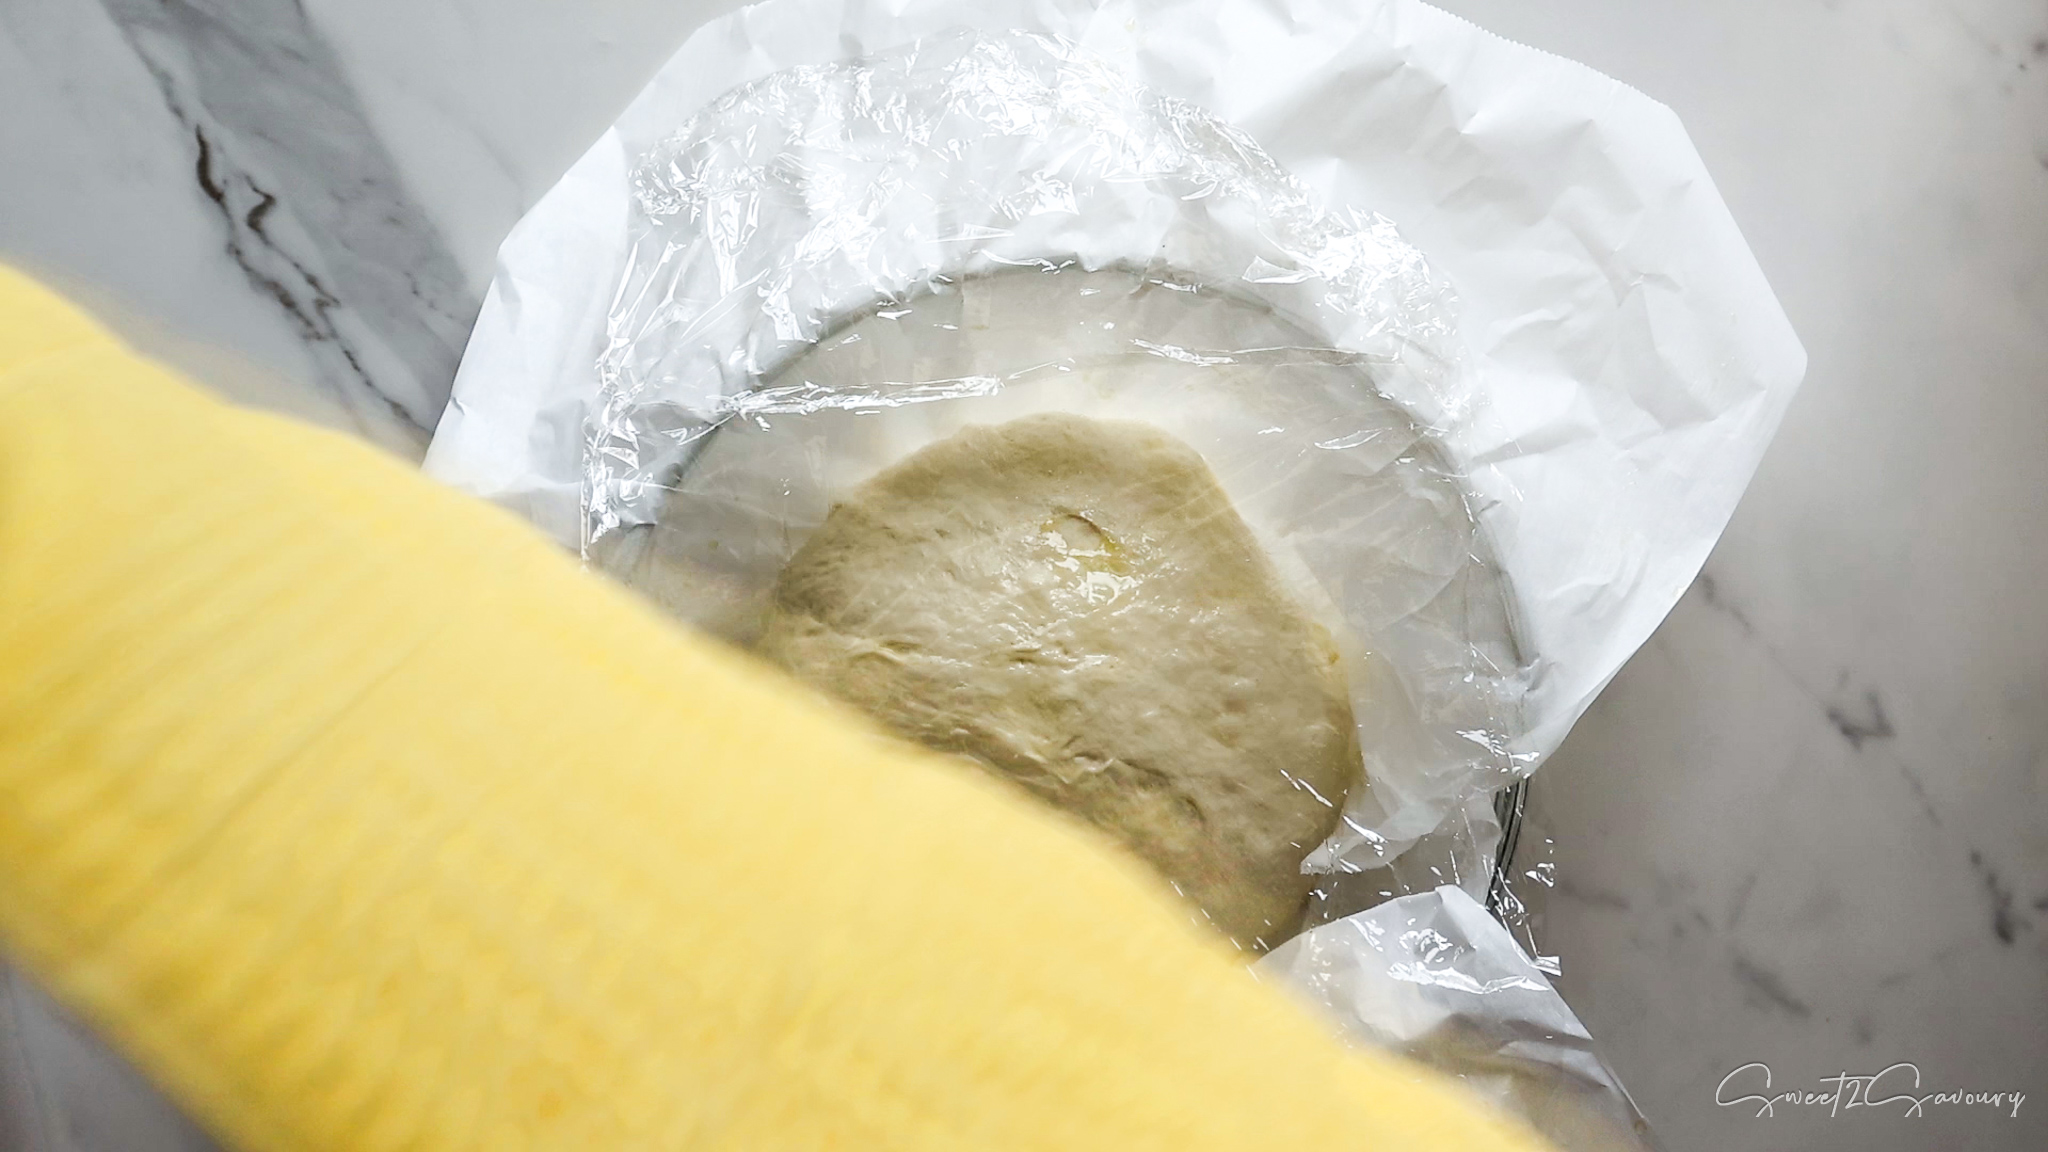
- After the final fold and pinch, cover the bowl lightly with plastic wrap (don't wrap the sides to allow dough room to rise) and a clean towel.Place it in the refrigerator for 12 to 15 hours (overnight) to cold-proof. Ensure nothing is pressing down on the dough.
- Preheat your oven to 475°F (246°C). Position your oven racks on the lowest and mid-lowest levels. Place a baking tray on the lowest rack, and an empty Dutch oven (with the lid on) on the mid-lowest rack to preheat.
- Remove the dough from the fridge. Using a lame or sharp knife, make a deep slash across the top of the dough (or a pattern of your choice). Drizzle with a little olive oil and sprinkle with sea salt.
- Using oven mitts, carefully remove the hot Dutch oven. Take off the lid and add a handful of ice cubes inside.
- Using the parchment paper, carefully lower the dough into the pot on top of the ice cubes. Generously mist the dough with water, quickly close the lid, and place it back in the oven. Bake for 40 minutes.
- After 40 minutes, remove the lid and rotate the pot 180°. Spray the loaf and the inside of the oven with water once more. Bake uncovered for another 10 to 15 minutes until the crust is deeply golden brown.
- Transfer the bread to a wire rack and let it cool for at least 1 hour before slicing to ensure the center sets perfectly and the exterior has a crispy crust.