This post may contain affiliate links, which means I’ll receive a commission if you purchase through my links, at no extra cost to you. This helps keep the content on my site free. please read my disclosure here
Are you wondering which pumpkin is best for homemade puree? In this post, I compare pie pumpkin and carving pumpkin to show you the key differences in flavour and texture. Read on to learn how to make your own pumpkin puree from scratch and decide which puree is best for your recipe!
When it comes to fall baking, homemade pumpkin puree can make a big difference. While canned puree works great in a pinch, the flavour is much better when you make it from scratch. So, which type of pumpkin should you use – pie pumpkin or carving pumpkin? The choice between these two can affect the flavour and texture of your recipes, and it can also come down to personal preference.
What’s the Difference Between Pie Pumpkin and Carving Pumpkin?
Pie Pumpkin (Sugar Pumpkin)
Flavour & Appearance: Smaller, sweeter, and denser taste. Has a deep orange colour and thick flesh with a thin rind. Usually weighs around 2 - 4 pounds.
Texture: Thicker and creamier consistency in puree form.
Best For: Cooking and baking such as pumpkin soup, bread, pie, and other desserts.
Carving Pumpkin
Flavour & Appearance: Larger, often used for jack-o'-lanterns, and great for decorations. Less sweet, and more watery than pie pumpkin. The rind is thick and has more stringy, fibrous strands in the flesh than pie pumpkin. Usually weighs around 10 or more pounds.
Texture: Thinner consistency in puree form.
Best For: Carving, but can also be used for recipes that require a milder pumpkin flavour (or to use up leftover after carving)
*Good To Know*
Why is homemade pumpkin puree lighter in colour than canned?
When you make homemade puree from scratch, it will usually be lighter in colour because it’s made with only one type of pumpkin, like the pie pumpkin (also known as sugar pumpkin).
On the other hand, some canned pumpkins are typically made from a variety of squash and pumpkin, including squash with a darker, deeper orange flesh, such as butternut squash (or Dickinson squash if you’re in the U.S. or Canada). Other ‘common field pumpkins‘ can include Hubbard, or Boston Marrow squash.
Additionally, when you roast your own pumpkin at home to make a puree, the cooking process is gentler compared to canned pumpkins. The manufactured puree often undergoes a more intense cooking process, which can deepen the puree’s colour.
To find out which pumpkin is best for puree, I made both from scratch. Here’s how you can do it:
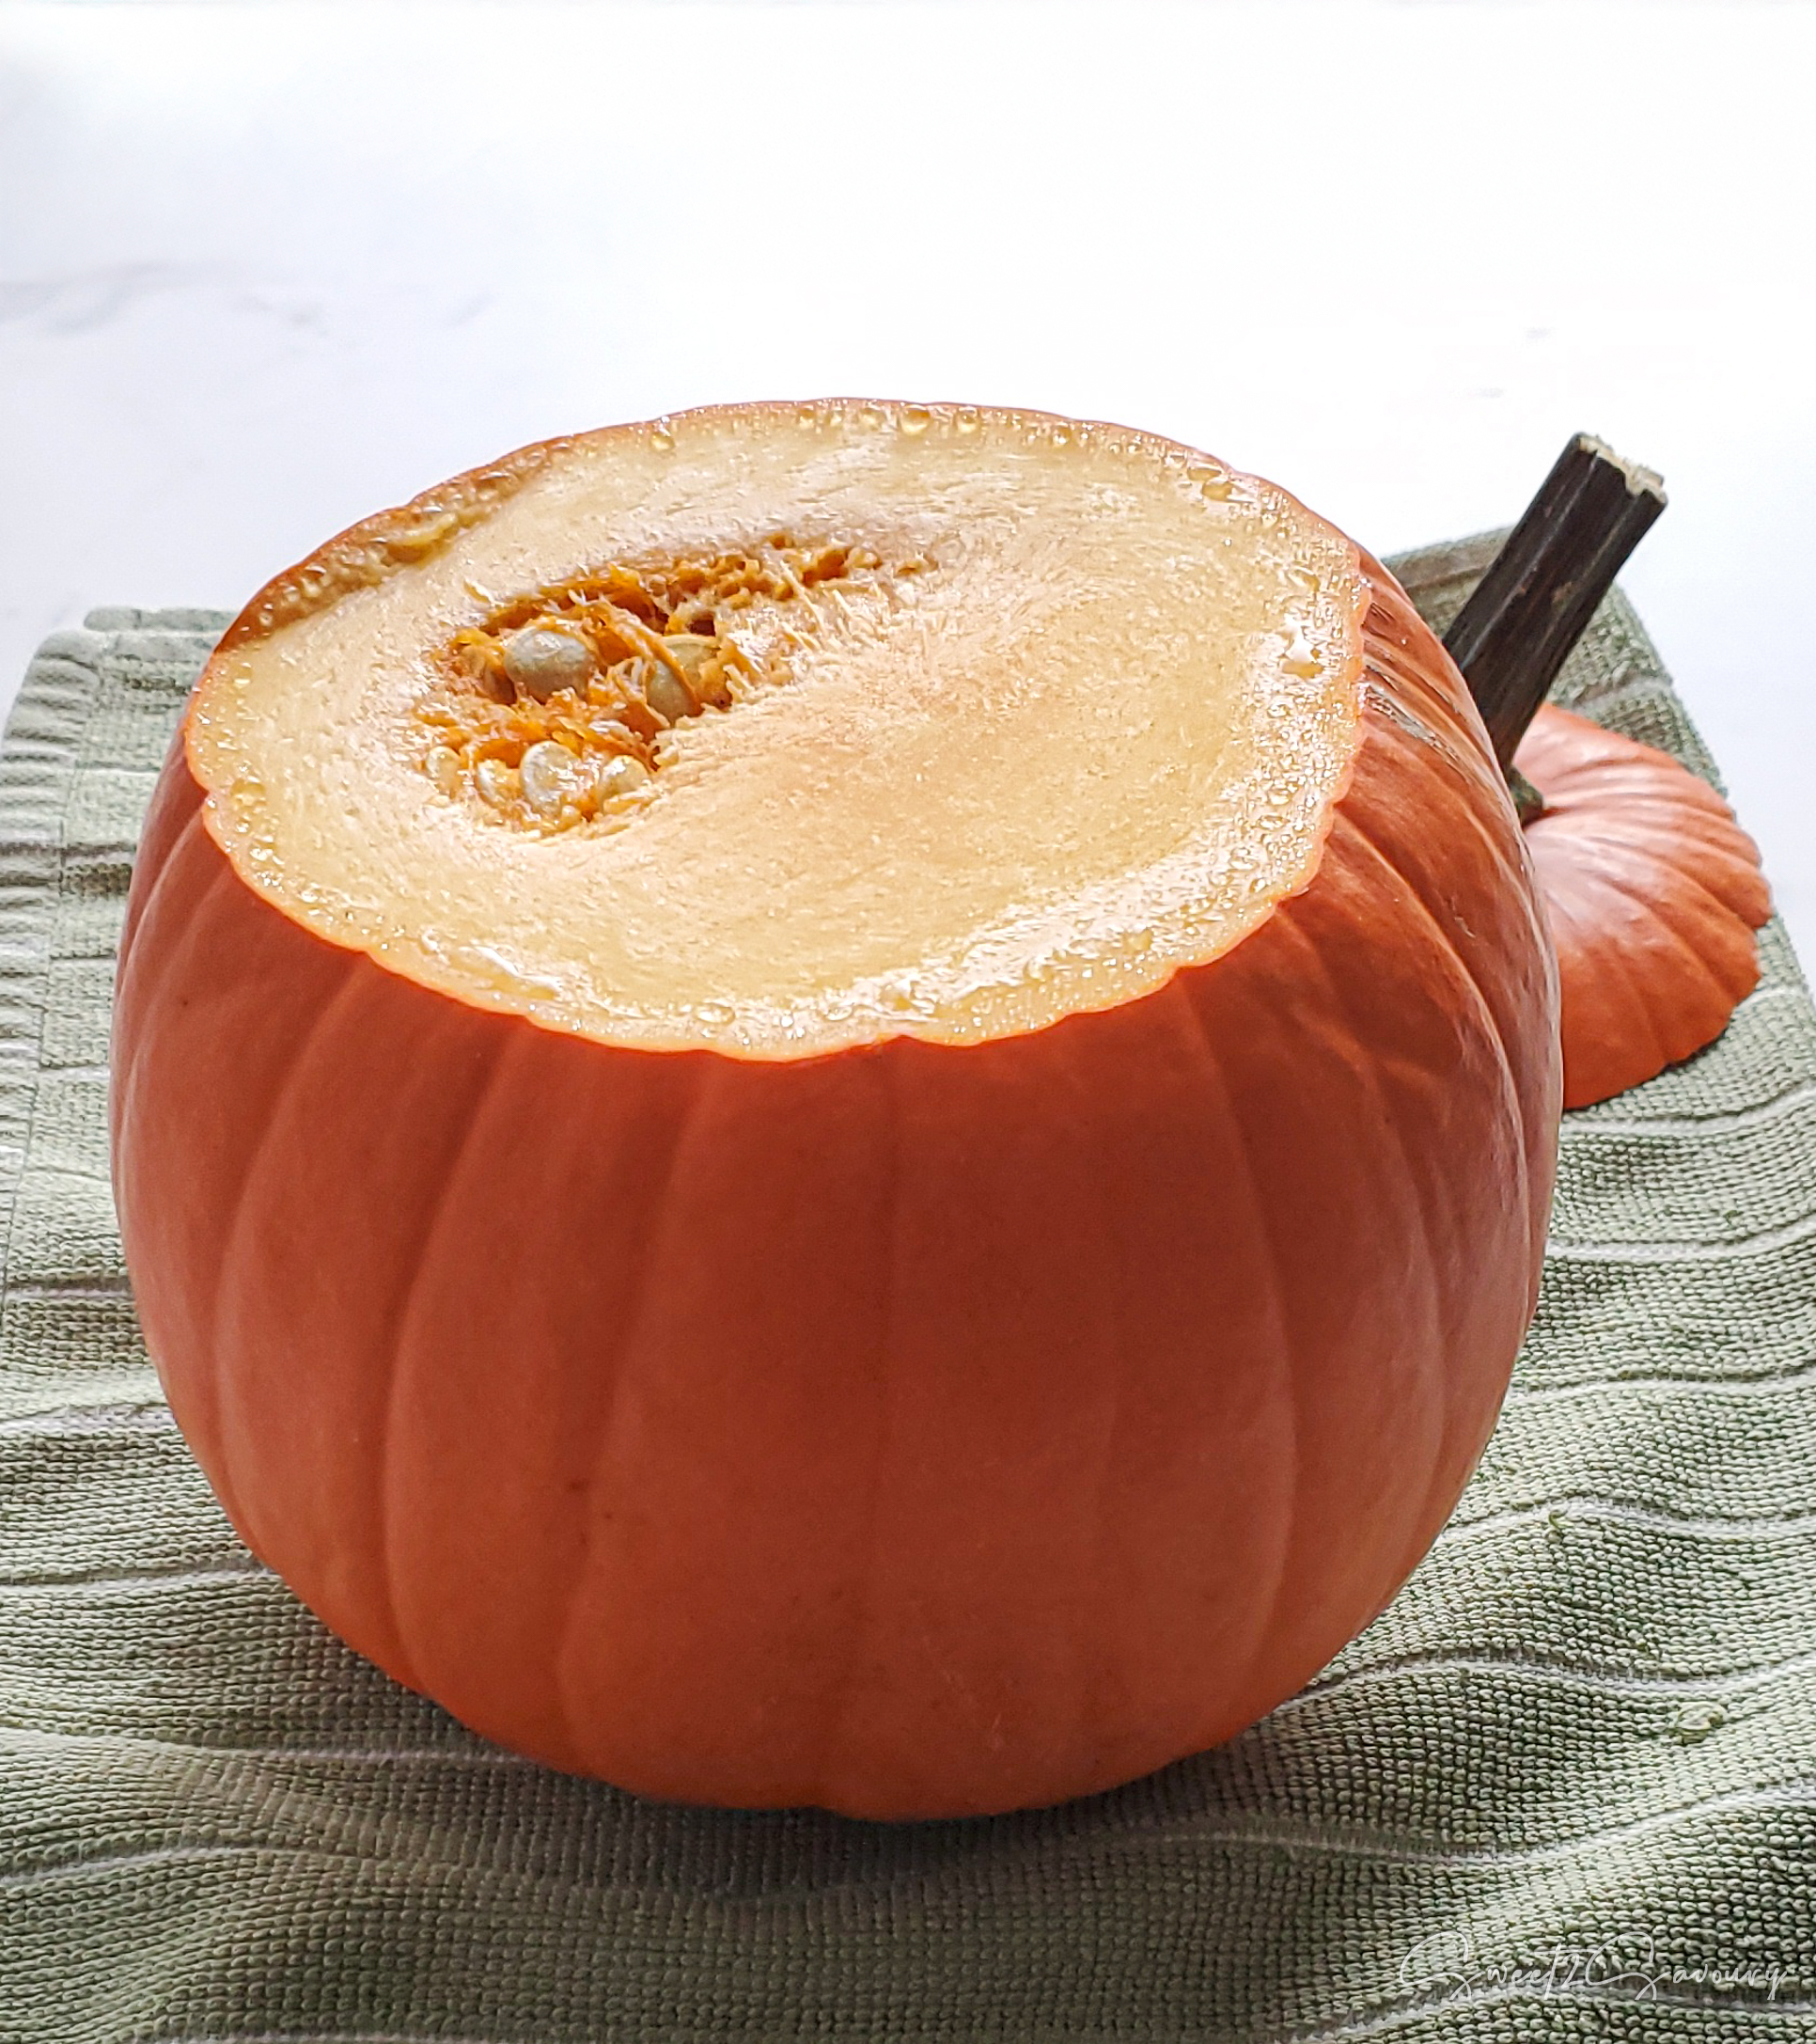
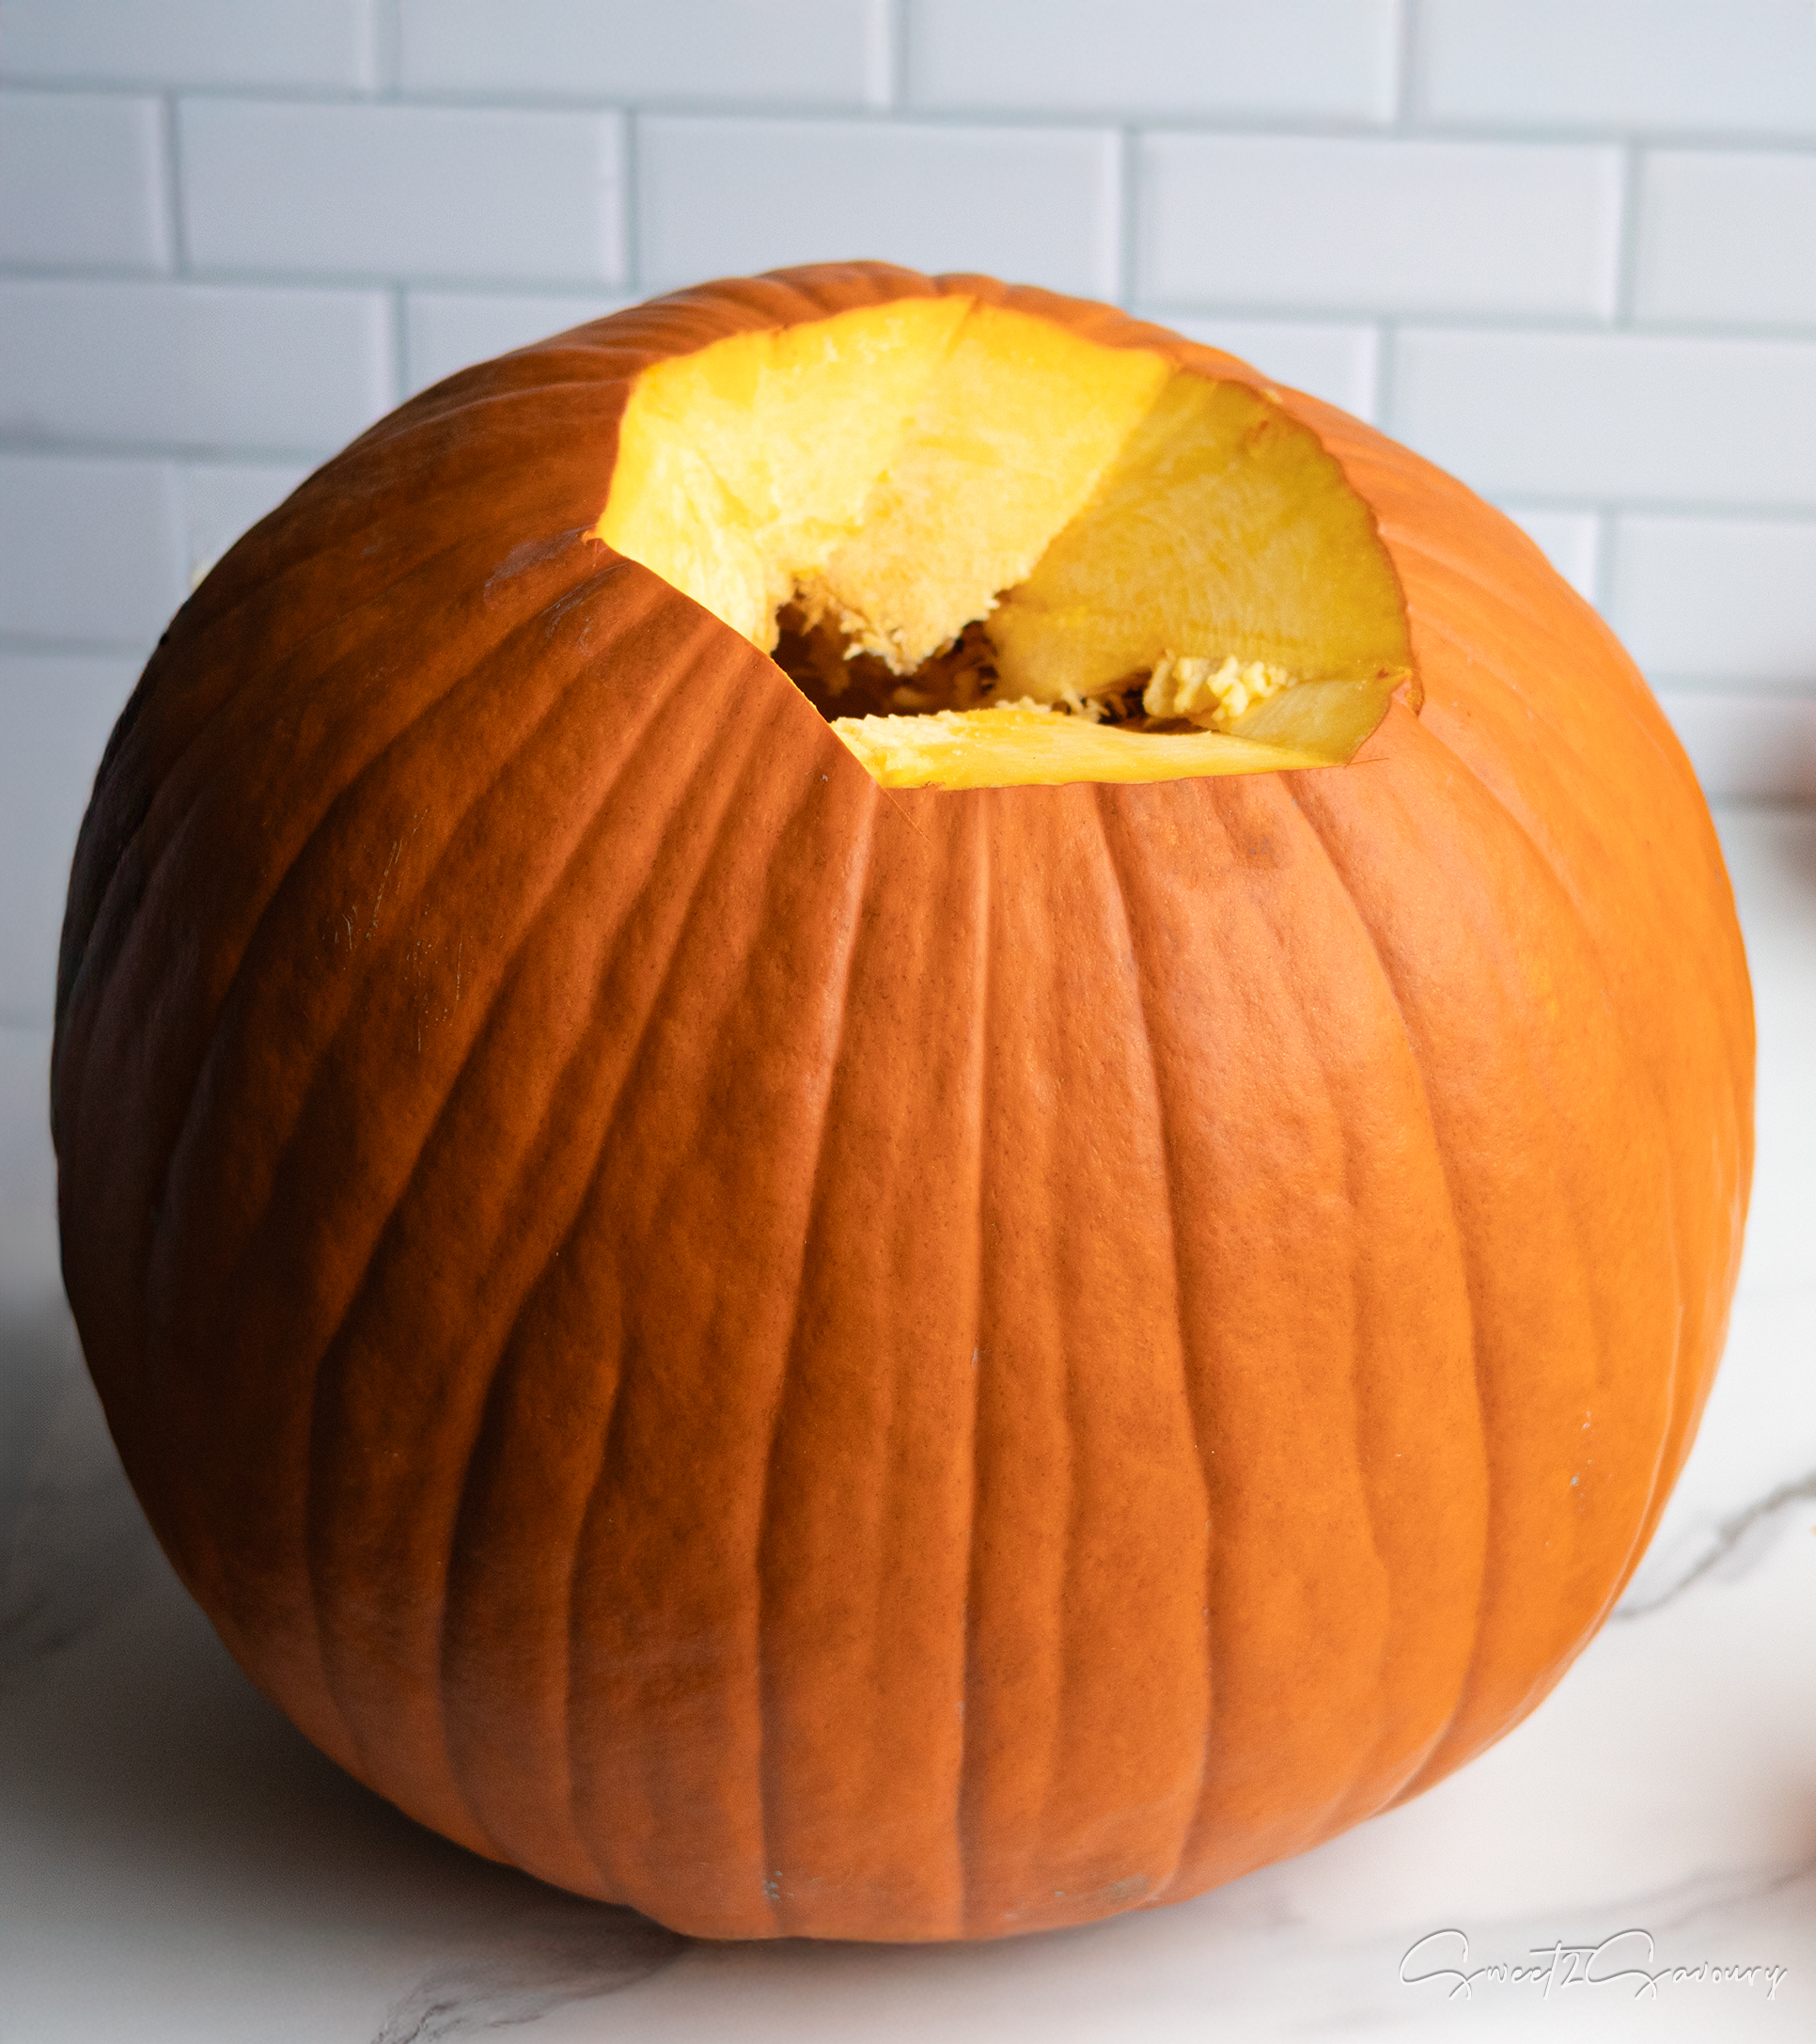
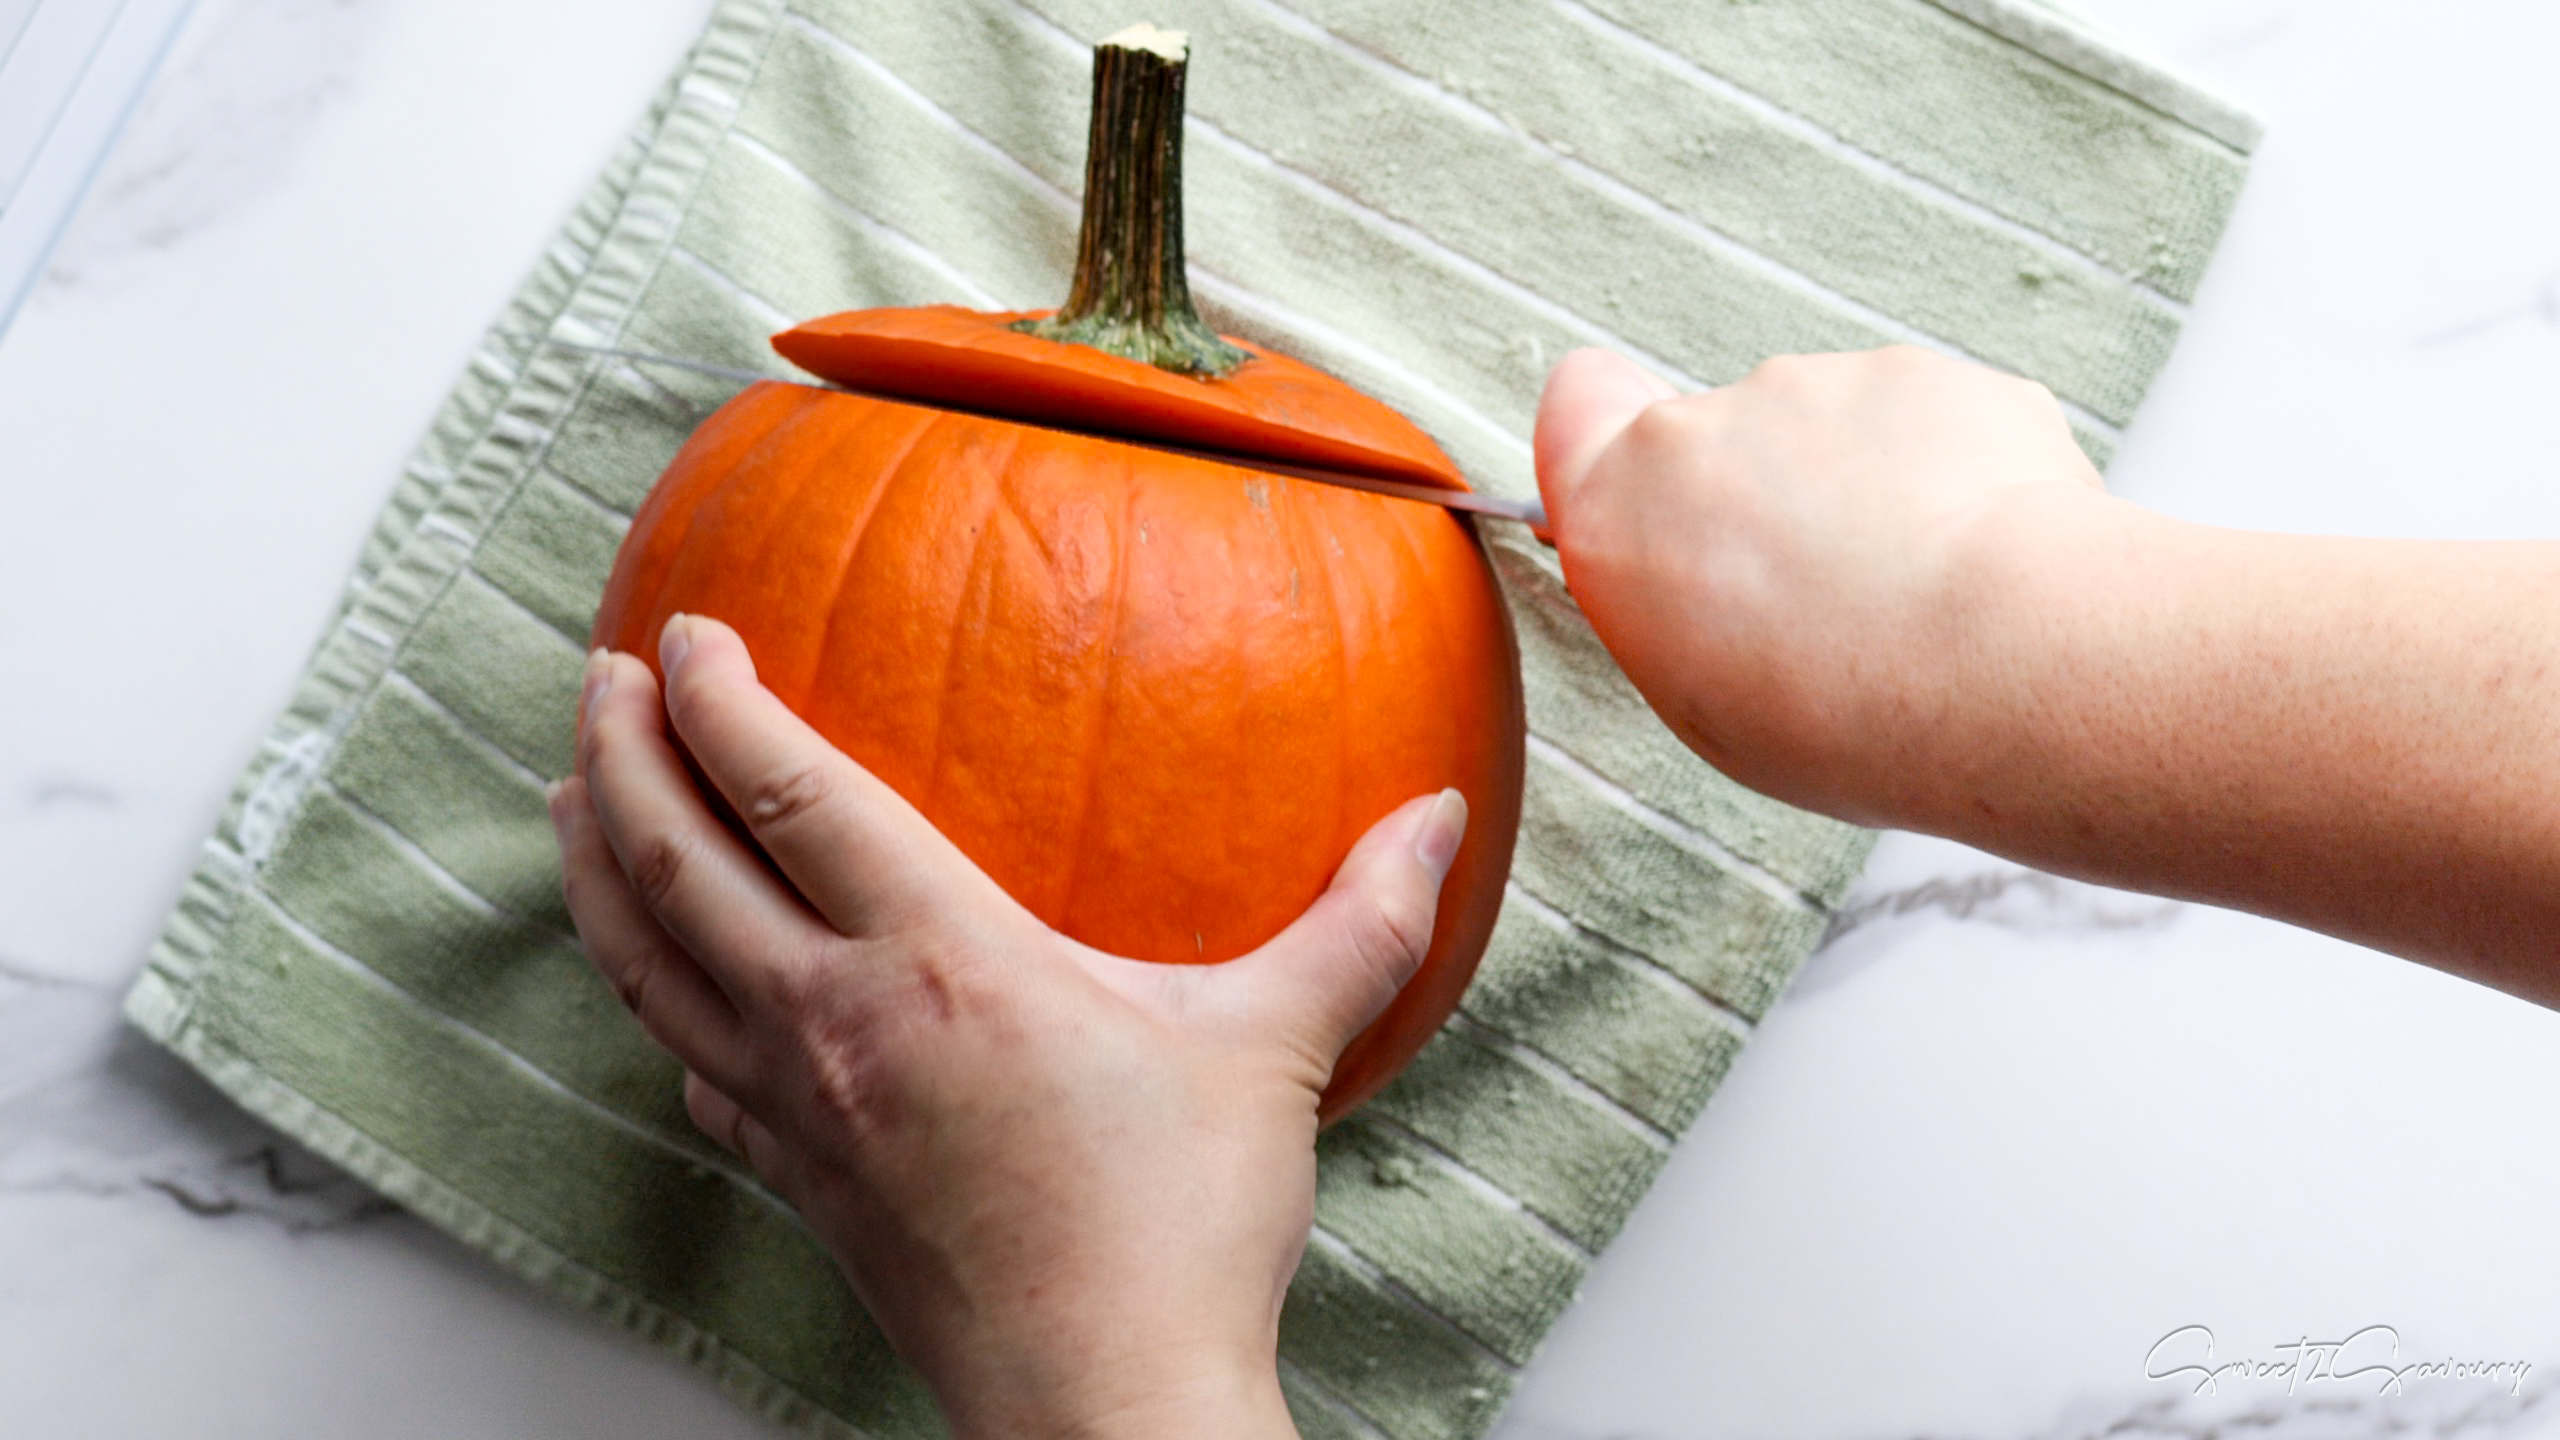
Trim the top: Place the pumpkin on its side (with a hand towel underneath to prevent it from sliding) and carefully cut off the top, where the stem is located. If using a carving pumpkin, you may need to cut around the stem instead.
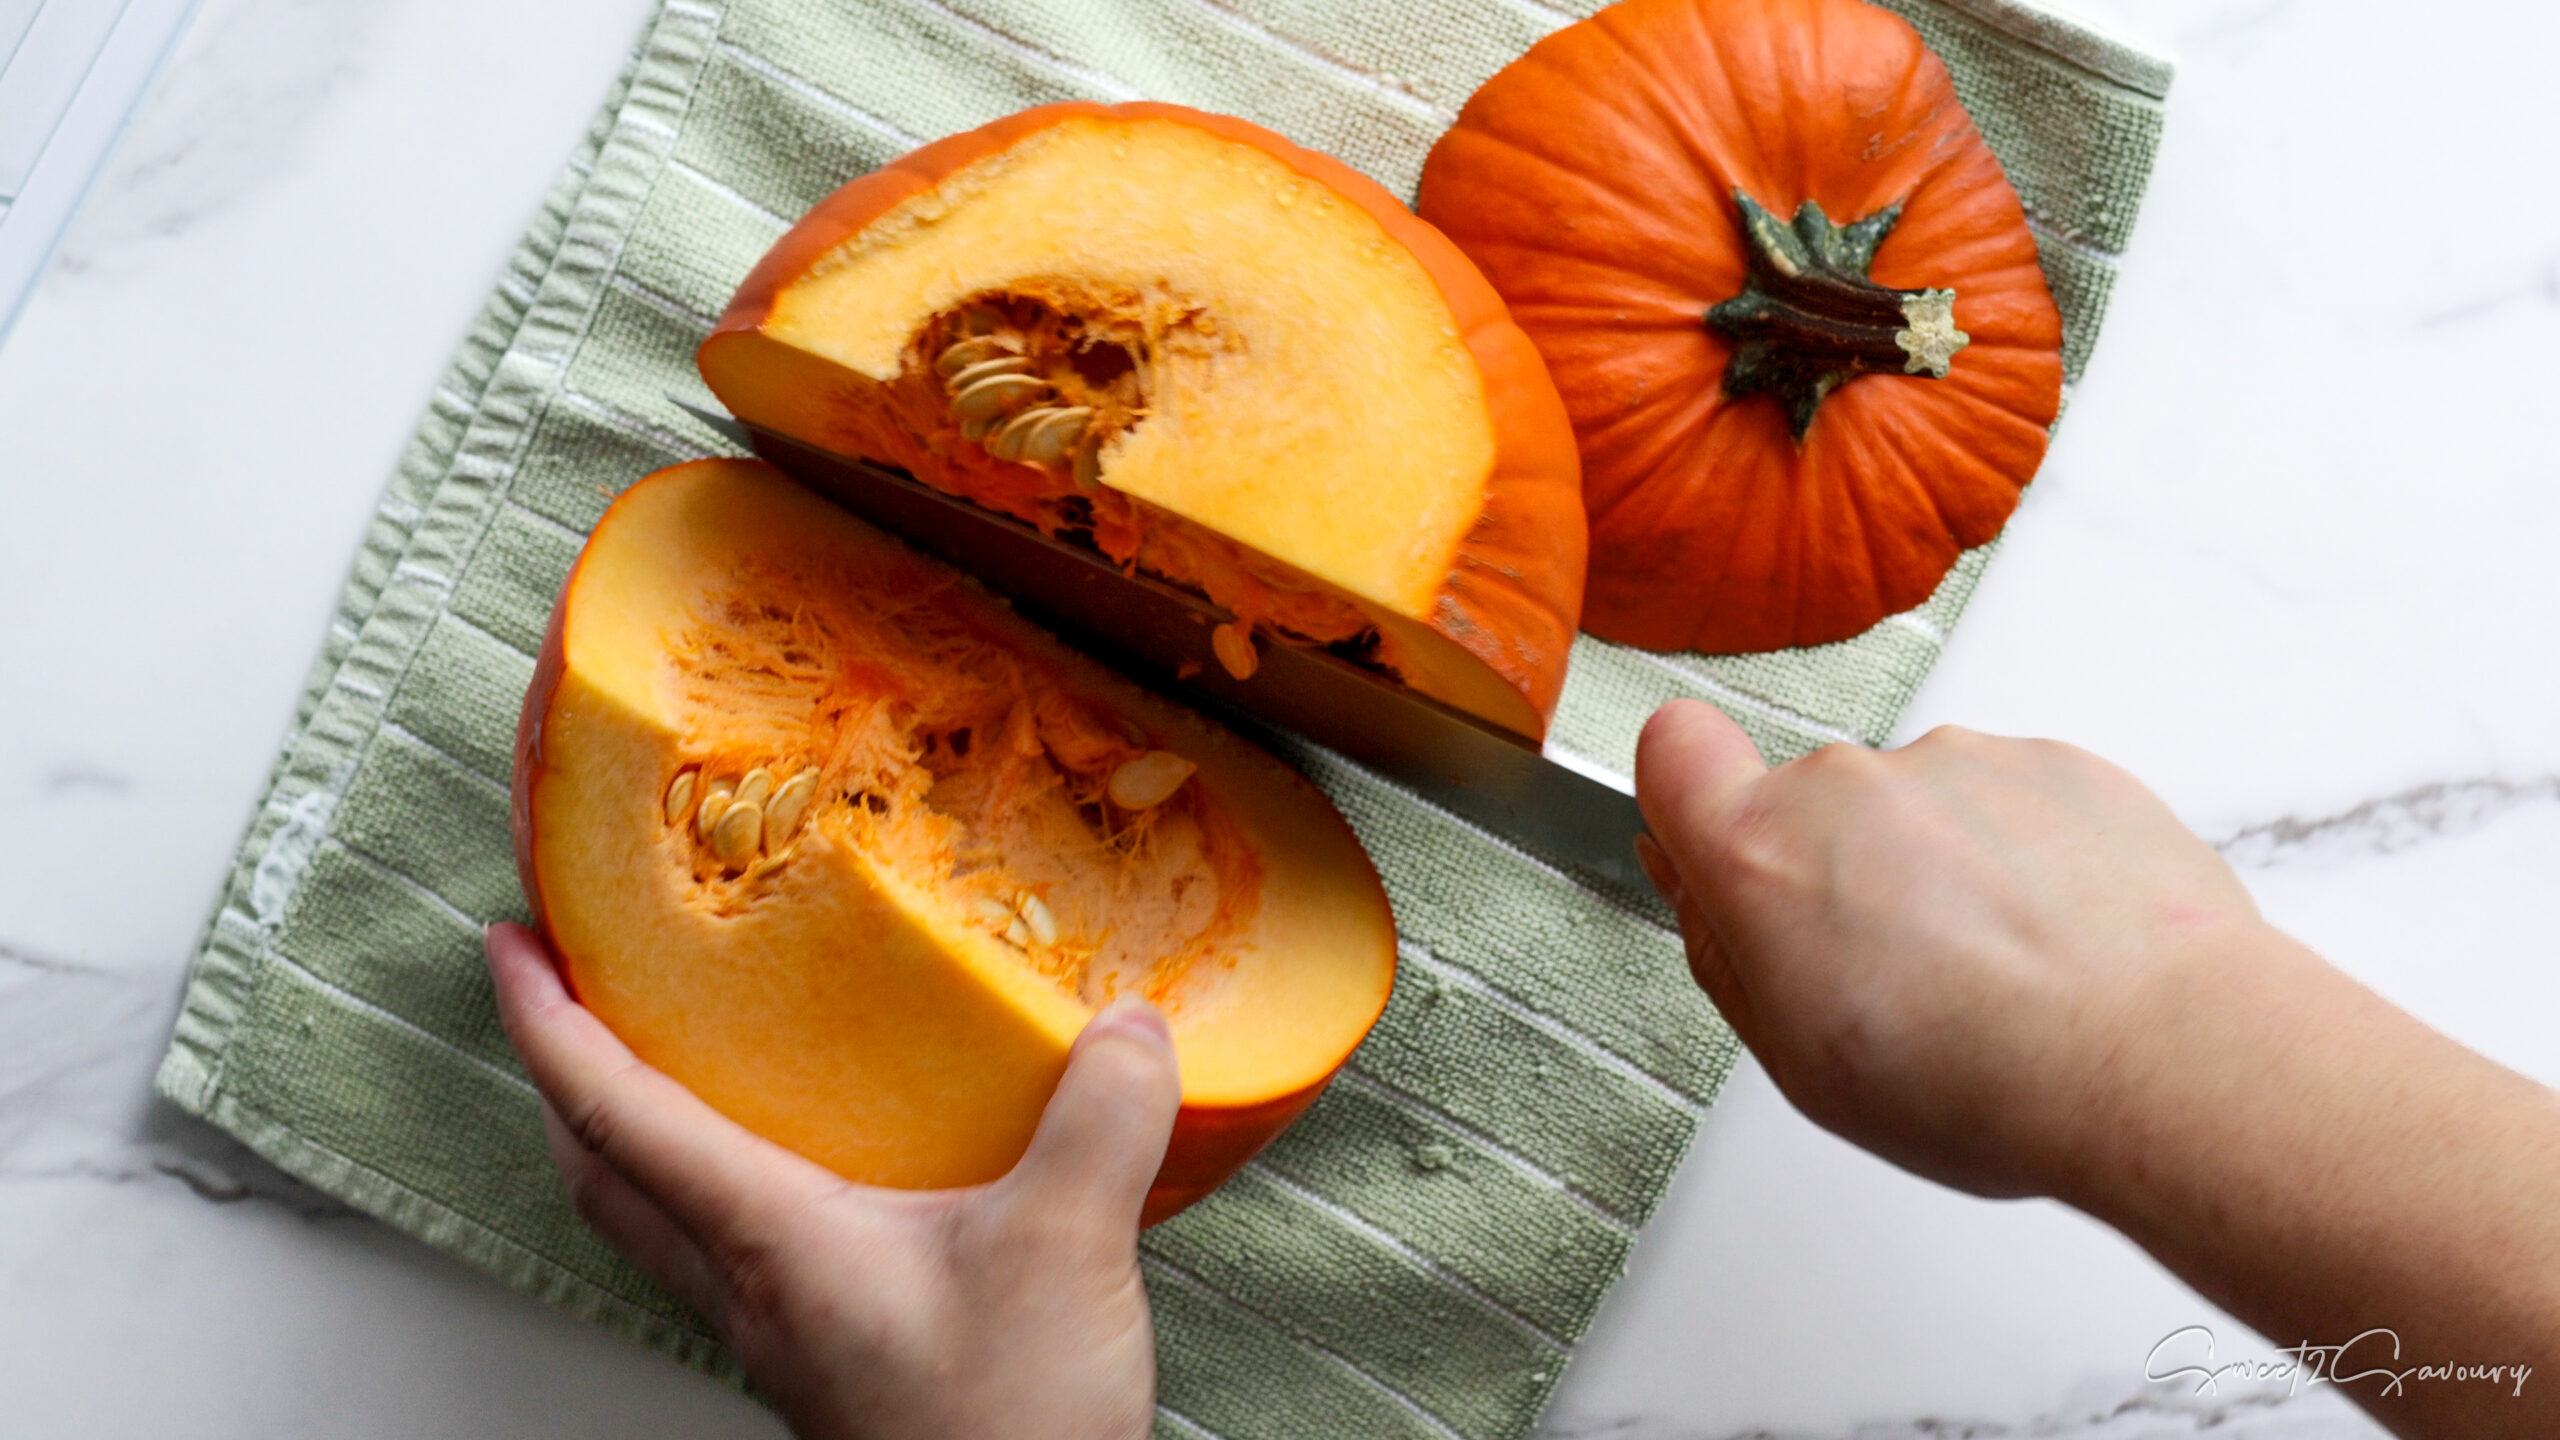
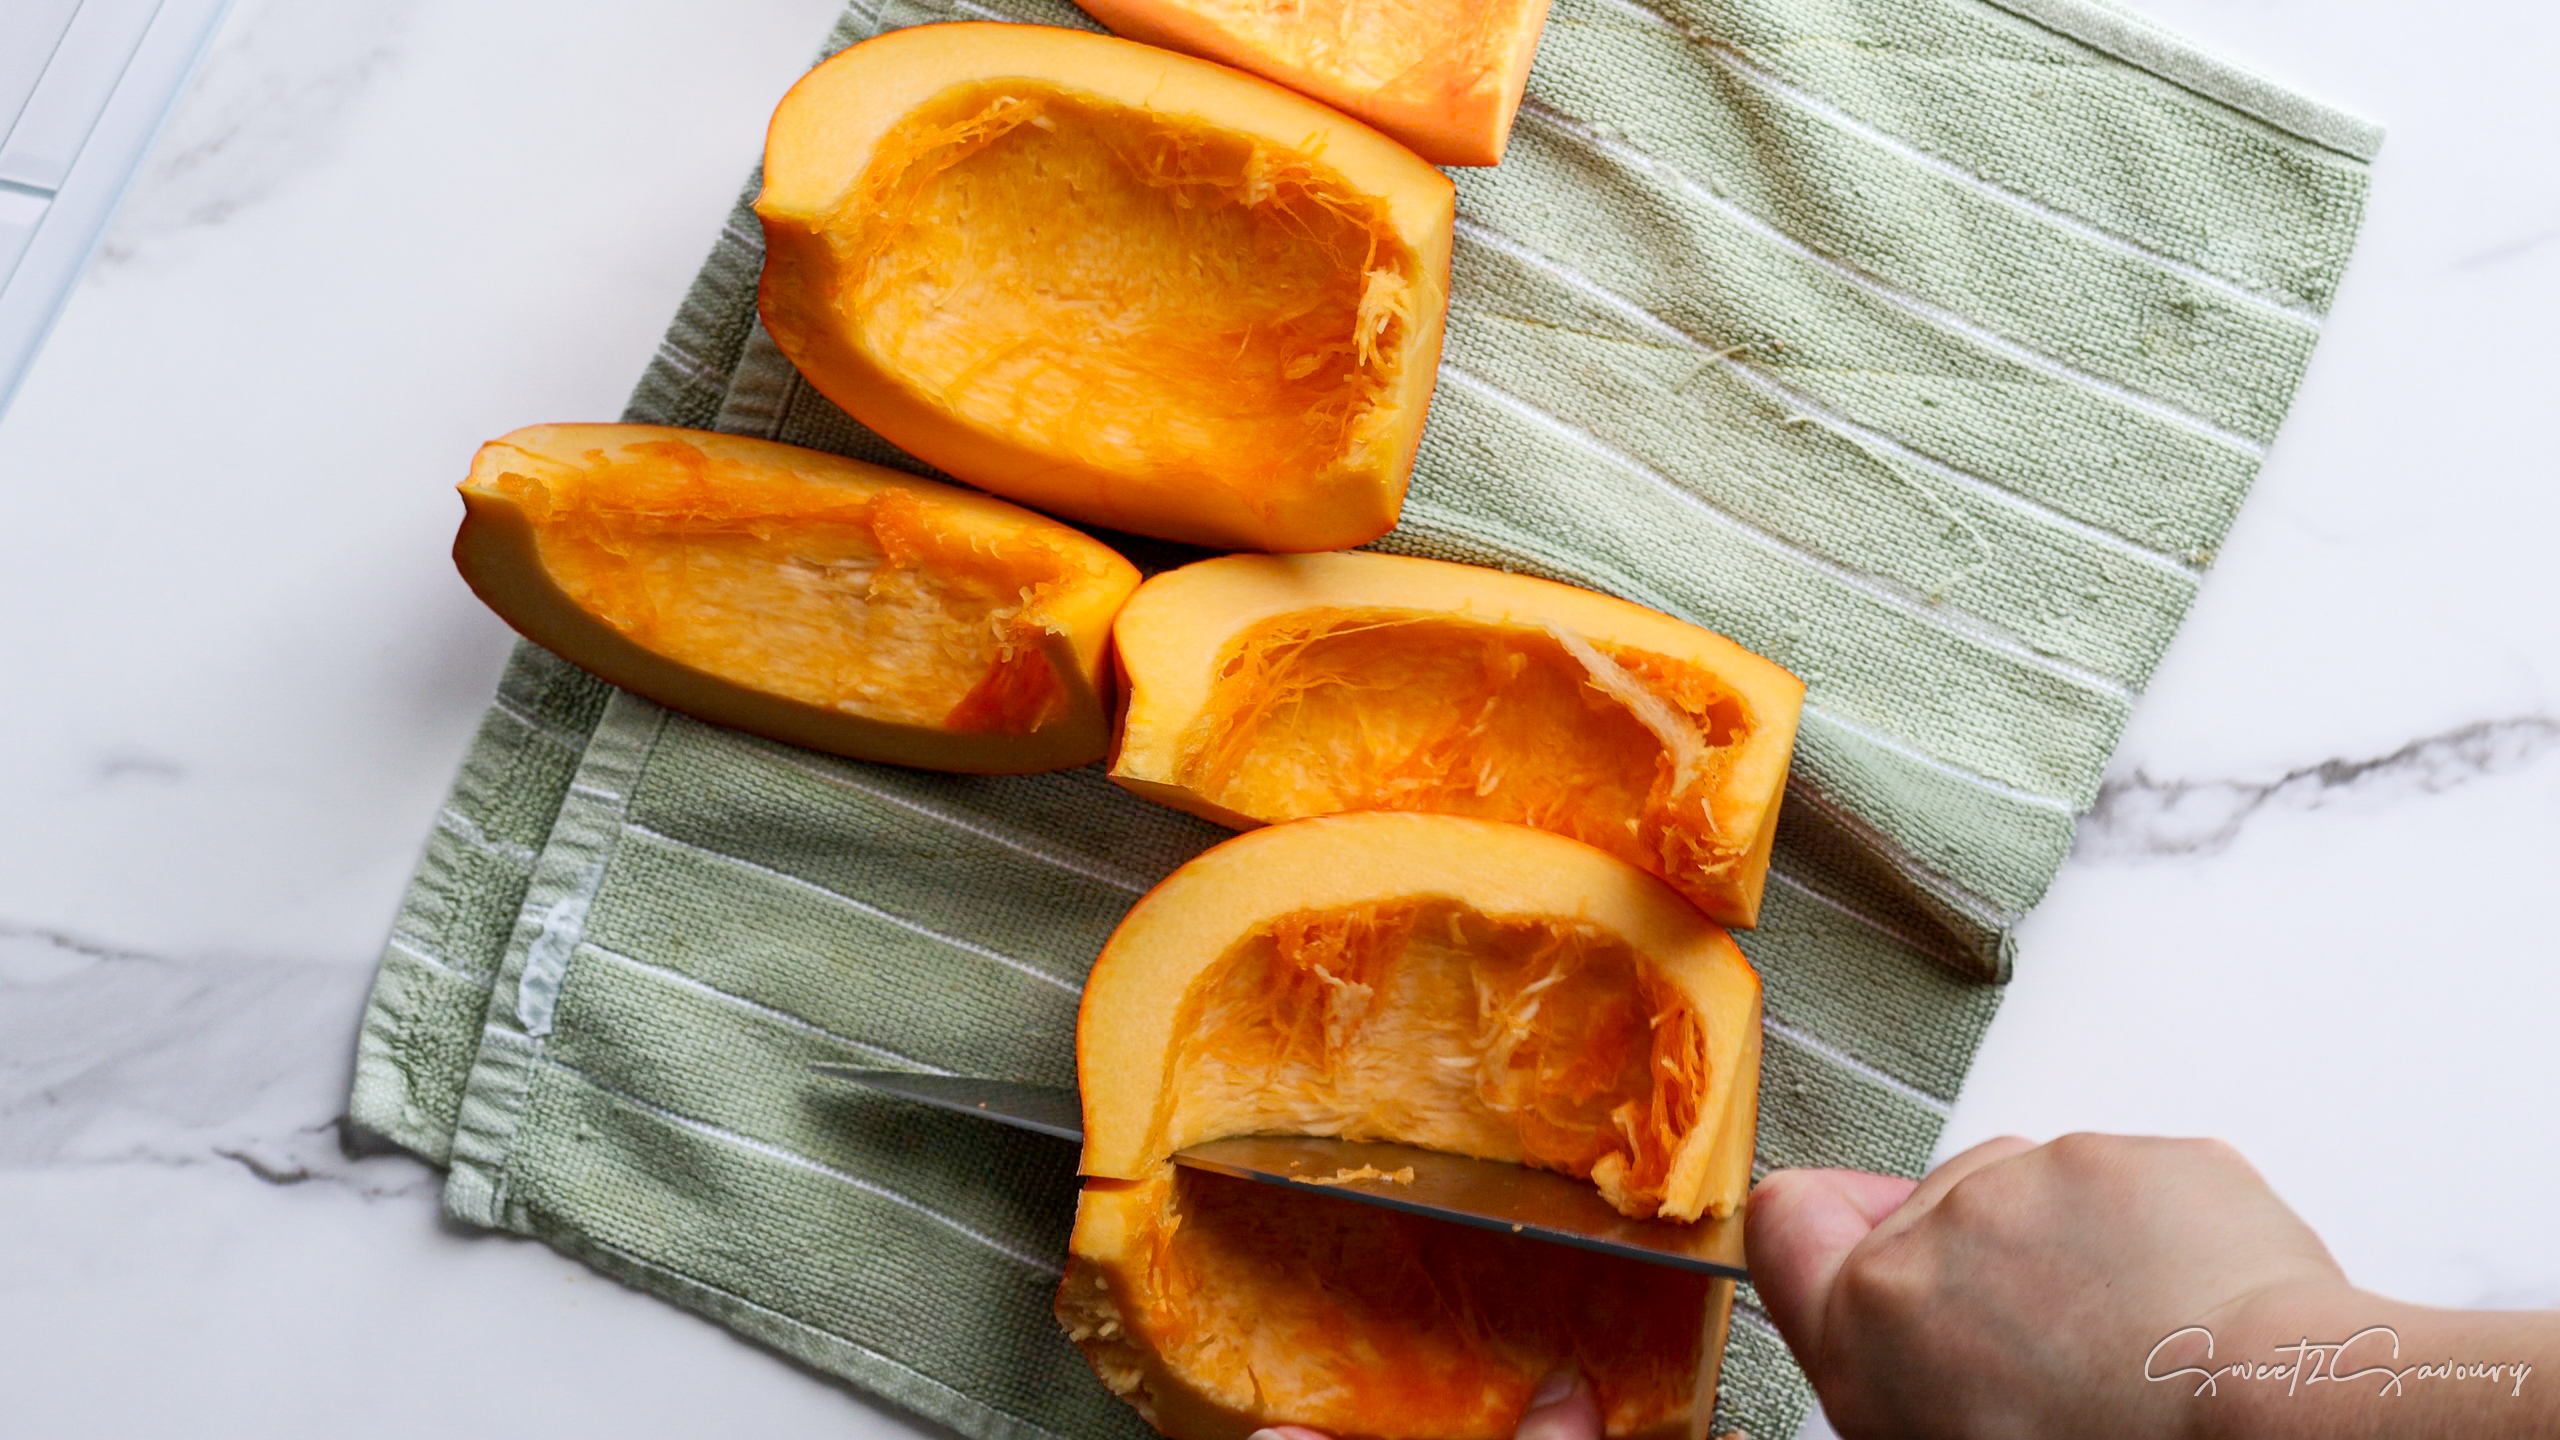
Divide Pumpkin: Cut the pumpkin in half from the trimmed top down to the bottom.
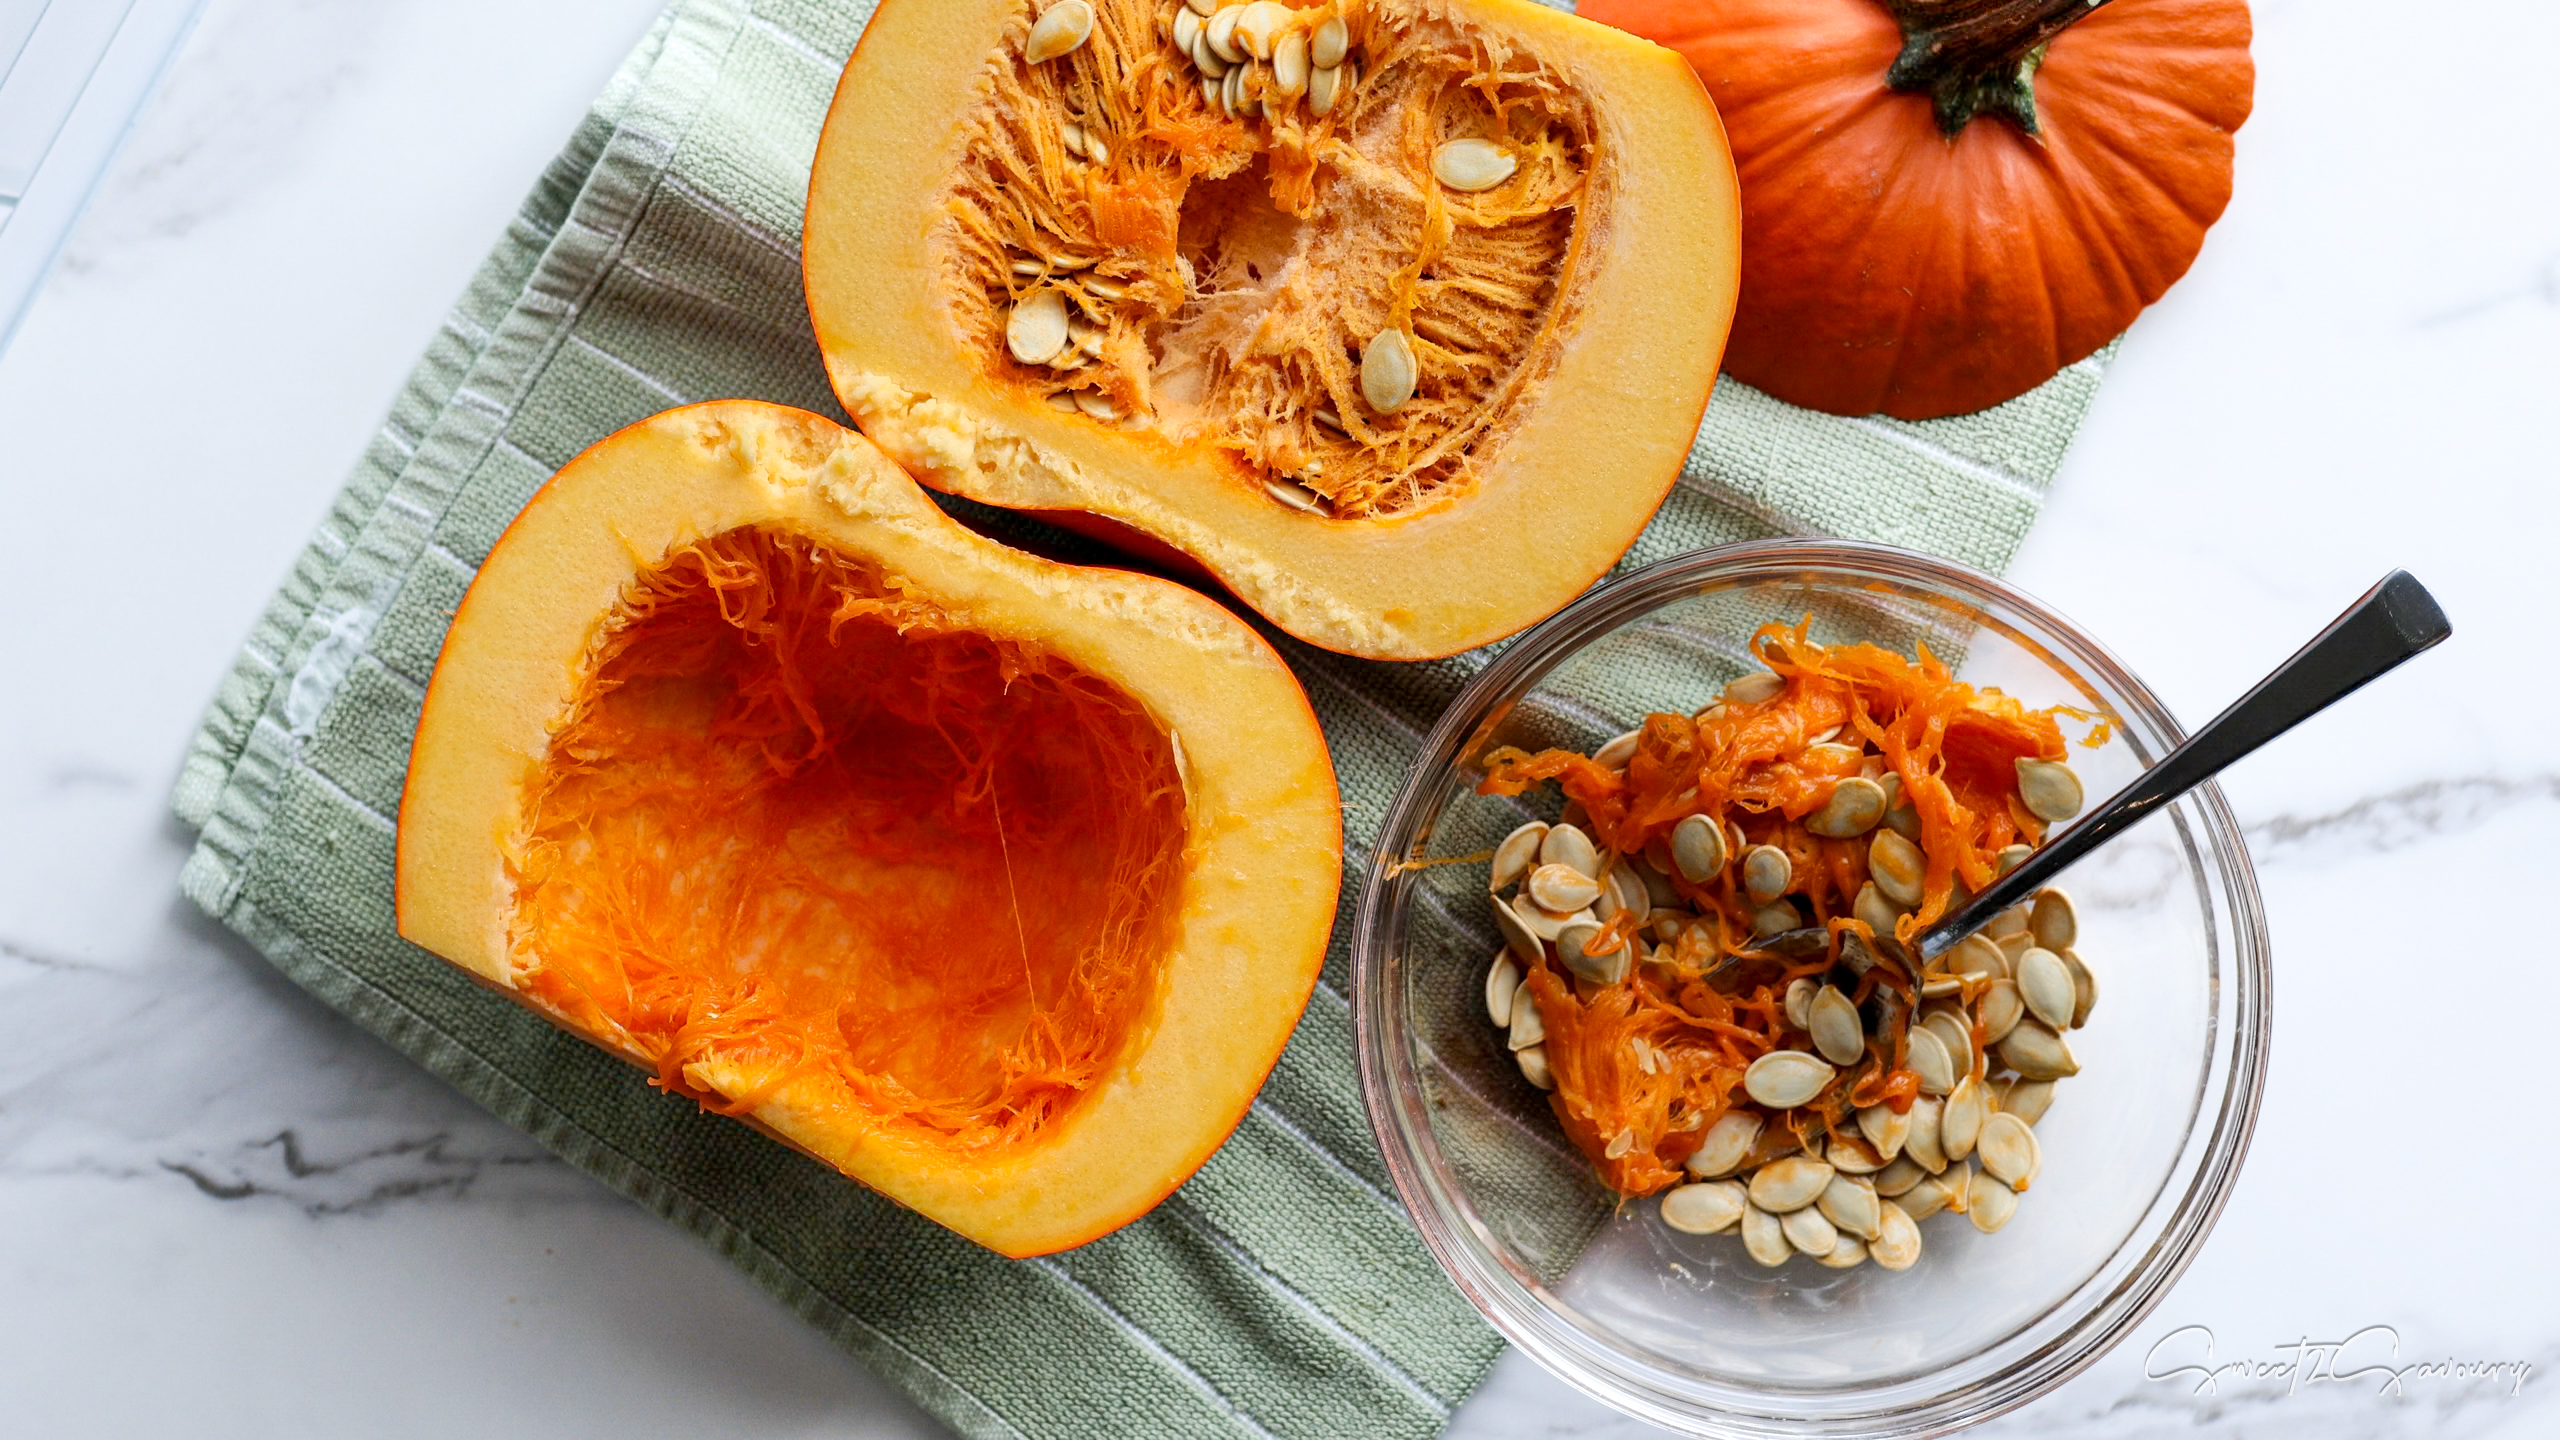
Clean: Scoop out the seeds and stringy parts; save the seeds for roasting later.
Quarter the pieces: Cut each half of the pumpkin into wedges. This will make peeling them easier later on.
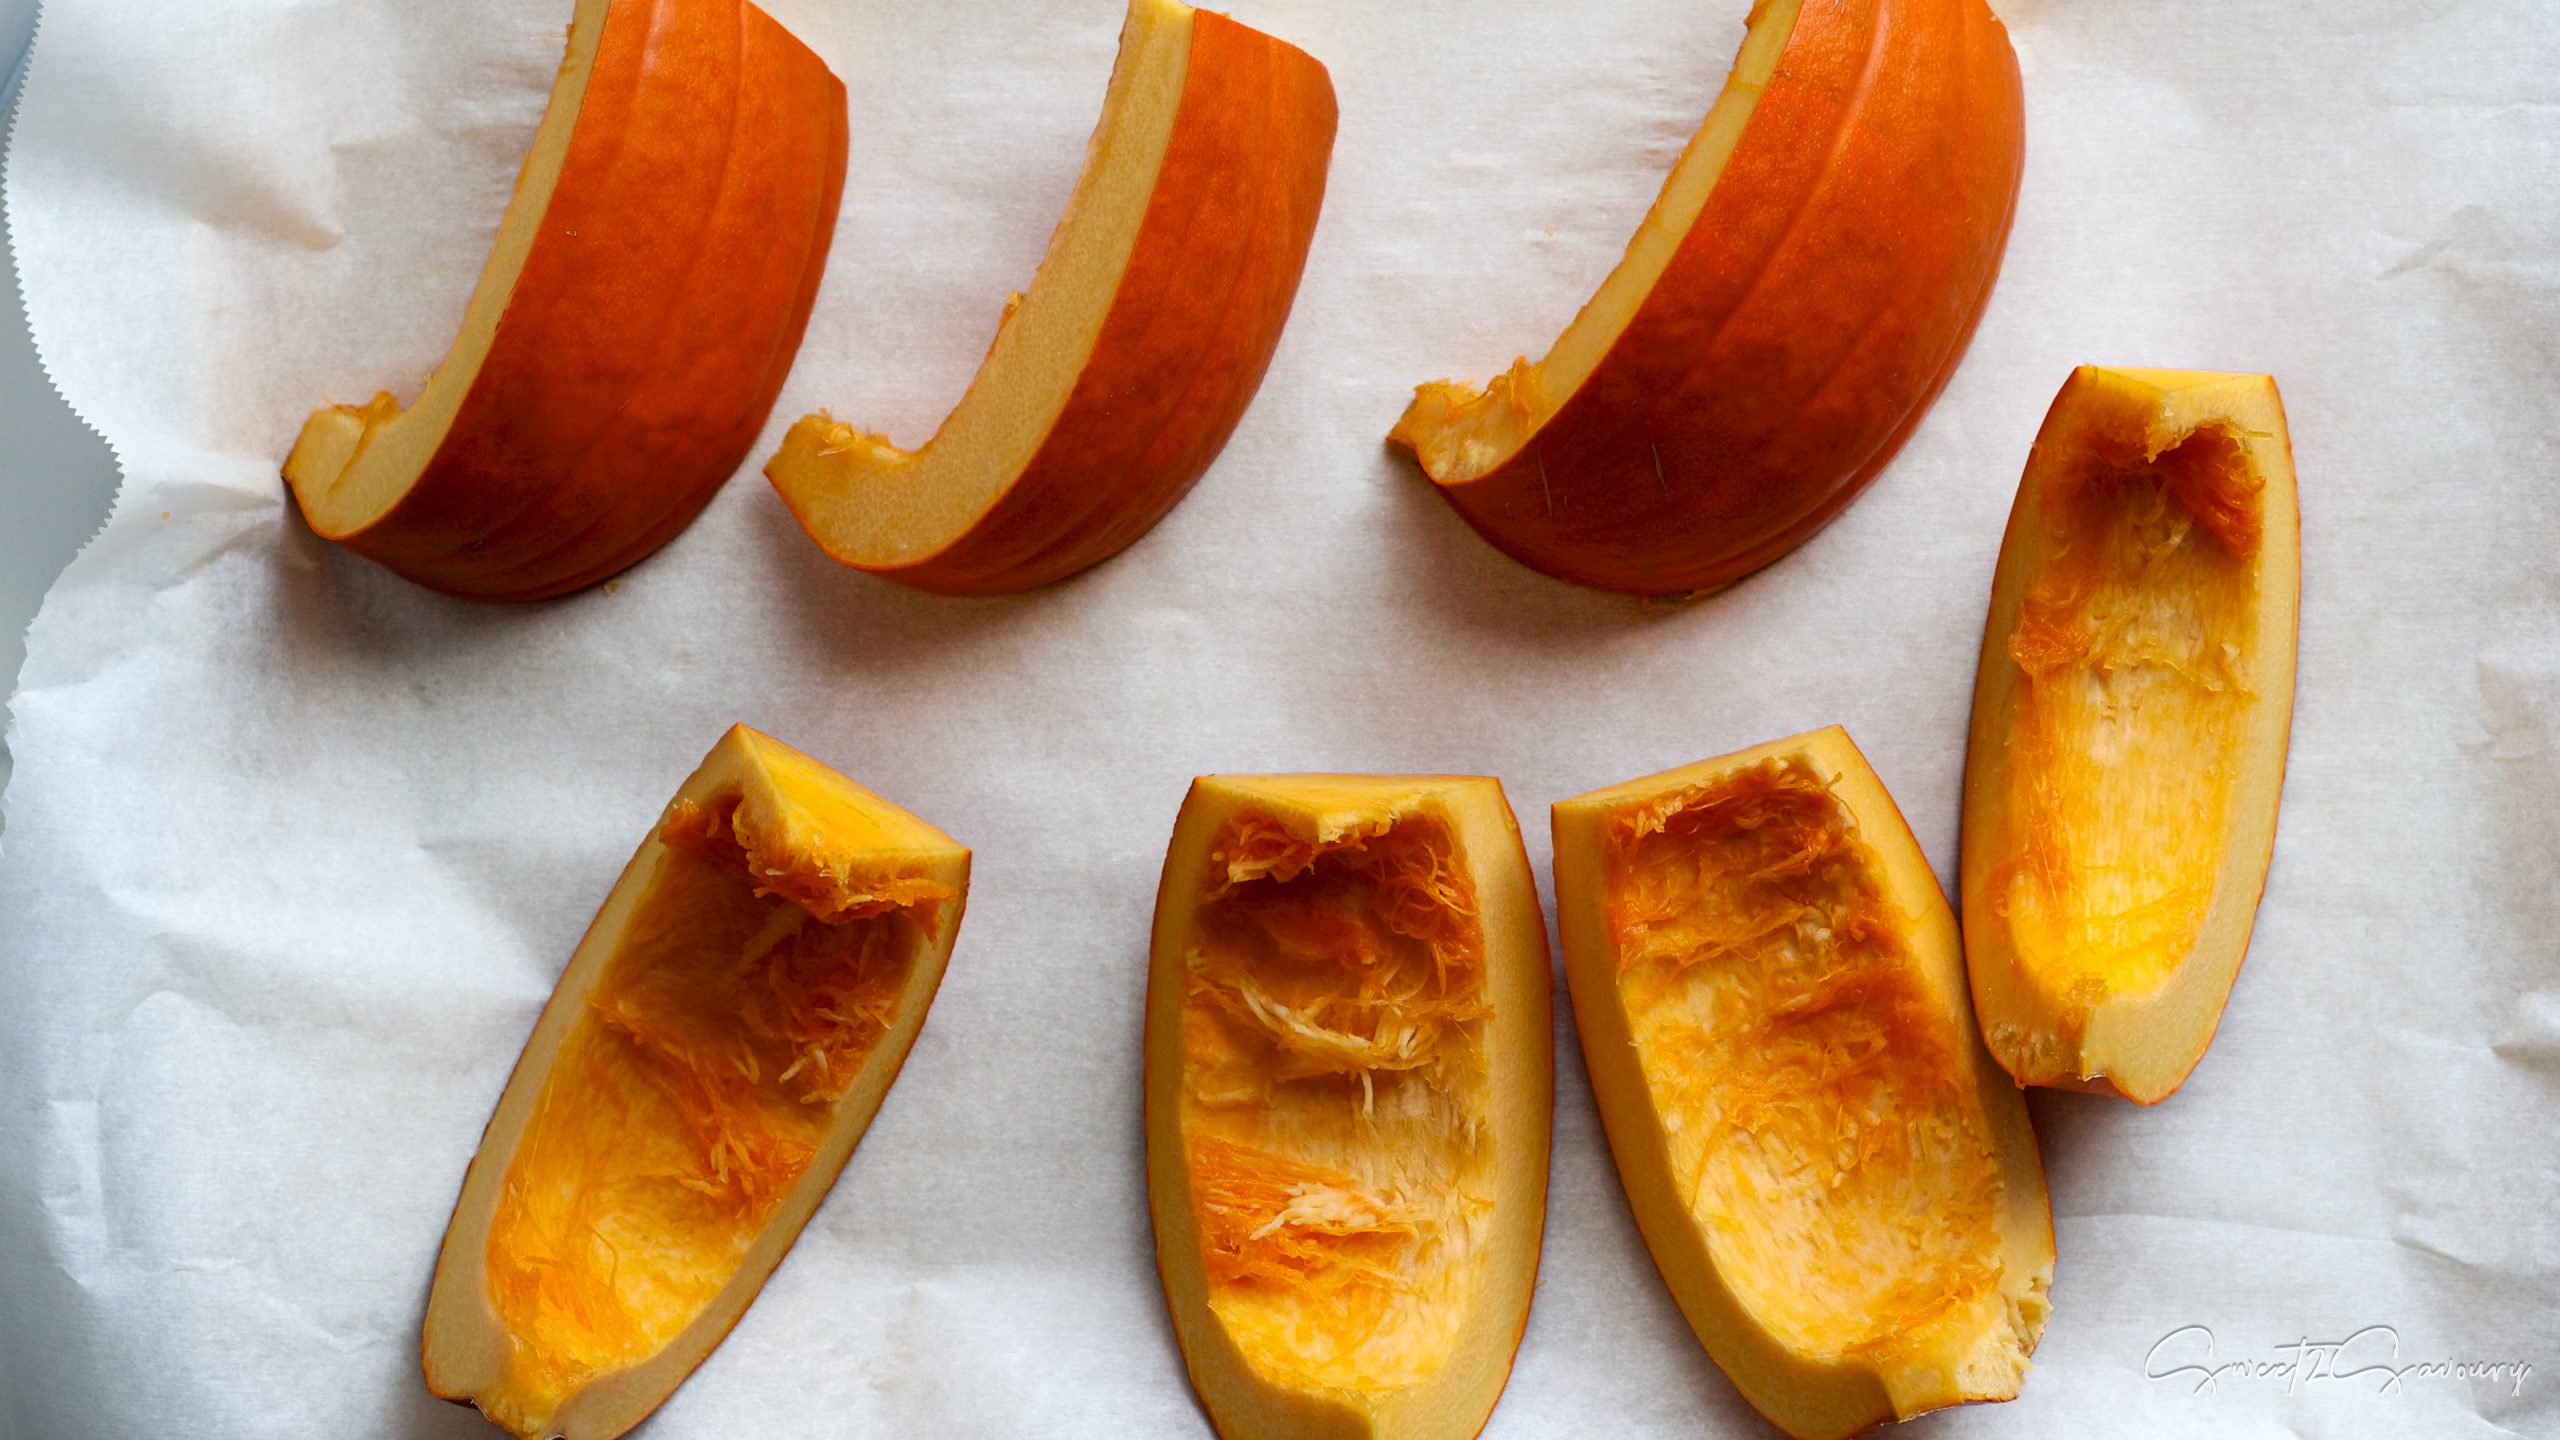
Roast or Steam: Roast the pumpkin wedges face up (or down) on a baking sheet covered with parchment paper at 350°F (177°C) for 45 – 60 minutes until fork tender and the rind looks golden brown. No need to season with salt or oil since we’re making puree. Roasting enhances the pumpkin’s sweetness, but if you want to speed up the process, steaming pumpkin wedges is an alternative method you can use.
Cool and Peel: Allow the pumpkin to cool for 10 minutes, but peel off the rind from each wedge while it is still warm (makes it easier to peel). Use a fork to help you lift and peel the rind from the flesh.
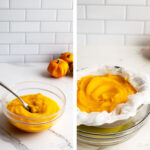
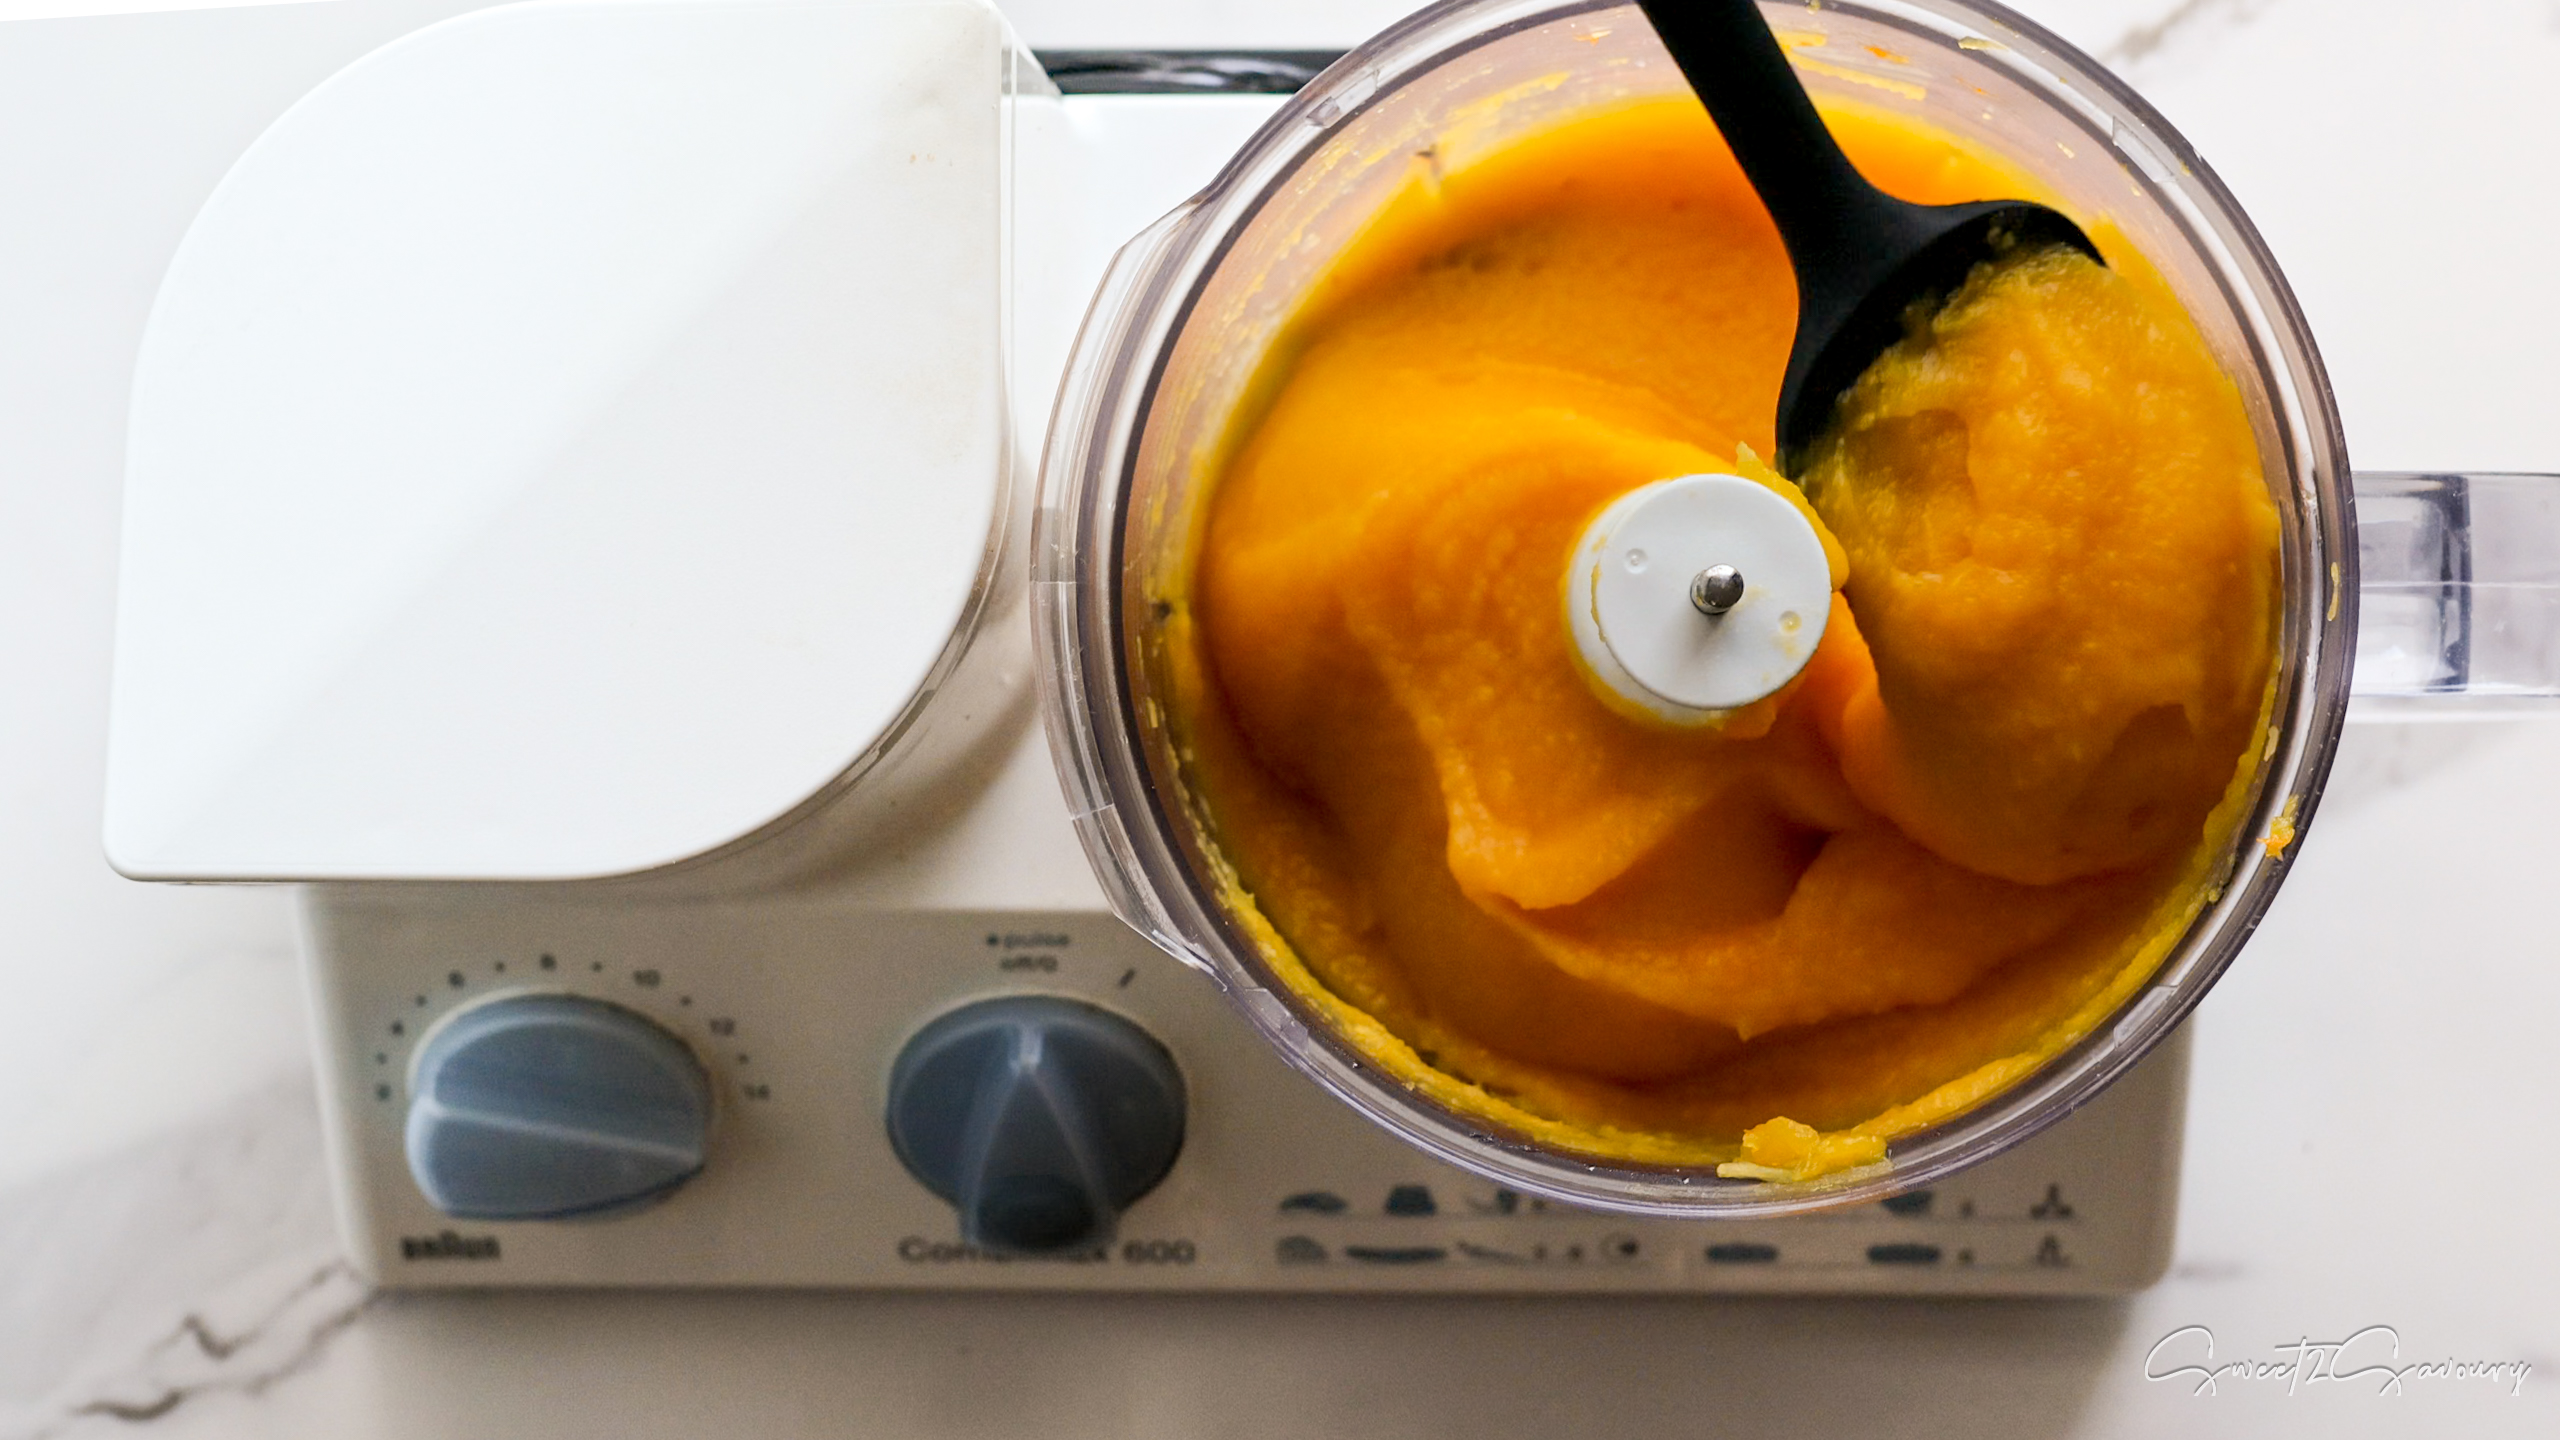
Blend to Puree: Blend pumpkin flesh in a food processor (or blender) until smooth.
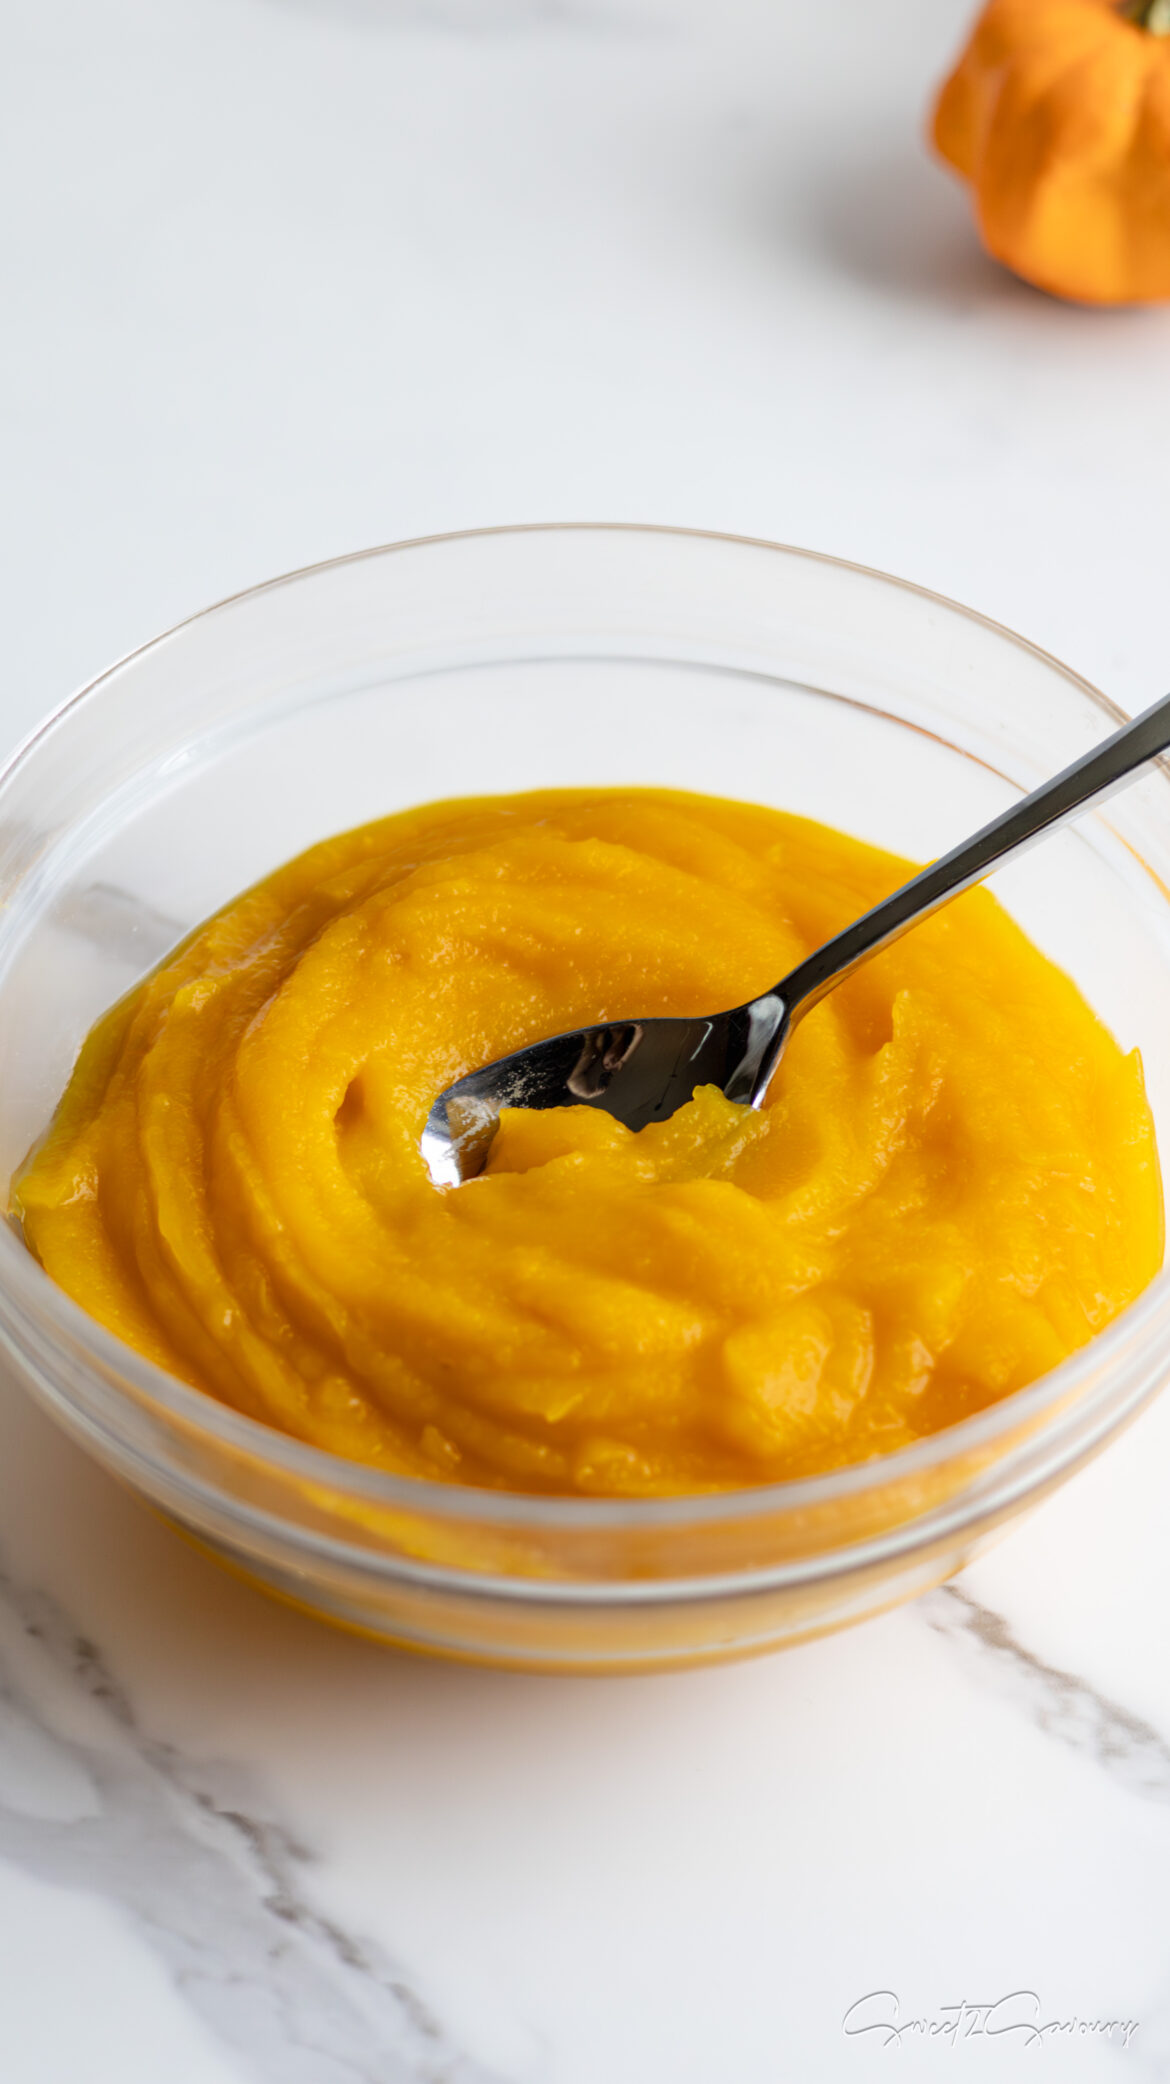
Use or Store: Now the puree is ready for your recipe, or you can store it in an airtight container in the fridge for up to 5 days.
Mash roasted pumpkin with a potato masher if you do not own a food processor or blender.
When blending the pie pumpkin, add one or two tablespoons of water if needed to help with blending. Be cautious not to add too much, as you want the puree to remain dense rather than watery.
If stored properly in an airtight container, pumpkin puree lasts up to 5 days in the fridge.
Pumpkin puree can be frozen for up to 3 months.
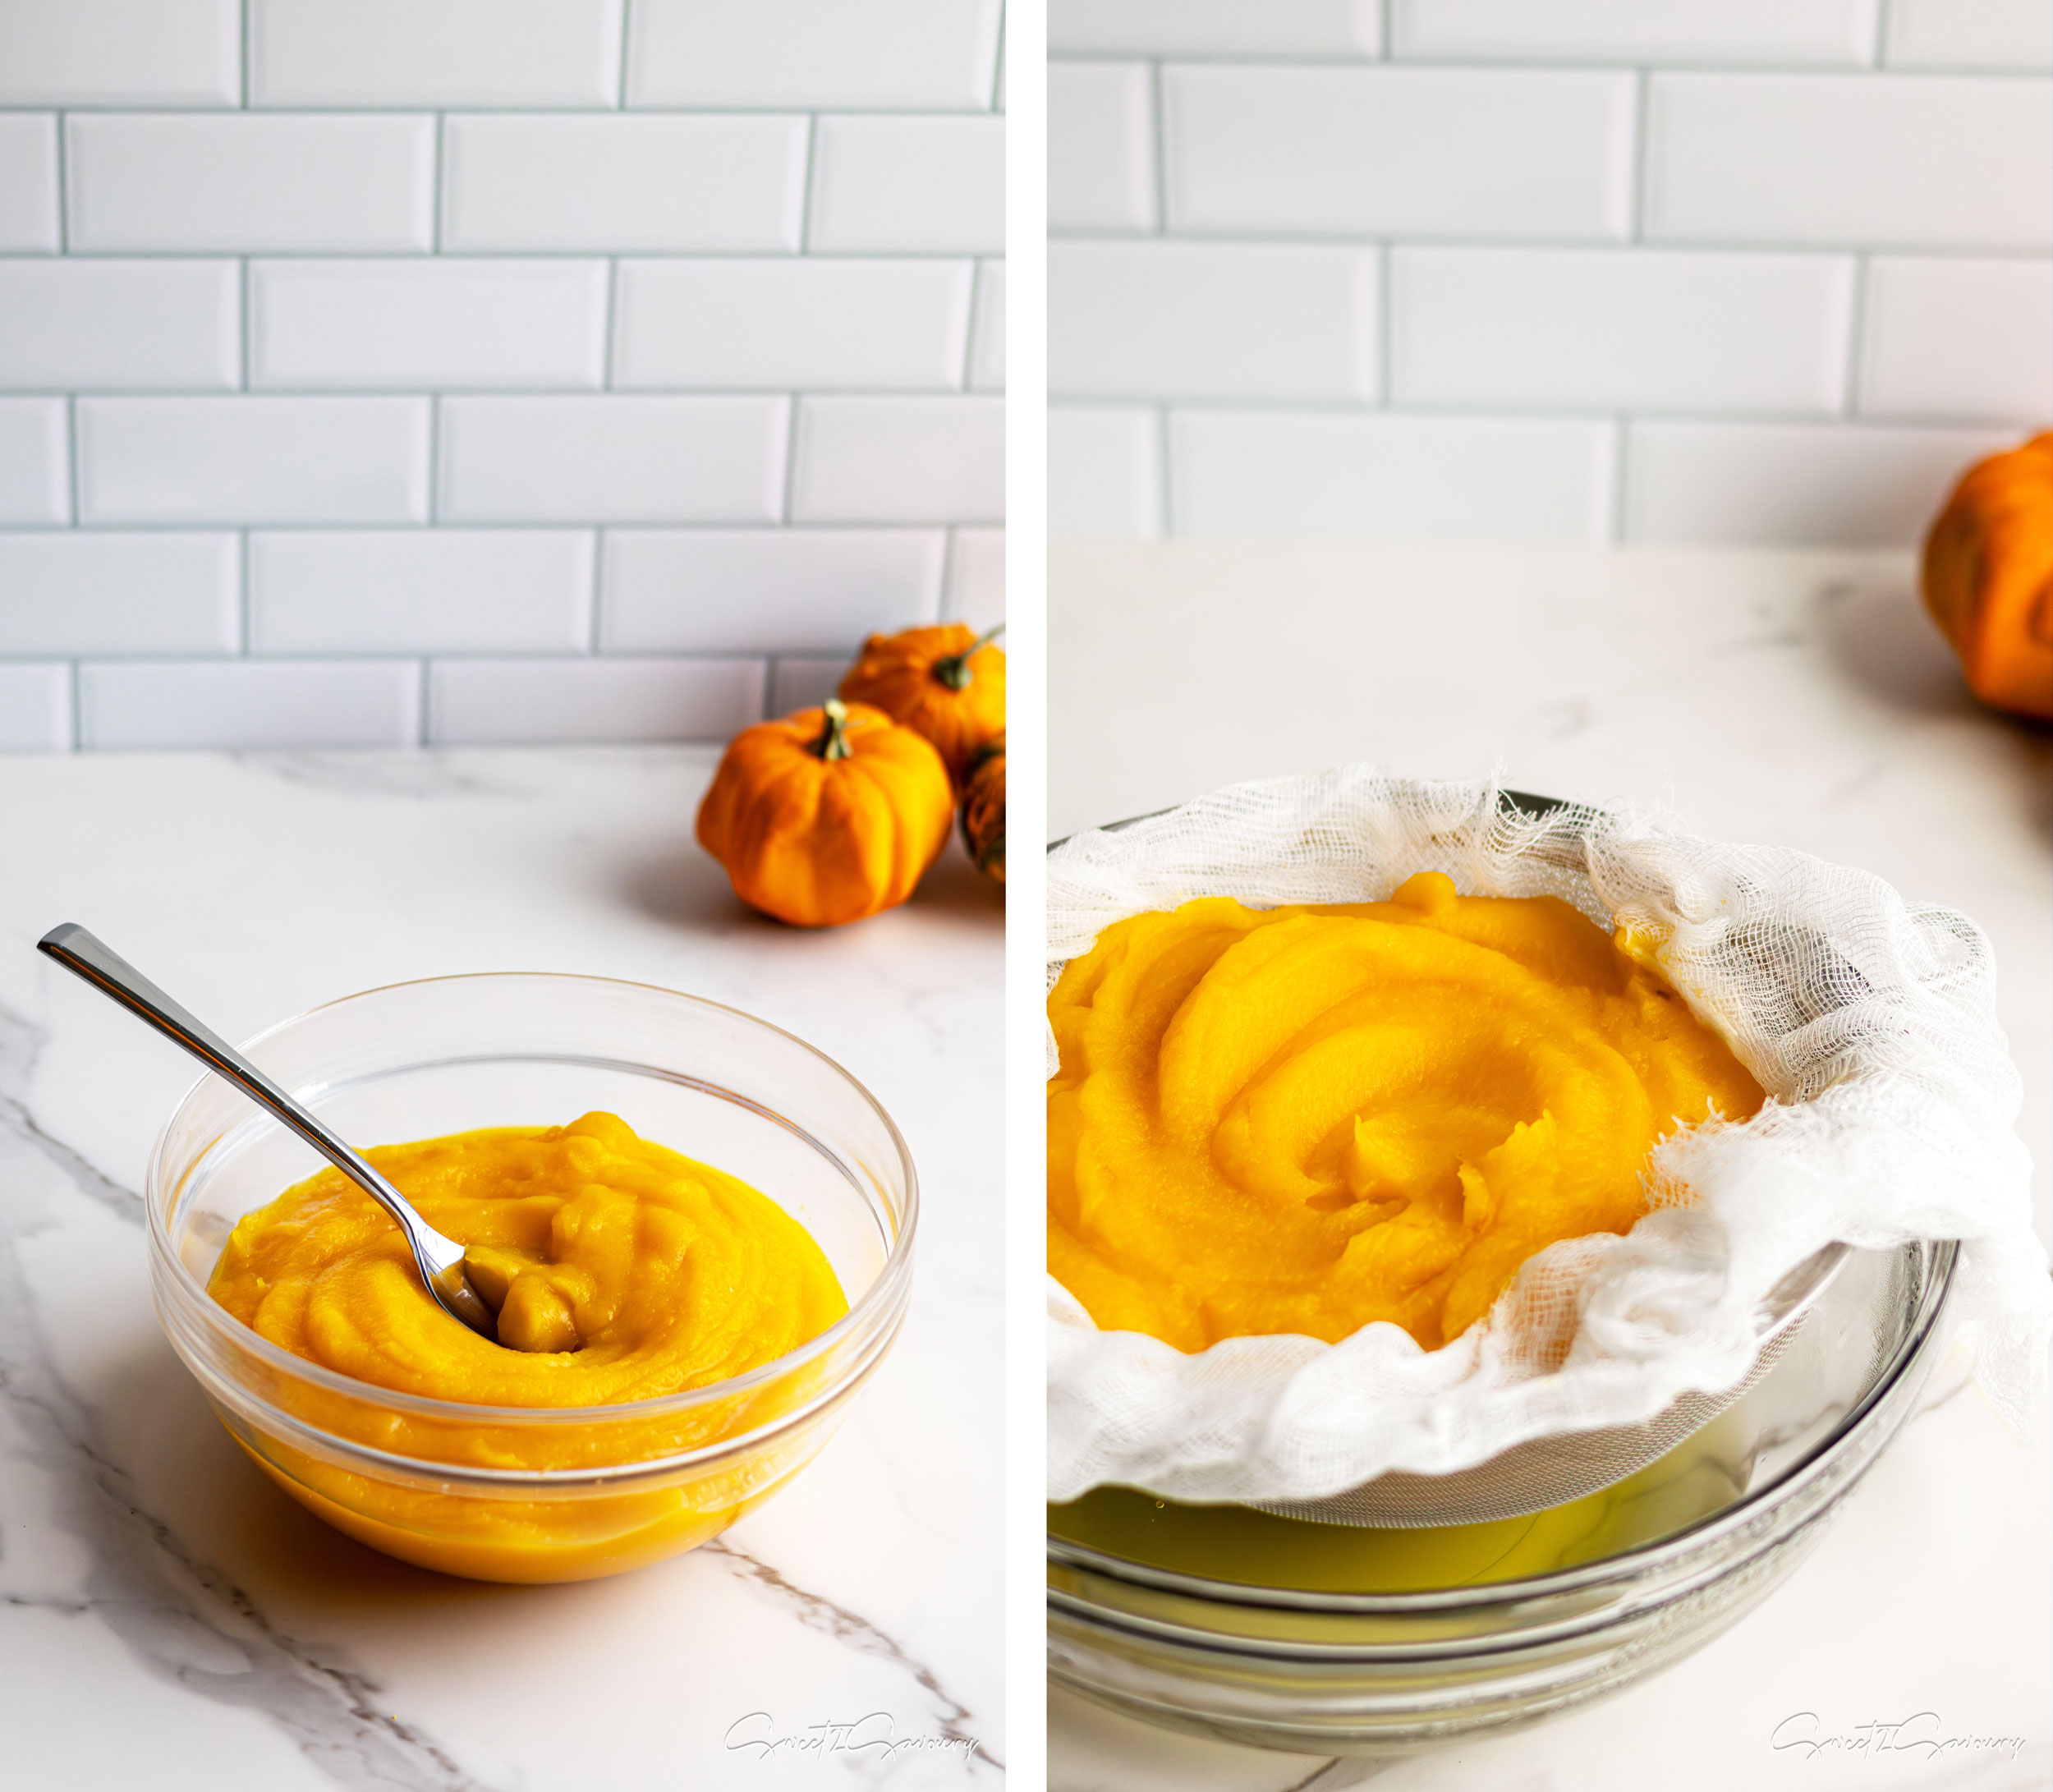
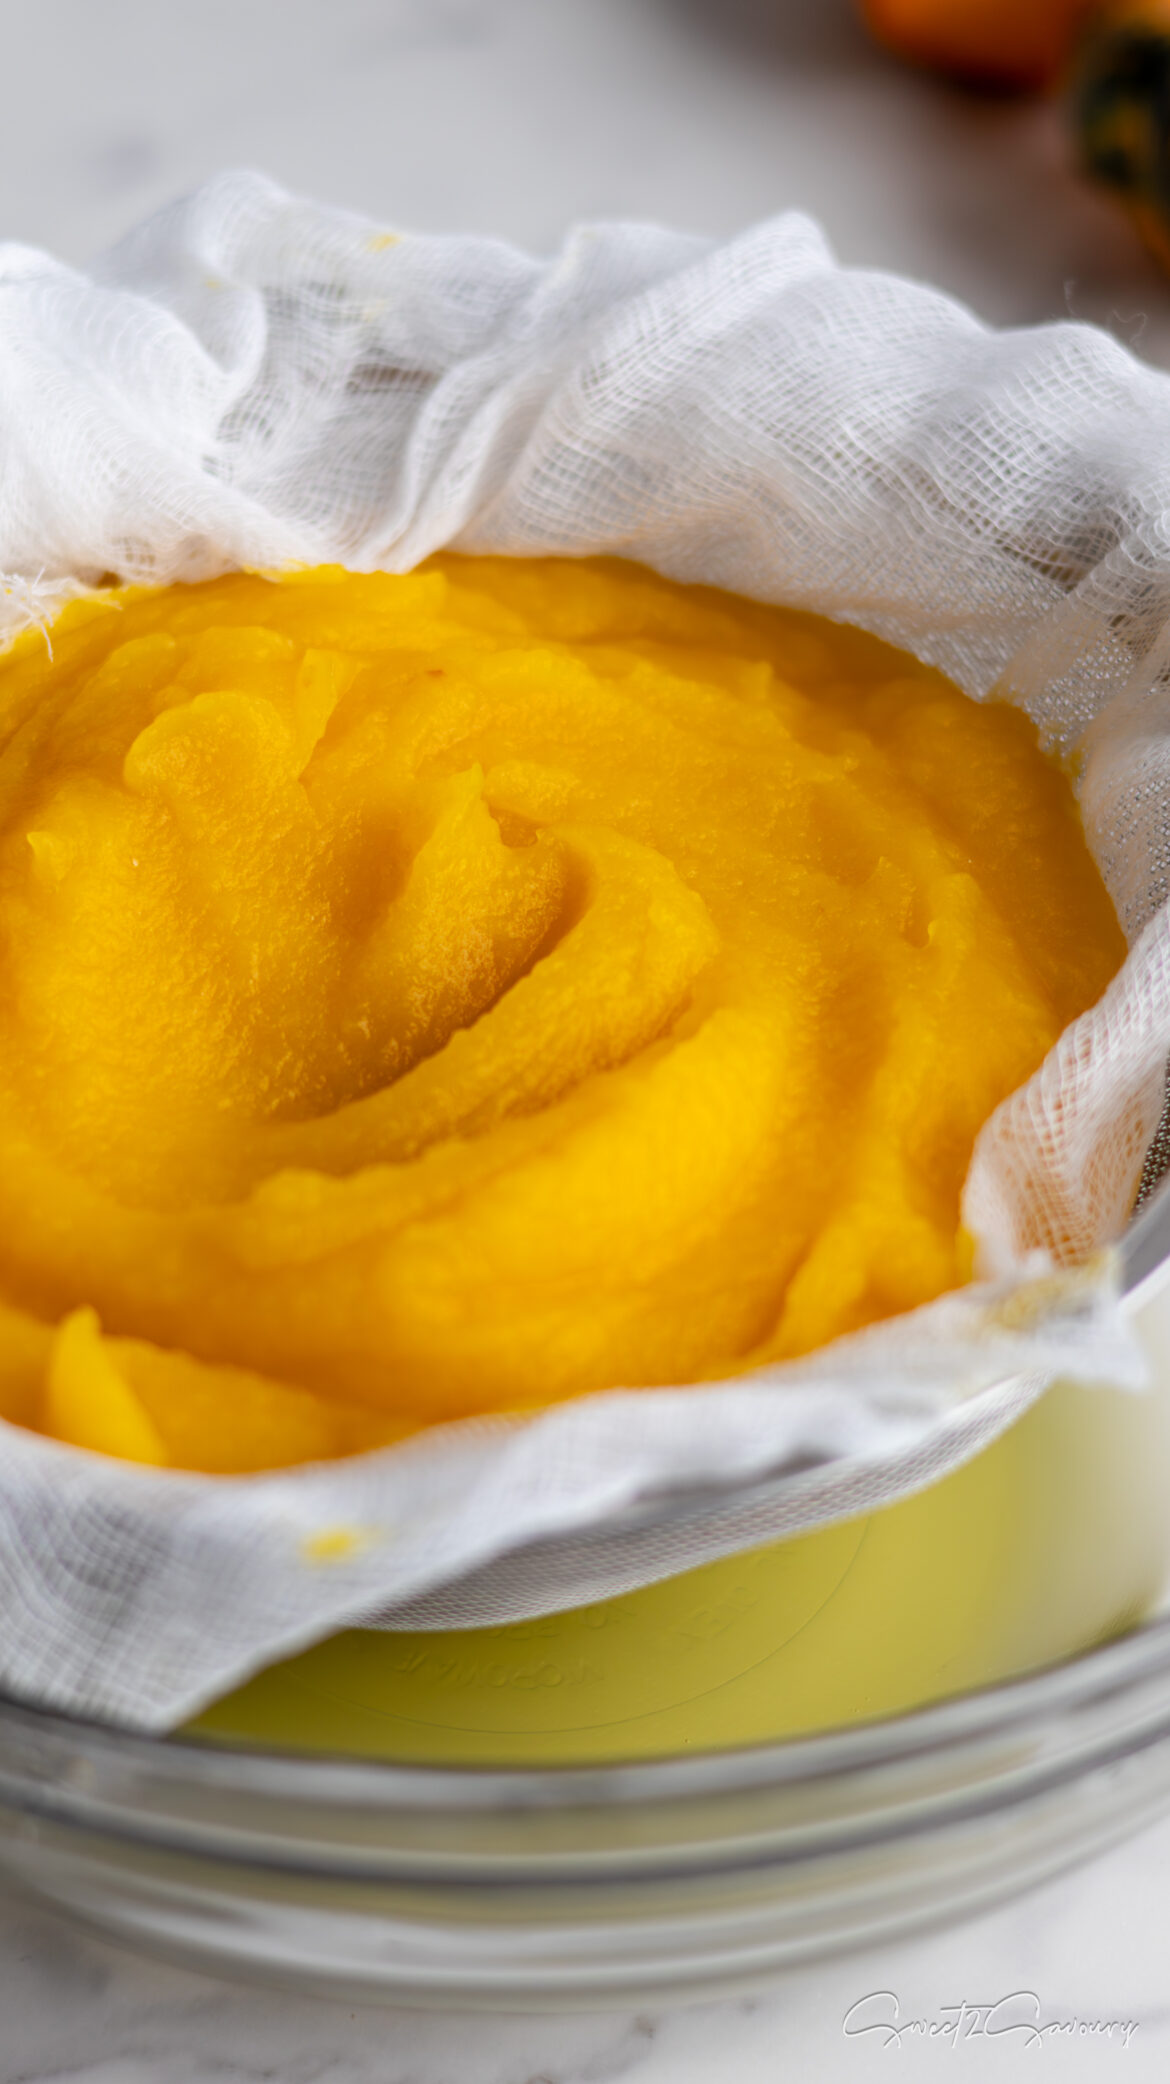
Carving pumpkin puree is thinner and has a higher water content. To achieve a denser puree for your recipe, use cheesecloth to drain the puree before using it.
Don’t discard the pumpkin water after it’s strained if you’re using a carving pumpkin. Here are some creative uses for this (often overlooked) pumpkin water: – makes a great addition to broths or stocks for extra flavour – use it in a béchamel or other creamy sauce (like alfredo) – replace some of the liquid in your favourite baked goods with this pumpkin water – great way to add moisture and flavour into cakes, muffins, and bread – blend it with fruits and vegetables in your smoothie
Why Pie Pumpkin Is Best for Homemade Pumpkin Puree
After conducting a side-by-side taste test, we have a clear winner!
If you want to whip up some tasty pumpkin puree from scratch, definitely choose the pie pumpkin! It produced a rich, smooth, and sweet puree that’s perfect for baking because it’s denser and creamier.
On the other hand, carving pumpkin usually ends up being a bit watery and doesn’t pack that natural sweet flavour you want for desserts. A sprinkle of sugar can easily solve that problem though! But if you have a leftover carving pumpkin, you can still make it work! Just make sure to strain it through cheesecloth to remove excess water before using it in your recipe. Refer to my Tip box above for what to do with the pumpkin water.
Understanding the difference between pie pumpkin and carving pumpkin can help you choose the best option for your recipes. There’s no wrong choice, it’s up to you and what your preference for flavour and texture is.
Pin it for later
If you enjoyed my recipe, please leave a comment or rate it below. Also don’t forget to follow me on my social media channels (YouTube, Pinterest, Facebook, Instagram, TikTok) to keep up with my latest kitchen shenanigans.
Homemade Pumpkin Puree with Pie or Carving Pumpkin
Making pumpkin puree from scratch tastes better than using canned puree, both in flavour and texture. Additionally, homemade puree is pure pumpkin, unlike the canned varieties that often contain other squashes. With a bit of effort and some roasting time, you can create a fragrant, dense, and creamy puree to use in your favorite recipes.
1medium or largepumpkin of your choice (pie or carving)
Get Recipe Ingredients
COOK MODE – Prevent your screen from going dark
INSTRUCTIONS
Place the pumpkin on its side (with a hand towel underneath to prevent it from sliding) and carefully cut off the top, where the stem is located. If using a carving pumpkin, you may need to cut around the stem instead.
Cut the pumpkin in half from the trimmed top down to the bottom.
Scoop out the seeds and stringy parts; save the seeds for roasting later.
Cut each half of the pumpkin into wedges. This will make peeling them easier later on.
Roast the pumpkin wedges face up (or down) on a baking sheet covered with parchment paper at 350°F (177°C) for 45 – 60 minutes until fork tender and the rind looks golden brown. No need to season with salt or oil since we’re making puree. Roasting enhances the pumpkin’s sweetness, but if you want to speed up the process, steaming pumpkin wedges is an alternative method you can use.
Allow the pumpkin to cool for 10 minutes, but peel off the rind from each wedge while it is still warm (makes it easier to peel). Use a fork to help you lift and peel the rind from the flesh.
Blend pumpkin flesh in a food processor (or blender) until smooth.
Now the puree is ready for your recipe, or you can store it in an airtight container in the fridge for up to 5 days.
Video
Category: Dessert, How To, Main Course
Cuisine: American, Canadian
Diet: Gluten Free, Vegetarian, Vegetarian
Keyword: carving, how to make pumpkin puree, pie, pumpkin
Tips
Mash roasted pumpkin with a potato masher if you do not own a food processor or blender.
When blending the pie pumpkin, add one or two tablespoons of water if needed to help with blending. Be cautious not to add too much, as you want the puree to remain dense rather than watery.
If stored properly in an airtight container, pumpkin puree lasts up to 5 days in the fridge.
Pumpkin puree can be frozen for up to 3 months.
Carving pumpkin puree is thinner and has a higher water content. To achieve a denser puree for your recipe, use cheesecloth to drain the puree before using it.
Don’t discard the pumpkin water after it’s strained if you’re using a carving pumpkin. Here are some creative uses for this (often overlooked) pumpkin water:- makes a great addition to broths or stocks for extra flavour
use it in a béchamel or other creamy sauce (like alfredo)
replace some of the liquid in your favourite baked goods with this pumpkin water
great way to add moisture and flavour into cakes, muffins, and bread
blend it with fruits and vegetables in your smoothie


If you enjoyed my recipe, please leave a comment or rate it below. Also don’t forget to follow me on my social media channels (YouTube, Pinterest, Facebook, Instagram, TikTok) to keep up with my latest kitchen shenanigans.