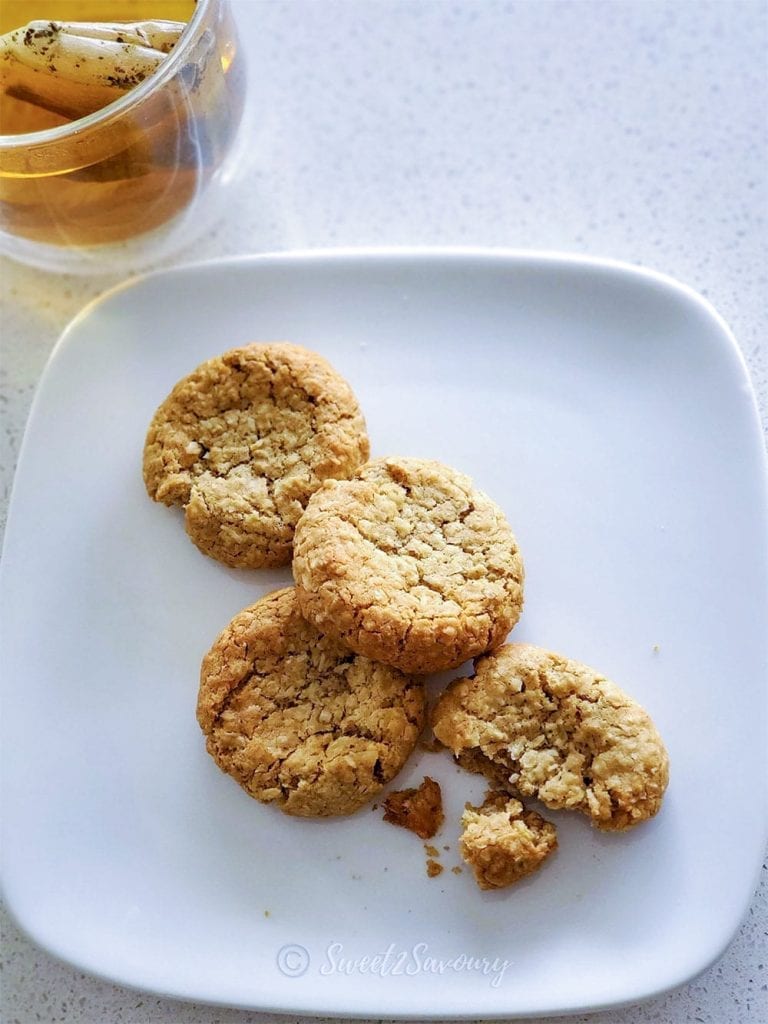
To distract myself from the daily COVID-19 news updates, I checked my pantry and discovered a pack of quick rolled oats. Typically, I would stick to the generic Oatmeal Raisin cookies, but since I didn’t have any raisins, I decided to get creative and incorporate unsweetened coconut flakes I had on hand. I ran out of vanilla extract and used rum extract instead. (the rum kind of reminds me of rum and raisin ice cream. Random thought, I know, but it’s what led me to use it in place of the vanilla extract).
*Good To Know*
- How do I bake even sized cookies?
Use a cookie scoop or a standard ice cream scoop to measure out your cookie dough. If you don’t have one on hand, use a 1/8 measuring cup. The number of cookies you get from this recipe depends on the size of your cookies. Shape each cookie dough ball in your hand by rolling it a few times before placing it on the bake tray. Gently press on it to flatten it slightly. - Why do I need to use room temperature Butter?
This seems like an unnecessary step but it makes a difference when utilizing it at room temperature vs. cold. It makes a difference between having a smooth vs. a clumpy dough. Plan ahead and leave butter on your counter overnight or at least 2 hours ahead. If you forget to do this, a trick (that I’ve done in the past) is to weigh out the butter I need and use the ‘inverter thaw’ feature on the microwave. Do this 30 seconds at a time. Check the butter by pressing your finger on it. It should feel soft like pressing on a very ripe peach. Always use unsalted butter when baking to give you better control over the amount of salt you use for the recipe. - What type of Coconut Flakes should I use?
I personally prefer unsweetened flakes, however, if you only have sweetened coconut flakes, reduce the amount of sugar you are using for the recipe. (ie. scoop 2 Tbsp of brown sugar away from the 3/4 cup brown sugar) - Why sifted Flour?
Is this necessary you might wonder? Honest answer, it’s not. Commercial flour is refined enough that you don’t need to do this. I don’t always sift my flour depending on the recipe I’m working on. However, it does help break up any lumps, filter ‘dirt’ (like leftover husks or seeds that may not have been refined) and aerates the flour, aiding in the mixing process more easily. If you don’t have one, you can buy a reasonably priced Sifter here. - Do I measure or weigh my Ingredients?
I choose to weigh my ingredients with a digital food scale rather than measure since weight provides the most accurate amount I need for a recipe. However, if you don’t own a food scale, leveling the flour is key to getting precise measurements for your recipe. After you scoop your flour (scoop generously), use a butter knife to scrape the excess flour off the surface of the measuring cup. - Chill the Dough
Why? If you want a thicker cookie, chilling the dough will allow the cookie to bake in thicker form because the butter within the dough will harden up and help retain the shape better during bake time. If your preference is a thinner cookie, you can skip the chill time and go straight to baking. - Chewy or Hard?
The difference between a chewy or hard cookie is in your bake time, the size of your cookie and not over mixing your dough once flour is added. My recipe calls for 10 minutes of bake time. (I used 1/8 measuring cup to shape my cookies) and baked these at 350°F convection. Oven temperatures also vary and you may need to adjust your bake time (especially if you’re using convection or regular heat). Not over mixing your dough means less gluten being developed (which usually contributes to a drier cookie dough). Once your flour is added only mix enough to incorporate the dough.
The key to a good cookie dough is a well whipped butter base. Channel some patience (which I lack sometimes) and let the butter / sugar cream together long enough to give it volume before adding the rest of your ingredients. Doing so creates air pockets in our dough that, once mixed with the leavening agent will help cookies expand.
Also scrape! scrape! scrape! It makes a difference to scrape down the bowl in between mixing as this will help incorporate all of the ingredients evenly.
Chill cookie dough for a thicker cookie
Ever wonder why most cookie doughs need to chill in the fridge? In part, we have the butter to thank for that. The fat in the butter needs to solidify to slow down the melting process during baking. This is where your preference comes into play. Do you prefer thicker or thinner? Thicker = chill = less spread or thinner = skip the chill = more spread (there’s a joke in this equation somewhere). Just remember that the thinner the cookie, the higher the chance of baking it to a hard texture instead of a soft one.
Perfecting the size of the cookie should be easy…. allow me to elaborate. Using a cookie scoop is a good start to getting them even sized however, do you scoop the dough perfectly clean every time? Do you scoop the dough loosely with a bit extra dough? Truthfully, there is no wrong way to scoop as long as you are consistent with the amount you pick up. With a little practice you will be able to ‘feel’ the right weight / size / shape. The importance of getting the same amount of dough for each cookie is important for even baking.
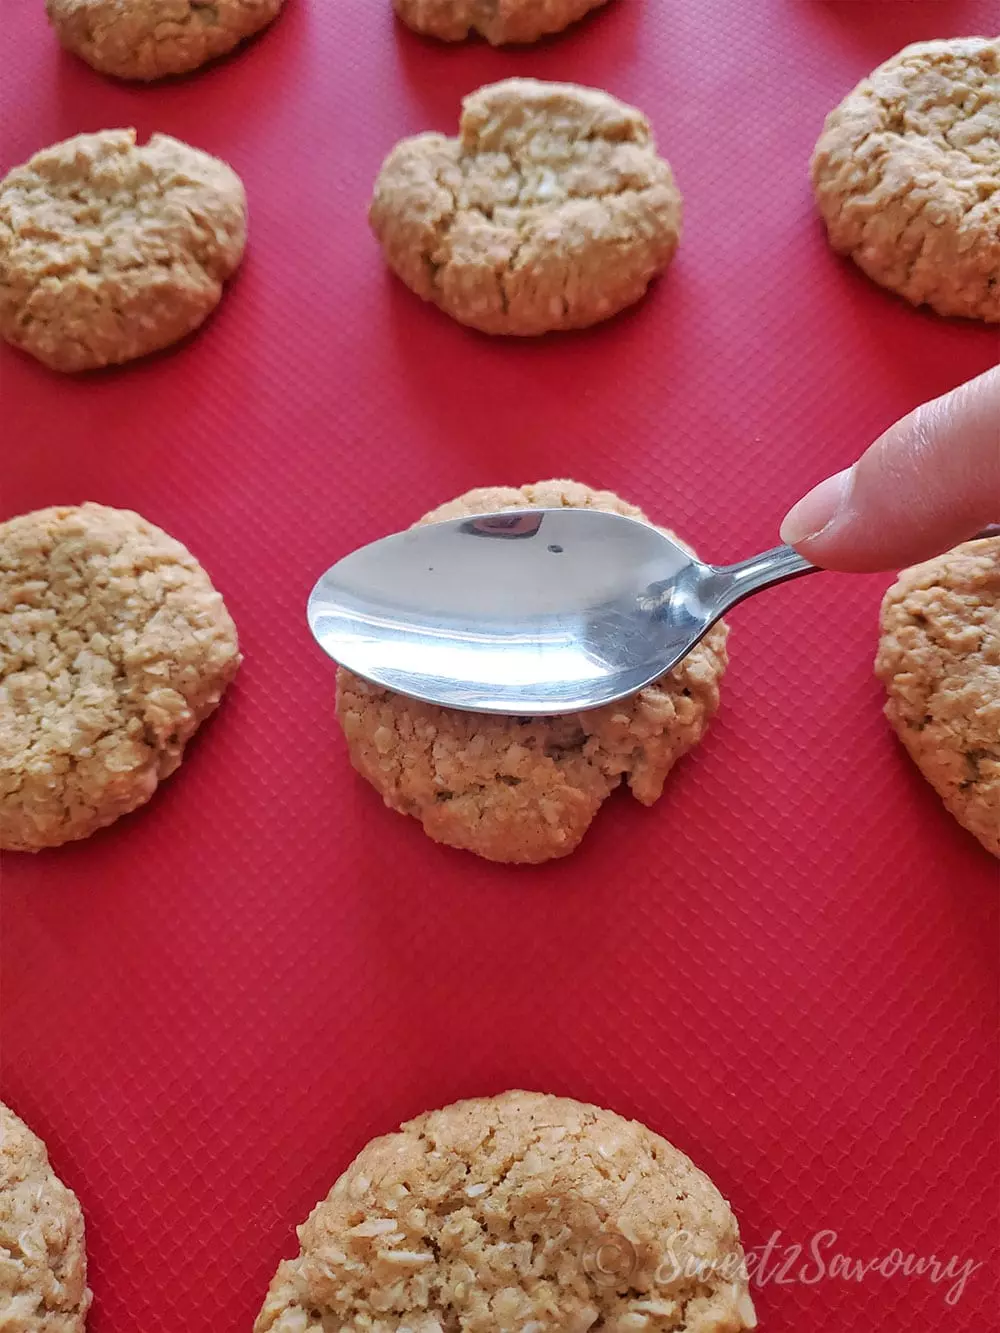
Lastly, flattening the cookie is key to getting it look so pretty…and even. During baking, cookies tend to rise slightly. To fix this, simply flatten the cookies with the back of a spoon or drinking glass immediately after you take them out of the oven. For this recipe, I also pressed gently on the cookies to flatten pre-baking (since the dough is a bit more dense than standard dough).
Soft & Chewy Coconut Oatmeal Cookies
Ingredients
- ¾ cup unsalted butter, room temperature
- ¾ cup brown sugar, packed into measuring cup
- 1 large egg
- 1 teaspoon rum extract, or vanilla extract
- ¾ cup unsweetened coconut flakes
- 1½ cup rolled quick oats
- 1 cup all-purpose flour, sifted
- 1 teaspoon ground cinnamon
- ½ teaspoon baking soda
- ¼ teaspoon salt
INSTRUCTIONS
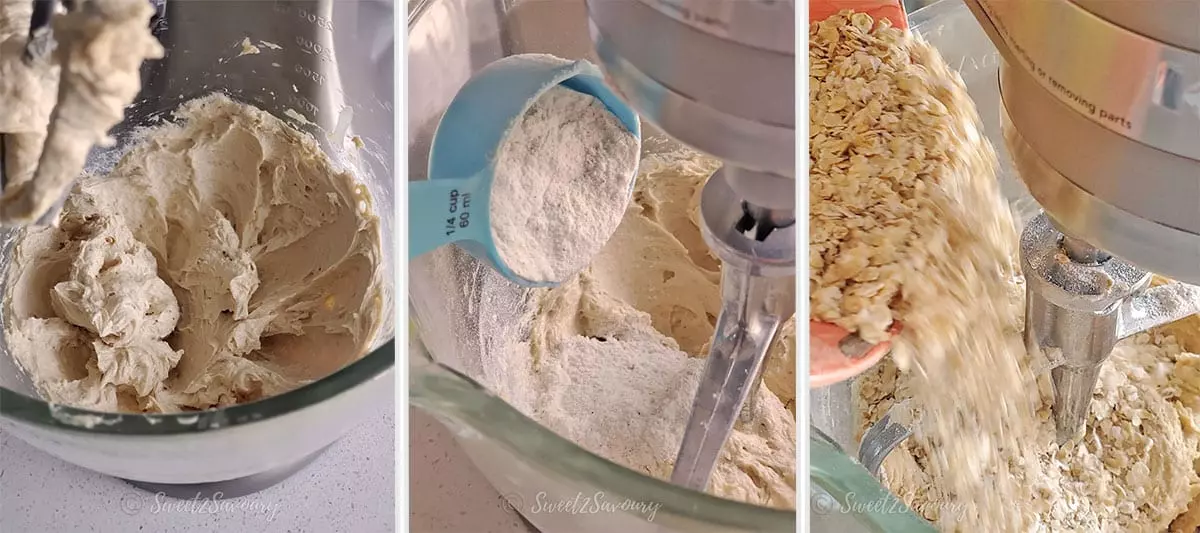
- In the bowl of a stand mixer fitted with paddle attachment, or in a large bowl using an electric hand mixer, cream butter and brown sugar on medium speed until well combined (2 to 3 minutes). Scrape down sides of the bowl. Reduce speed to low, add egg and rum extract. Bring speed back to medium and mix until consistency is fluffly (3 to 4 minutes).
- In a separate bowl, whisk together flour, cinnamon, baking soda and salt. Set aside.
- With mixer on low speed add in coconut flakes and quick oats until combined. Then add combined dry ingredients a quarter cup at a time to butter mixture until just combined (don't over mix). Scrape down bowl with a spatula as needed. The dough should be thick
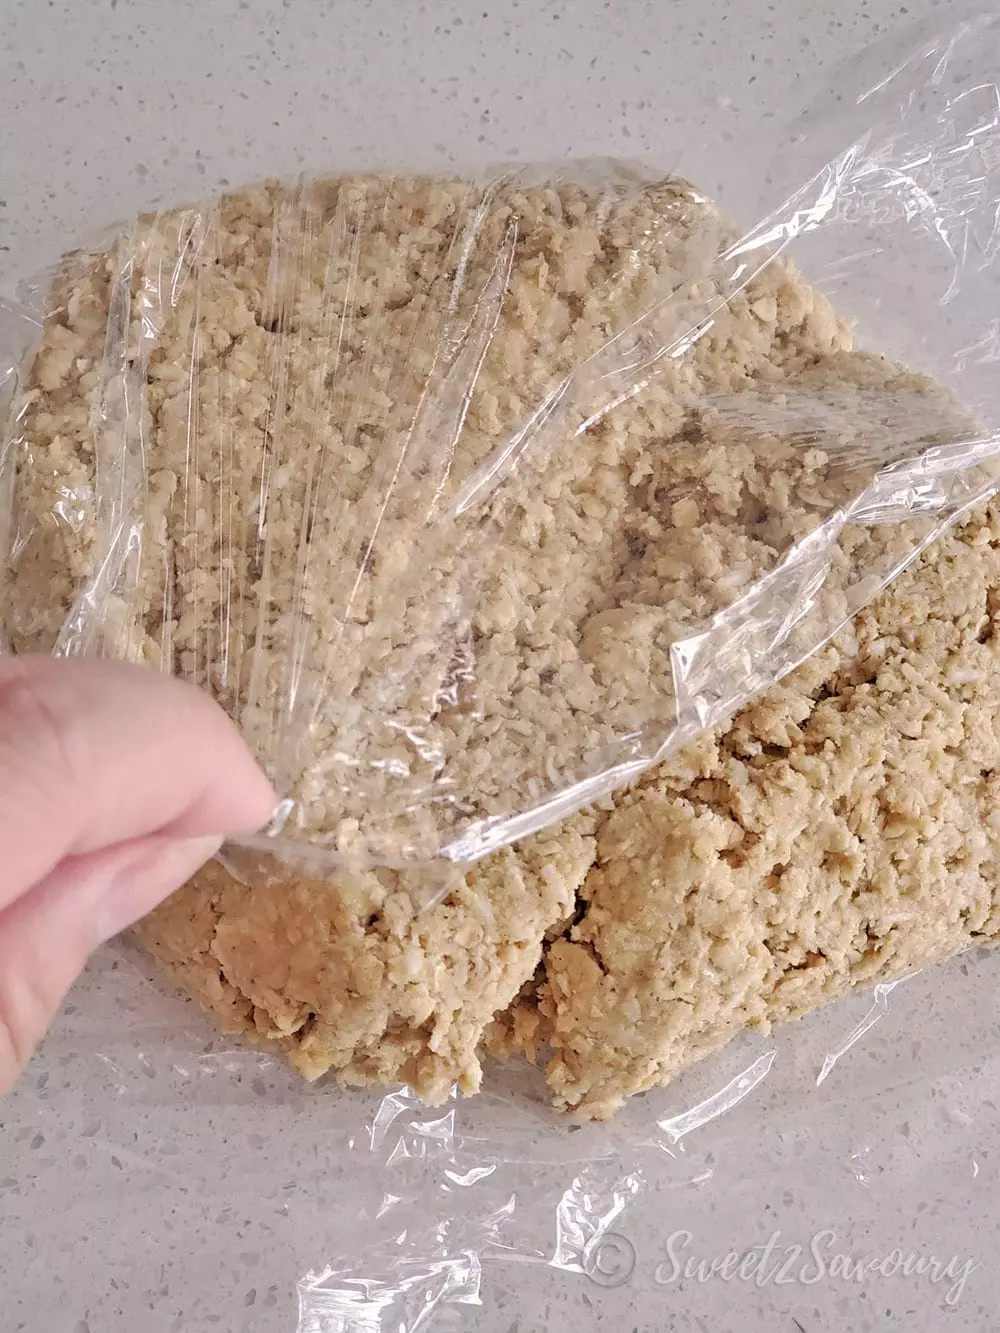
- Remove dough from bowl and cover tightly with plastic wrap. Refrigerate for 1h (or 30 minutes in the freezer). If thinner cookies are preferred, skip this step.
- Preheat oven to 350°F (or 177°C). Line 2 baking sheets with silicone baking mats or parchment paper (cut paper to fit trays perfectly instead of leaving an overhang).
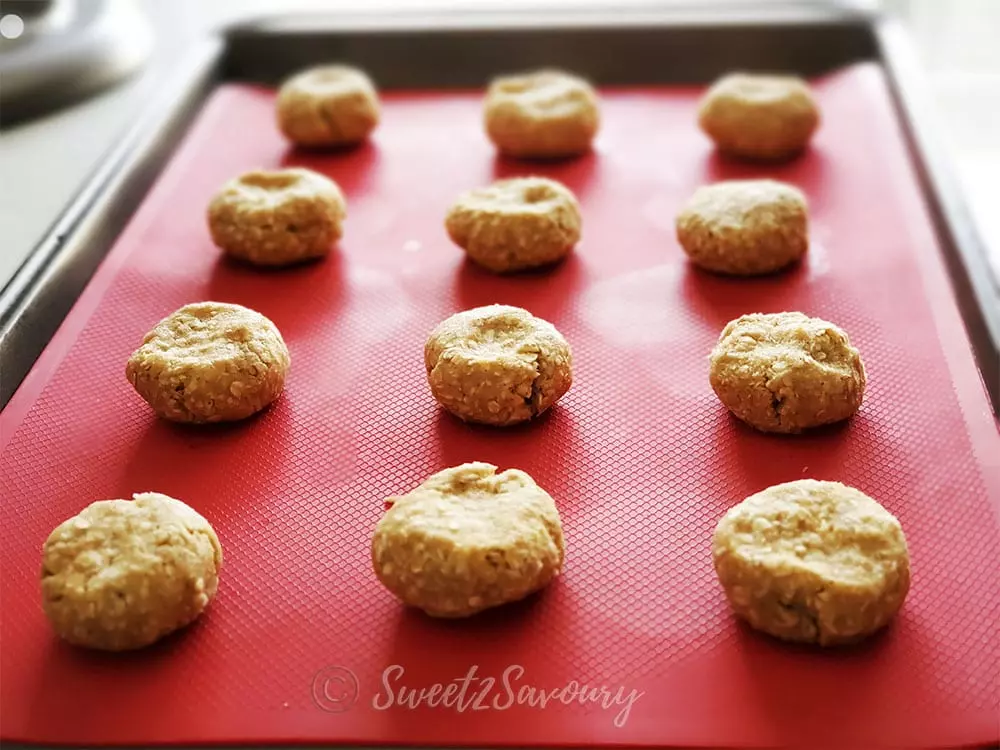
- Remove dough from refrigerator and scoop dough with a small cookie scoop or 1/8 measuring cup, (See *Notes* on cookie size and chewy texture). Roll and shape scooped dough into round ball with your hands. Place dough ball on tray and press lightly with index finger to flatten the top. Space each cookie ball 2 inches apart to leave room for the cookie to spread during baking.
- Bake 1 tray at a time (on middle oven rack) for 10 minutes until cookies are lightly brown (note that oven temperature may vary, adjust bake time accordingly by 2 or 3 minutes more). Do not bake for more than 13 minutes if chewy texture is desired. Immediately flatten cookie with the back of a drinking glass or soup spoon.
- Let cookies cool on tray for 5 minutes, then transfer to a wire rack with a flat spatula to cool completely.
Equipment
Tips
How do I bake even sized cookies?
Use a cookie scoop or a standard ice cream scoop to measure out your cookie dough. If you don’t have one on hand, use a 1/8 measuring cup. The number of cookies you get from this recipe depends on the size of your cookies. Shape each cookie dough ball in your hand by rolling it a few times before placing it on the bake tray. Gently press on it to flatten it slightly. Why do I need to use room temperature Butter?
This seems like an unnecessary step but it makes a difference when utilizing it at room temperature vs. cold. It makes a difference between having a smooth vs. a clumpy dough. Plan ahead and leave butter on your counter overnight or at least 5 hours ahead. If you forget to do this, a trick (that I’ve done in the past) is to weigh out the butter I need and use the ‘inverter thaw’ feature on the microwave. Do this 30 seconds at a time. Check the butter by pressing your finger on it. It should feel soft like pressing on a very ripe peach. Always use unsalted butter when baking to give you better control over the amount of salt you use for the recipe. What type of Coconut Flakes should I use?
I personally prefer unsweetened flakes, however, if you only have sweetened coconut flakes, reduce the amount of sugar you are using for the recipe. (ie. scoop 2 Tbsp of brown sugar away from the 3/4 cup brown sugar) Why sifted Flour?
Is this necessary you might wonder? Honest answer, it’s not. Commercial flour is refined enough that you don’t need to do this. I don’t always sift my flour depending on the recipe I’m working on. However, it does help break up any lumps, filter ‘dirt’ (like leftover husks or seeds that may not have been refined) and aerates the flour, aiding in the mixing process more easily. If you don’t have one, you can buy a reasonably priced Sifter here. Do I measure or weigh my Ingredients?
I choose to weigh my ingredients with a digital food scale rather than measure since weight provides the most accurate amount I need for a recipe. However, if you don’t own a food scale, leveling the flour is key to getting precise measurements for your recipe. After you scoop your flour (scoop generously), use a butter knife to scrape the excess flour off the surface of the measuring cup. Chill the Dough
Why? If you want a thicker cookie, chilling the dough will allow the cookie to bake in thicker form because the butter within the dough will harden up and help retain the shape better during bake time. If your preference is a thinner cookie, you can skip the chill time and go straight to baking. Chewy or Hard?
The difference between a chewy or hard cookie is in your bake time, the size of your cookie and not over mixing your dough once flour is added. My recipe calls for 10 minutes of bake time. (I used 1/8 measuring cup to shape my cookies) and baked these at 350°F convection. Oven temperatures also vary and you may need to adjust your bake time (especially if you’re using convection or regular heat). Not over mixing your dough means less gluten being developed (which usually contributes to a drier cookie dough). Once your flour is added only mix enough to incorporate the dough.



2 comments
Wow cocoliscious!! I love coconut and I love oatmeal cookies. What a great idea to combine the two. The cookies turned out amazing. Thank you for all the helpful tips.
Thank you! Glad you enjoyed my recipe!